A little over 2 months ago I got my first ever mirrorless camera - a Fujifilm X-T5. I’m still very much a beginner at photography, but it’s been a lot of fun trying out this new hobby, and I’m pretty happy with some of the photos I’ve been able to take so far. I’ve started posting my photos on Instagram and have been using them on my hiking blog too, and so have had a couple of people ask me about my camera setup. So I thought I’d go over what I use today and my thoughts so far, plus some comparison shots between my iPhone 14 Pro and the Fujifilm.
Choosing the Fujifilm X-T5
When deciding on which camera brand to go with, I was tossing up between Sony and Fujifilm. The reason I went with Fujifilm in the end was that the overall consensus I saw on the internet was that editing photos after you took them could be quite a hassle, and Fujifilm provided a specific feature known as film simulations that would help alleviate this. Basically, it would add a filmy-looking preset to your photos, and could save the photos as a JPEG. You could send the JPEGs straight to your phone with an app, letting you bypass having to edit the photos entirely. (Of course, you can also get the RAW files too).
As well as the default simulation presets provided on the camera, you can make your own custom ones, and plenty of people have their recipes documented on the internet that you can follow.
At first, I was keen to try out a bunch of the custom presets. The ones I tried out included:
- Fujicolor Natura 1600
- Cubanace
- Alpine Negative
- Kodachrome 64
However what I ended up finding was that although these presets may look quite nice in certain situations, they are quite aggressive as well, so if not used in that exact best-case situation they just make your photos look bad (and in my opinion, pretty unnatural). After a little bit of experimentation, I’ve ended up sticking with the Astia preset that comes pre-installed on the camera for all of my photos. It’s a bit more of a subtle edit, and I find I like the look of the most.
I’ve added a little toggle at the top right of each photo so you can see for yourself:
I think the first one is Astia, or something similar to it, which I prefer to the second photo which adds a very brown tinge.
Ironically, I have ended up editing all of my photos after I take them. I go a bit into my editing process below, but they’re fairly minor things, so I don’t really find that it’s been too much of a hassle so far. I think it helps that generally after I take my photos, I either want to put them on my blog or Instagram so there’s a bit of a motivation to get it done quickly. I can imagine if you procrastinated on editing and your photos started to pile up after a couple of weeks or months, it would be a lot more daunting to try and edit them.
Camera lenses
For my first lens, I went with the kit lens that comes with the X-T5 - the XF16-50mmF2.8-4.8 R LM WR. If you’re not familiar with camera lenses, the first choice you have to make is whether you get a prime lens (which has a specific focal length), or one that has a variety of lengths. It’s sort of like whether you got an iPhone with just the 1x zoom, or whether you got one with 1x -> 3x. I decided to just go with the stock 16-50mm lens becuase this is basically identical to what zooms you get out of an iPhone, and I quite enjoyed the zoom versatility of an iPhone and didn’t want to lose that for my camera.
I also got a second-hand XC50-230mmF4.5-6.7 based off a recommendation from this great blog post by Lily M Tang. I really wanted a telephoto lens for distant mountains and the occasional bird, and this seemed to be a good combination of lightness and cheapness.
Two months in, I think this was a pretty solid choice. For hiking, I’m finding that the telephoto lens is not really that useful - even at the lowest zoom of 50mm it’s still pretty zoomed in, which makes it hard to get general “setting the scene” sort of shots you’ll see on my blog (photos like “here is the trailhead” kind of thing). And swapping between the two lenses is quite a hassle while hiking, so usually I just keep the 16-50mm on the camera.
But the telephoto lens has been amazing in other scenarios - particularly for wildlife shots (mainly birds). I’m finding that if I’m doing a city walk, then the telephoto lens is great for when a bird quickly pops out. If I want to get a more wide shot, I usually have the time to swap between the lenses too.
The other thing I often heard was that telephoto lenses are great for getting the sort of shots you wouldn’t be able to get on a regular phone camera, and so you can get much uniquer-looking photos as a result. I definitely agree with this one.
iPhone 14 Pro vs Fujifilm X-T5
When I was debating whether to get a camera or not, one of the doubts that I had was: can you actually tell the difference in quality between the two cameras? Considering iPhones take pretty decent photos, and I only upload my photos on my blog and Instagram which are fairly low quality anyway, I was a little bit dubious.
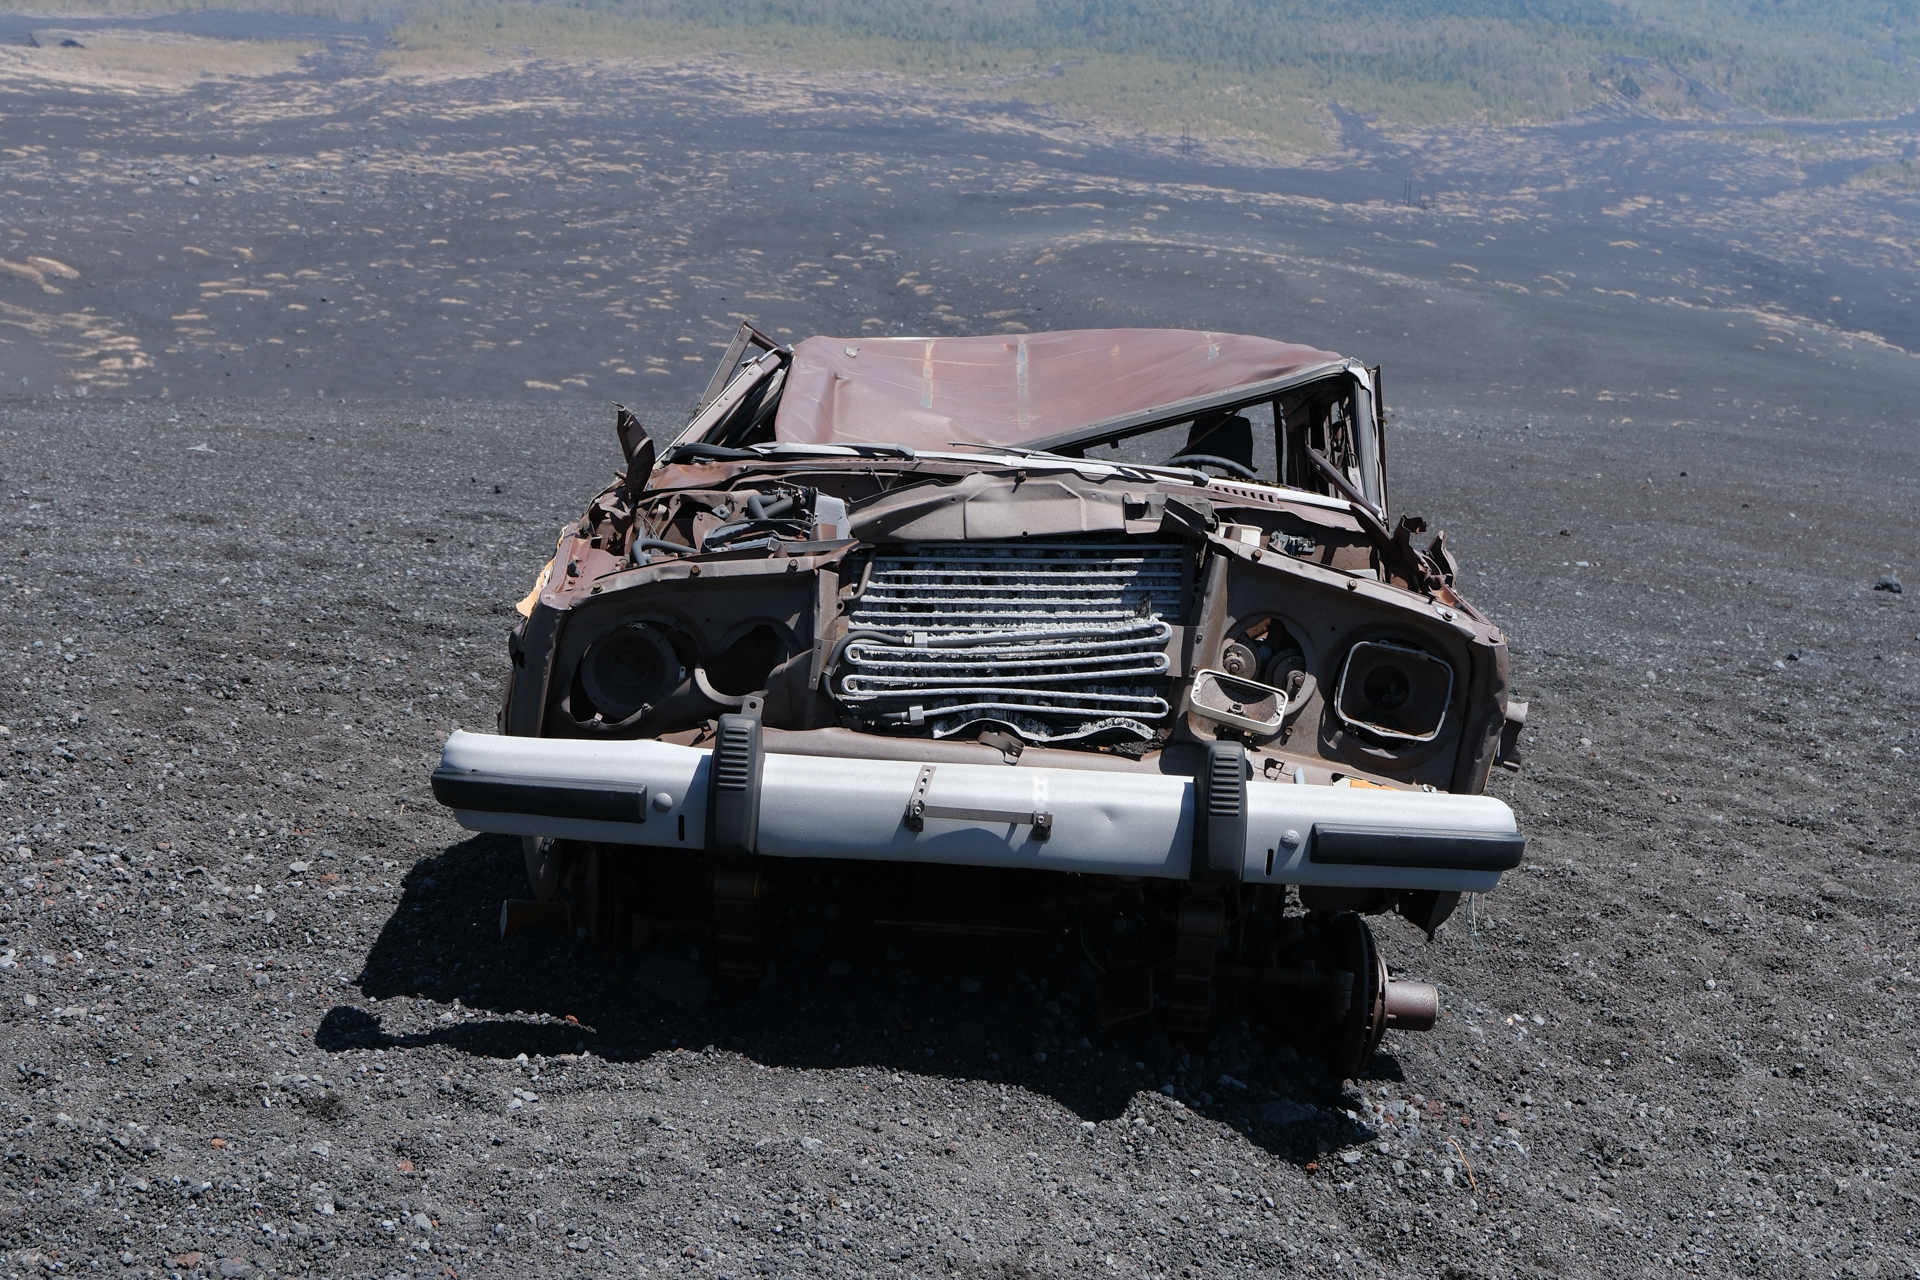
So on my first outing with my camera to Mt Futatsuzuka, I did take some comparison shots.
You may or may not agree with me, but for landscape shots like this, you could totally get by with just using the iPhone. It’s not bad. I still do prefer the Fujifilm enough to bring it along on all my hikes though, even though it adds a fair bit of weight. Maybe it’s just feels a bit softer and less contrasty than the iPhone. Having the RAW files does also provide a lot more flexibility, since you can improve some photos in Lightroom afterwards e.g if the lighting was a bit off.
As another example of an iPhone vs Fujifilm, here’s a sunset from my recent trip to Odaiba:
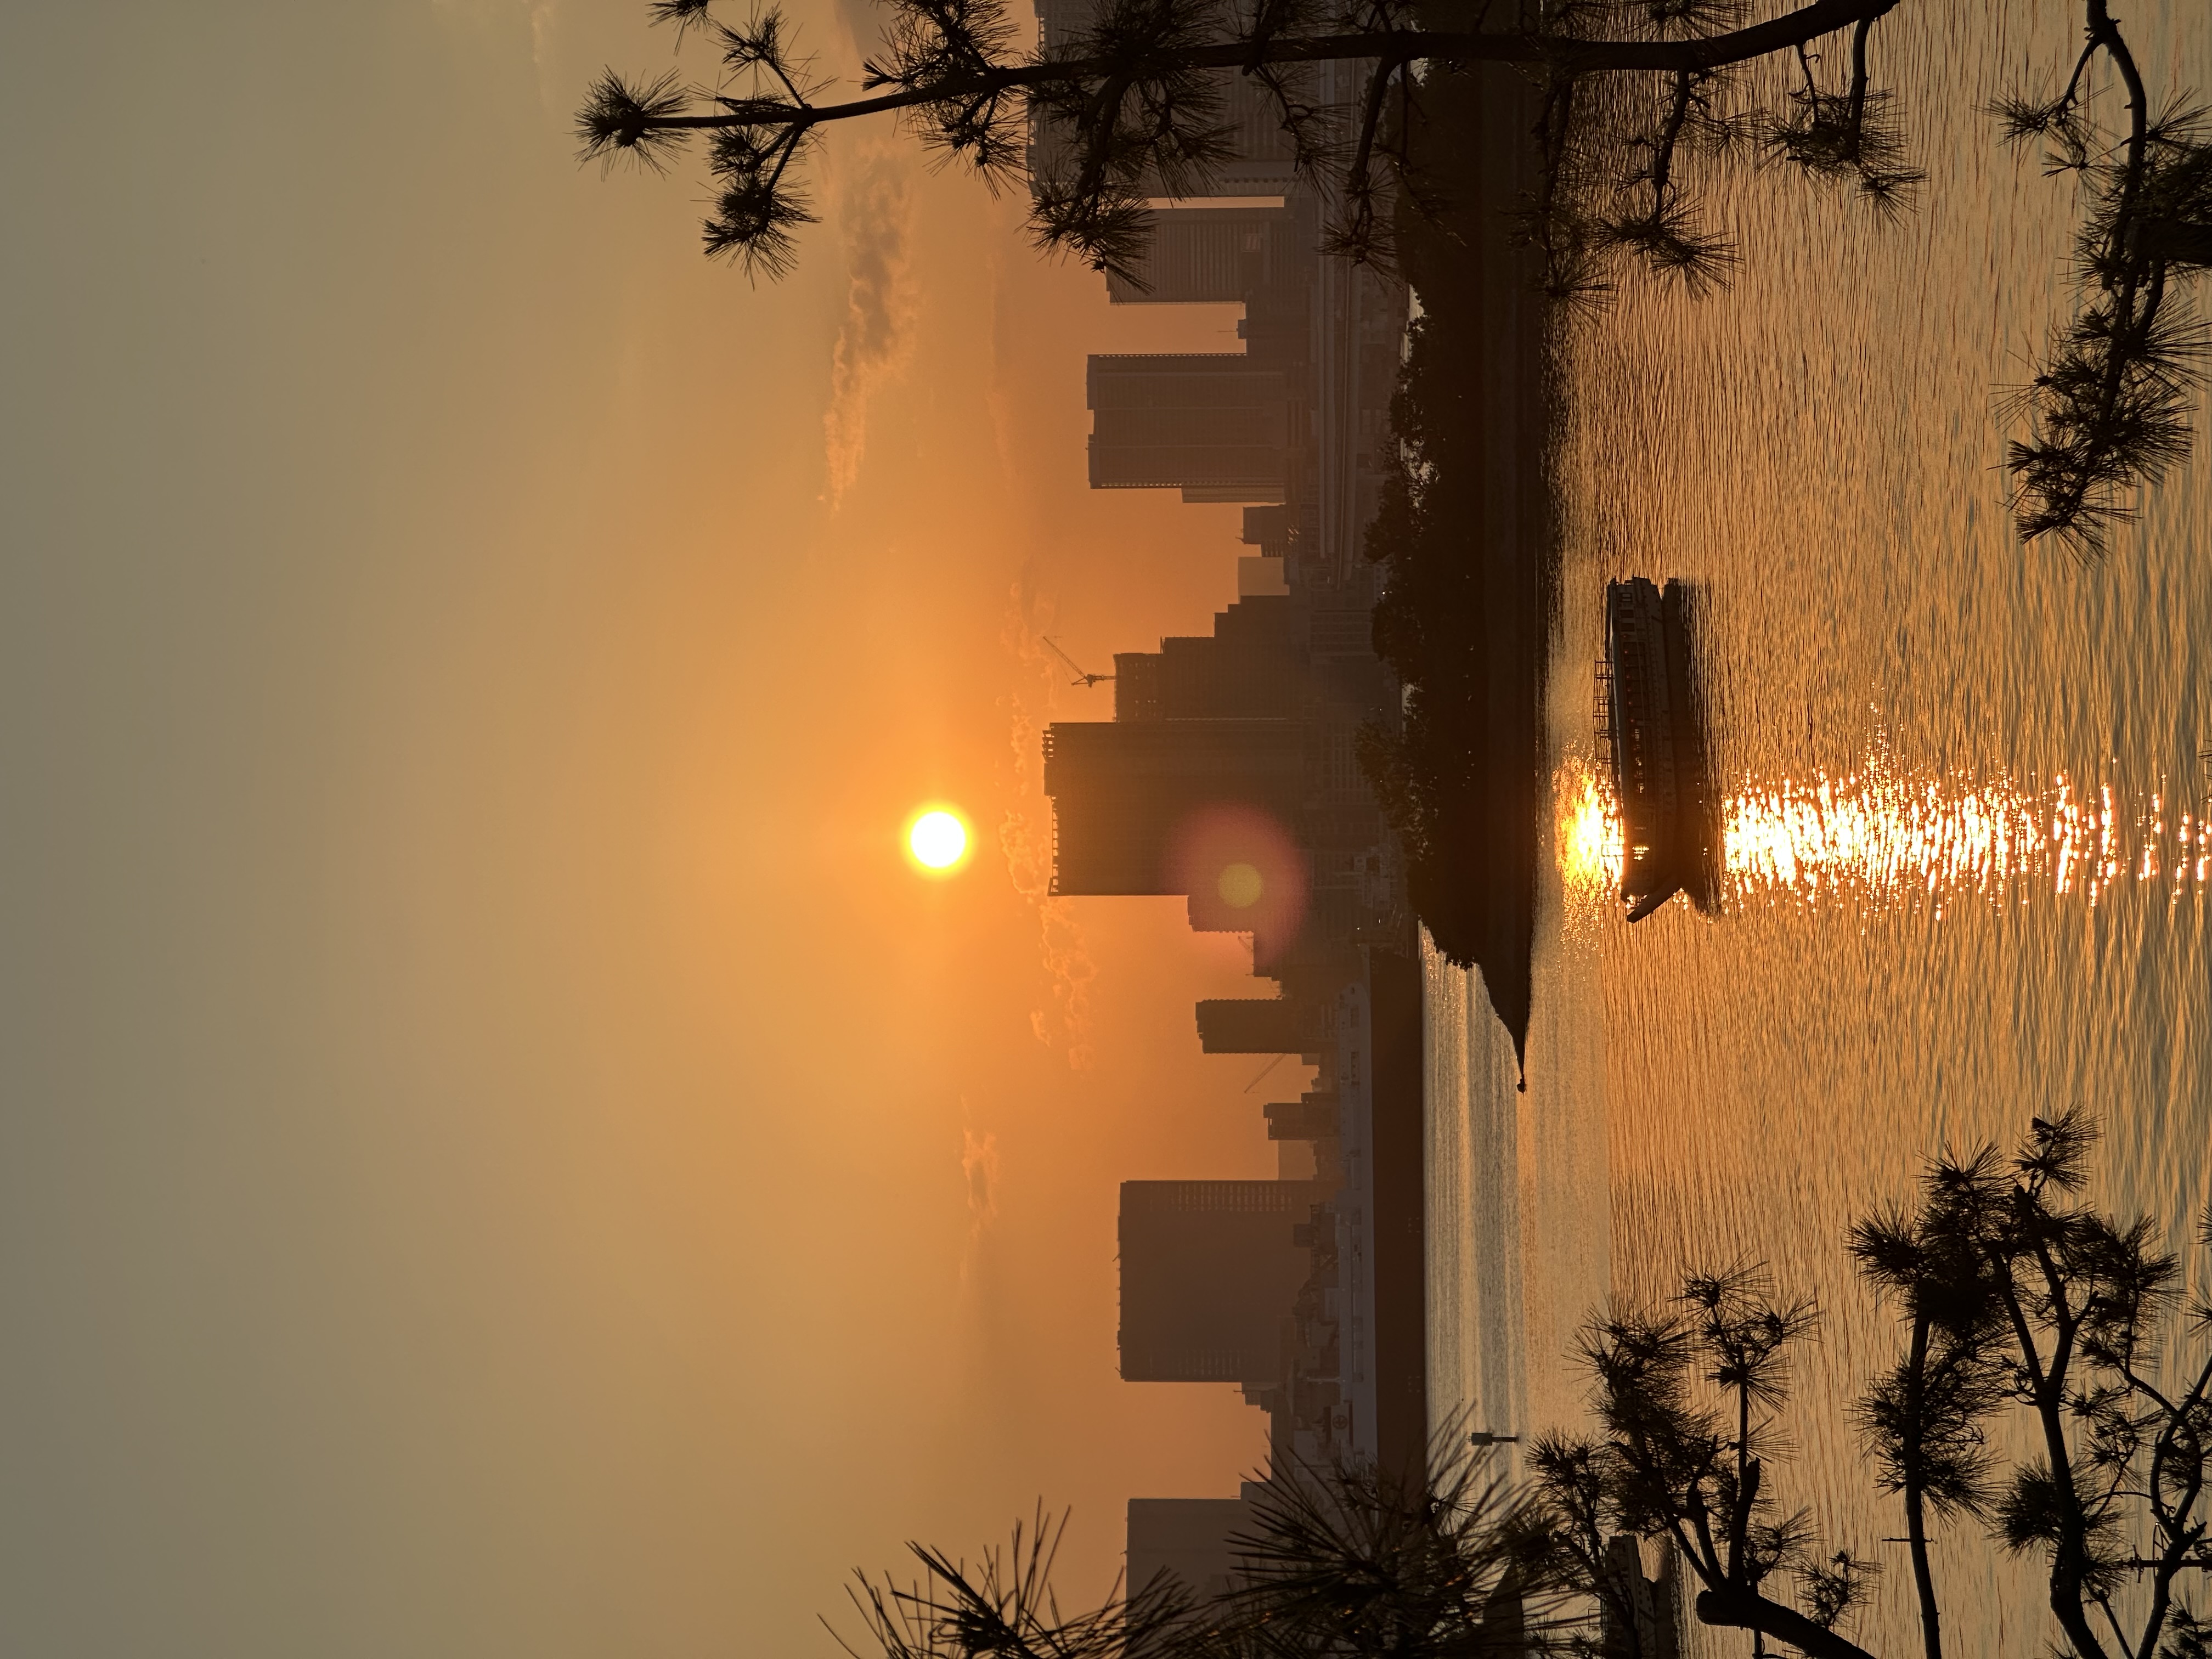
Again, pretty similar results.
But where it has really shined for me has definitely been with the telephoto lens photos like I mentioned before - on my recent trip to Sydney I got some lovely pictures of the local birds that I was really happy with.
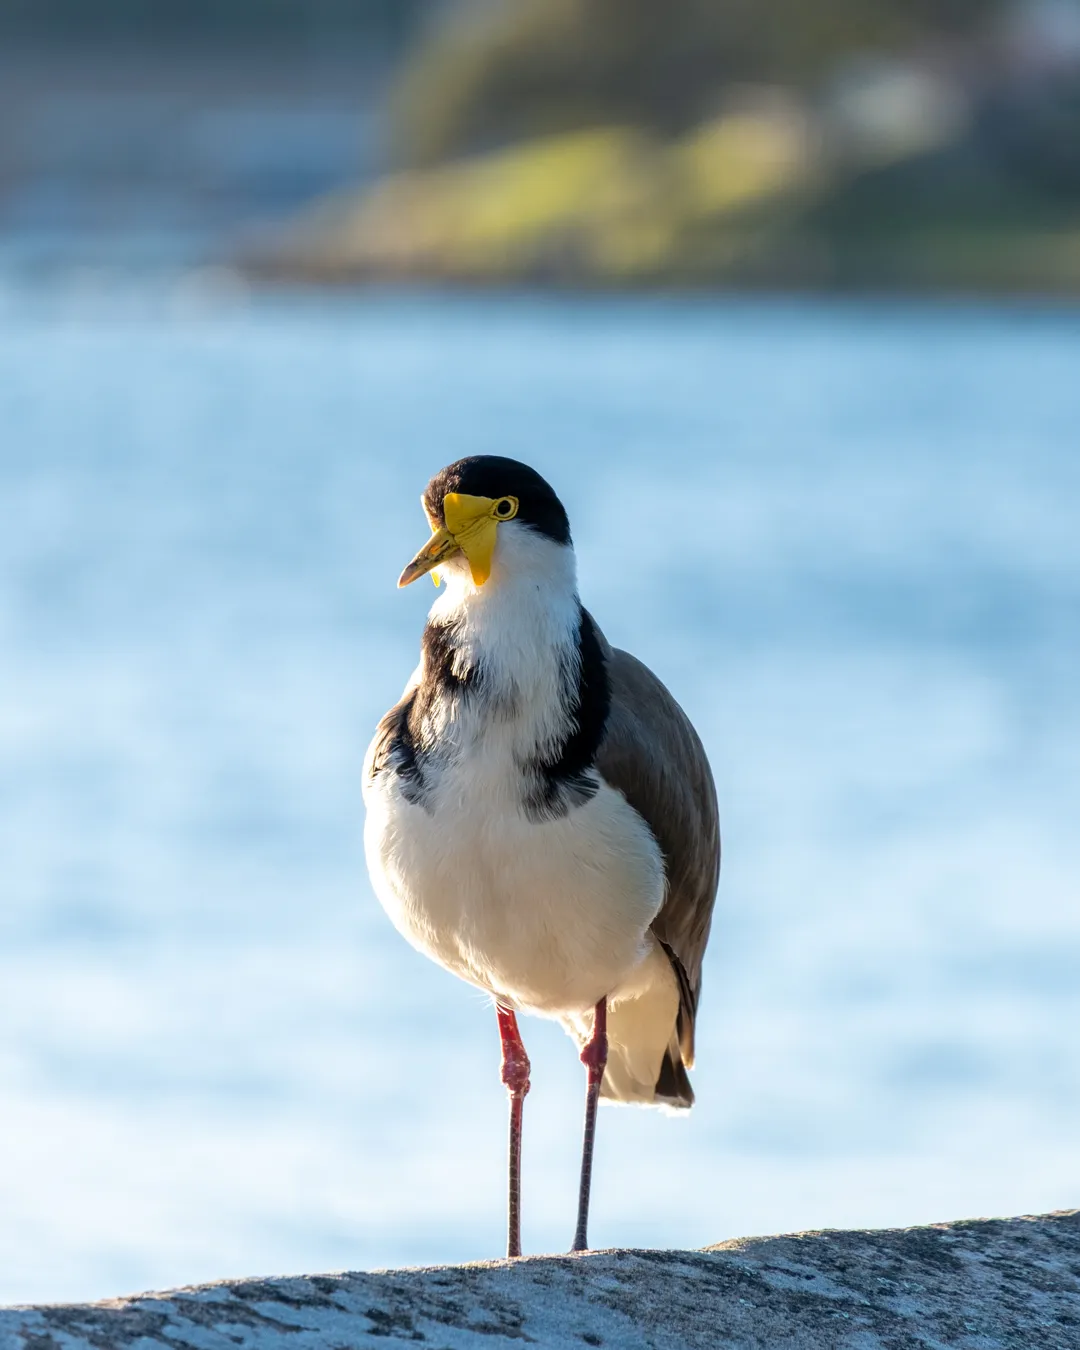
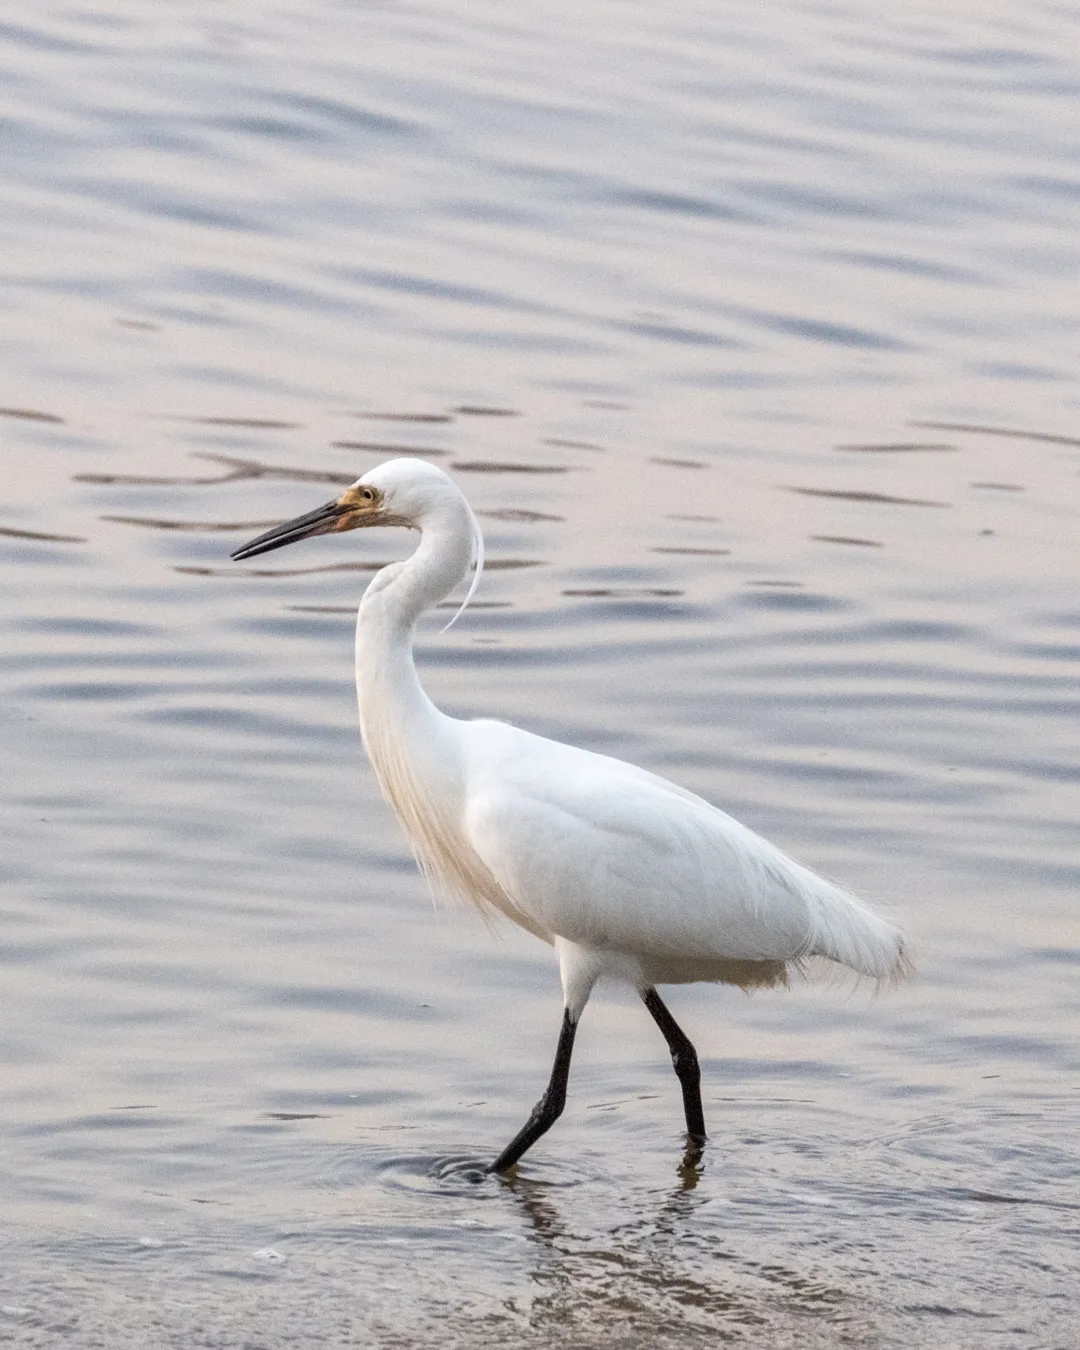
So that’s a win for the Fujifilm.
I think it just generally makes days out more memorable as well. What might be an okay-ish walk through a park suddenly becomes a lot more exciting when you can spot all the different birds about. Or maybe this photography hobby is revealing that I’ve been a closeted birder all along, ha.
My photo editing flow
So right now I have my camera set to save both JPEG and RAW files after I take a photo. To be honest, I don’t really use the JPEGs so I can probably remove that setting.
The first thing I do is go through and delete any blurry or doubled-up photos. Sometimes I use Adobe Lightbridge for this, which is free and provides stuff like letting you mark photos for deletion and add tags and star ratings, so that you can sort through all your photos before figuring out which wants you want to delete or use. But I also sometimes just use my Mac’s Finder and Preview since that works well enough too.
The second thing I’ll do is open up the photos in Adobe Lightroom. Now this is a paid software, and a little bit pricey, especially considering it’s something I might only use a couple times a month. But I have found it to be worth it for me to be able to edit the RAW files.
I don’t really know what I’m doing when it comess to editing, so usually I just hit the “Auto” button which applies a bunch of settings to the photo. This is surprisingly pretty decent. About half the time I find that it over does things - like it looks a bit too bright and contrasty - in which case I’ll go through and invidually dial down certain settings until I settle on something that I think “looks right”. It’s not a very exact science.
The other thing I’ll do is crop the photo if it’s for Instagram, since it uses a slightly different aspect ratio to what my camera takes. You can mass-crop photos if you right-click a cropped photo and click “Choose Edit Settings to Copy” so I find that to be helpful to change the ratios all in one go.
My (beginner) photography tips
If you don’t mind some of what I’ve learned as a a beginner -
Taking photos at different zooms
I have a tendency to focus too much on something (e.g. a bird) at the centre of the photo, and not really take into account that I might be a little too zoomed in, or that position of the bird in the photo might be a bit weird. So I try when taking a photo to take a second photo where I’m a bit more zoomed out, so I then have the flexibility to crop it later.
I started doing this after I realised that while my camera takes photos in a 2:3 aspect ratio, Instagram displays photos in a 4:5 ratio. What this means is that for a vertical shot, you’re going to have to crop a bit off the top and/or bottom of your original photo.
For example I got a pretty neat photo of a swan and a cathedral in Zurich:
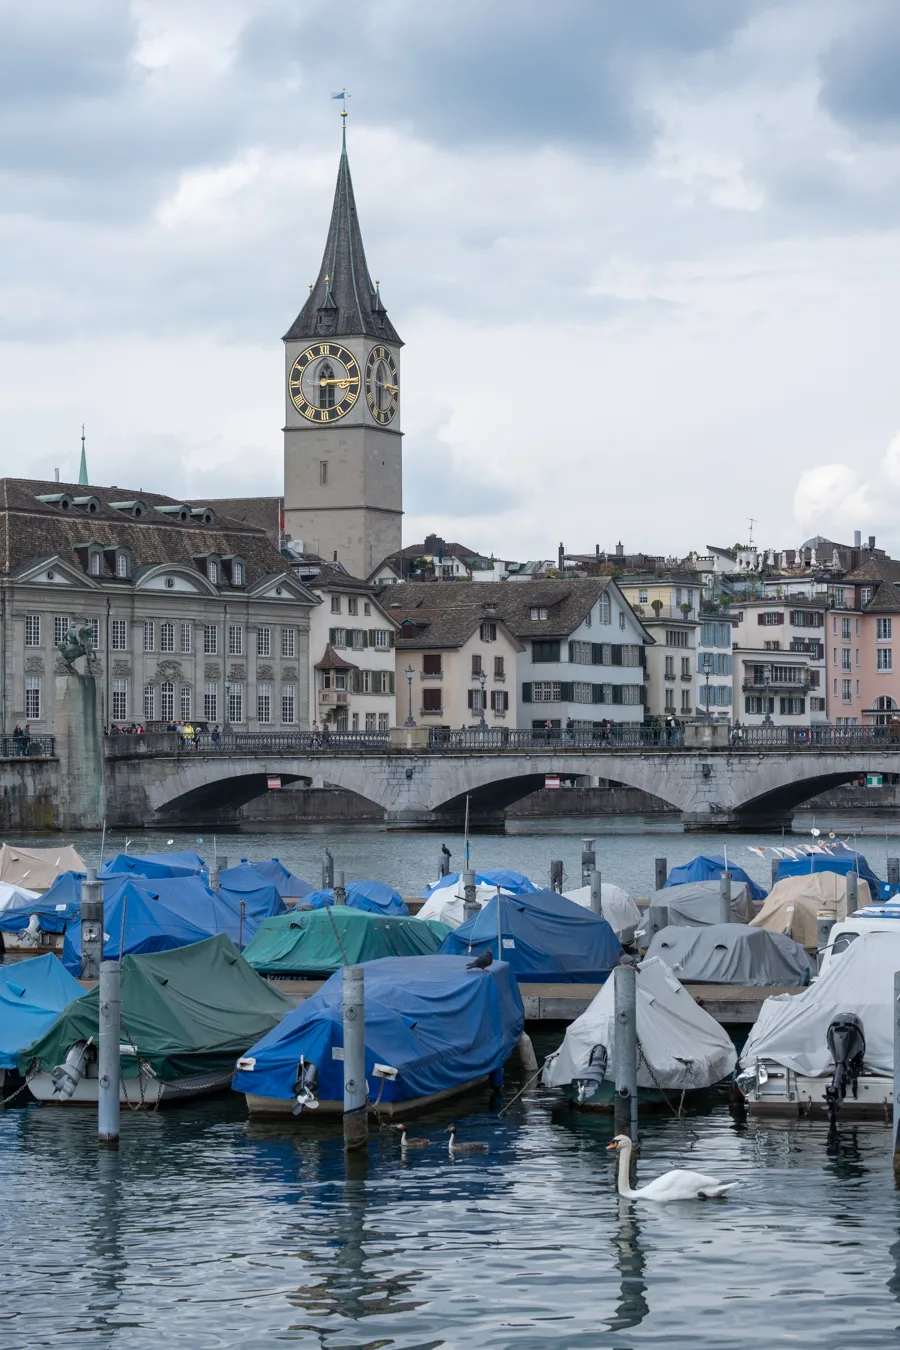
But unfortunately I had zoomed in too much and the whole thing wouldn’t be able to fit in the frame for Instagram. I could slightly crop the top off the cathedral but I didn’t really like that, so instead I cropped it down to be just the swan.
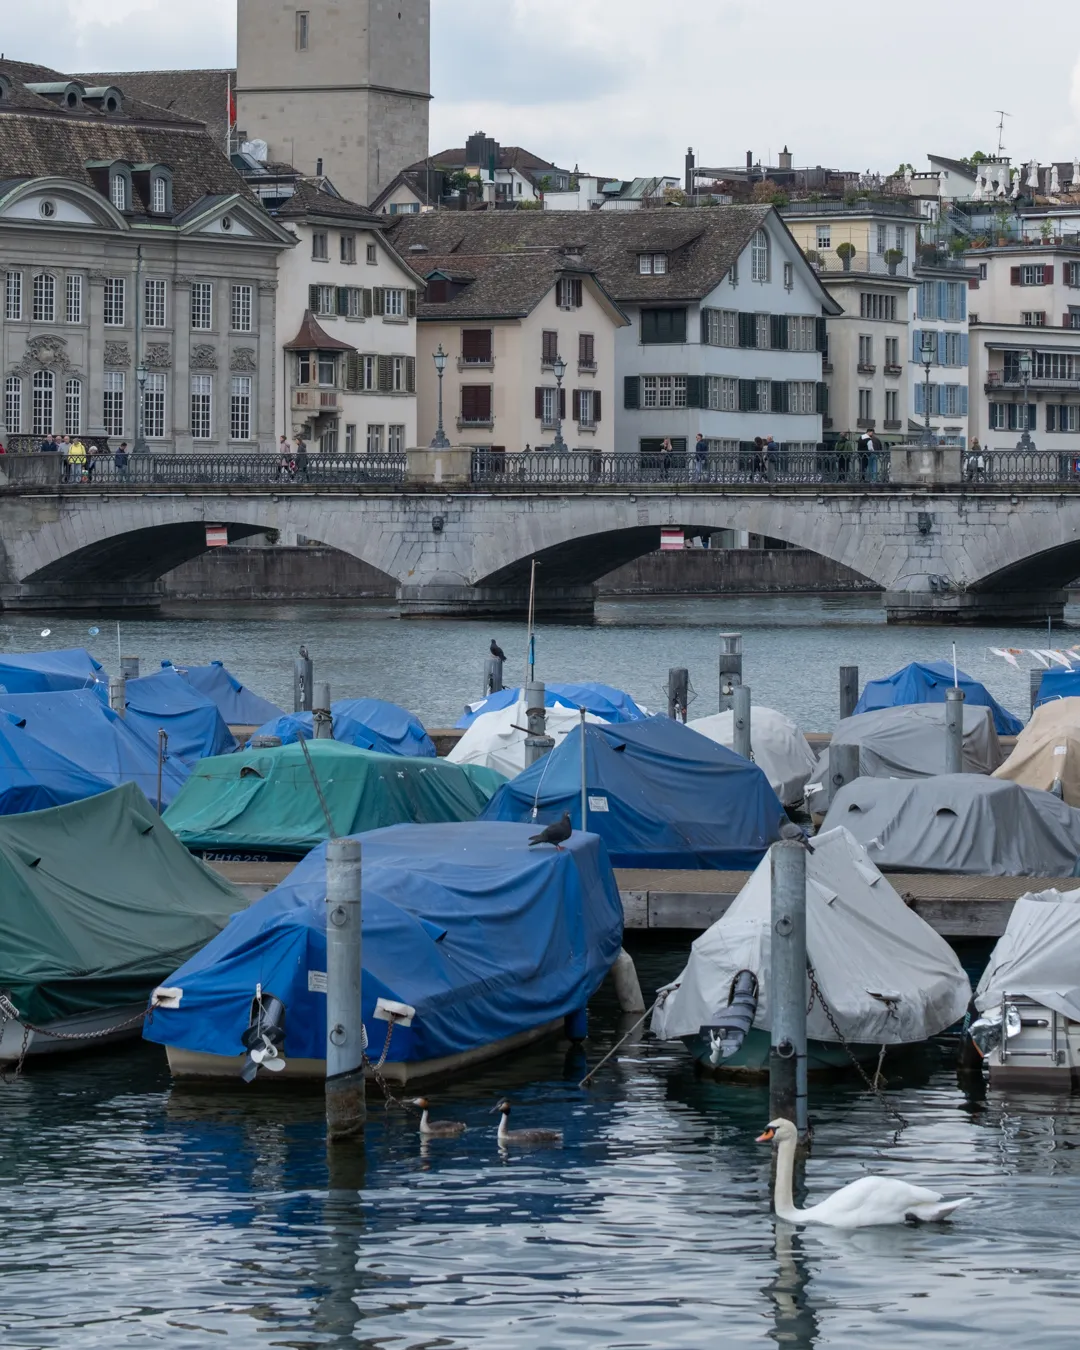
Lesson learned!
Different photos for different scenarios
I have two use-cases for my photos - my hiking blog and my Instagram. If you look at my blog posts for hikes like Mt Tsukuba, you’ll see that I have quite a few vertical photos in there, because I took those photos before I even had a blog. The photos tend to take up the full screen, which isn’t great, and so I definitely try and prioritise landscape photos for my blog.
On the other hand, vertical photos for Instagram work better, since people view them on their phones. So depending on the scenario, I try and take photos in both orientations so I have the flexibility on where I can use them.
Moving away from auto: use the priority aperture mode
So this one is advice I’ve received but am yet to use. I’m guilty of still just using the “auto” setting for all my photos. Hey - it works pretty well! I have been given the advice though that for zoomed in photos of birds especially, I should try using the priority aperture mode, which tends to let you focus more in on the bird and create more of a blurry effect in the background. I’ll update this page once I’ve given it a go.
My camera accessories
Other than the camera itself, the other bits of accessories that I have at the moment are PGYTECH’s Air shoulder strap and Beetle camera clip, which clips to my backpack strap. Peak Design seems to be the most-popular brand, but PGYTECH is cheaper but I’ve found it to bepretty decent. I always have the strap attached to the camera, and then optionally if I’m on a hike I’ll use the strap together with the clip.
Comments
Leave a comment