Hiking log
- Elevation 1266m
- When to climb April - December
- A 9km and under 5h course, with options to extend the course up to 17km
Mountain stats
A 2 hour train ride from Tokyo to Mitake station, and then transfer for a short bus and cablecar ride to begin your hike.
A 90-minute drive from Tokyo. Paid carpark outside the cablecar station (1500 yen).
Mt Mitake (御岳山, mitake-san) and Mt Odake (大岳山, oodake-san) are two neighbouring peaks located in Tokyo’s Okutama mountains. With good public transport and cablecar access, Mt Mitake is a good beginner-friendly hiking option, especially in the autumn season, and I find it to be a bit more enjoyable than the crowds you might get at Mt Takao or Mt Tsukuba. The hike to Mt Mitake and its shrine is only a 1-hour roundtrip course, so hikers will generally choose to extend their hike to include another one of the hiking courses in the area.
Today, I decided to hike out to Mt Odake - from where you can get a view of Mt Fuji - and then descend off the mountain by heading towards Okutama station. Mt Odake is also known as one of the “Three Mountains of Okutama”, together with Mt Gozen and Mt Mito.
To reach Mt Mitake, you’ll first get a train to Mitake station, then transfer to a 10-minute bus ride, and then finally take a 6-minute journey on the Mitake-Tozan Railway. I arrived in time for the 8:20 cablecar.

Apparently the cablecar has been in operation since 1927 - nearly 100 years!


Once off the cablecar, there’s a clearing with a couple of food and gift shops, although they don’t open until 9am so things were still very quiet. There’s also a chairlift here, which provides a shortcut to the Mt Mitake shrine.

The most common way of hiking Mt Odake is to do it as either a direct out-and-back or loop course and return to the Mitake cablecar station. I did that course a little over 3 years ago (and it was actually the very first solo hike I ever did) so it was nice to revisit Mt Odake today but also add a bit of variation by trying out a different course. I’ll be detailing both course options below, so this post will be like a little “choose your own adventure”.
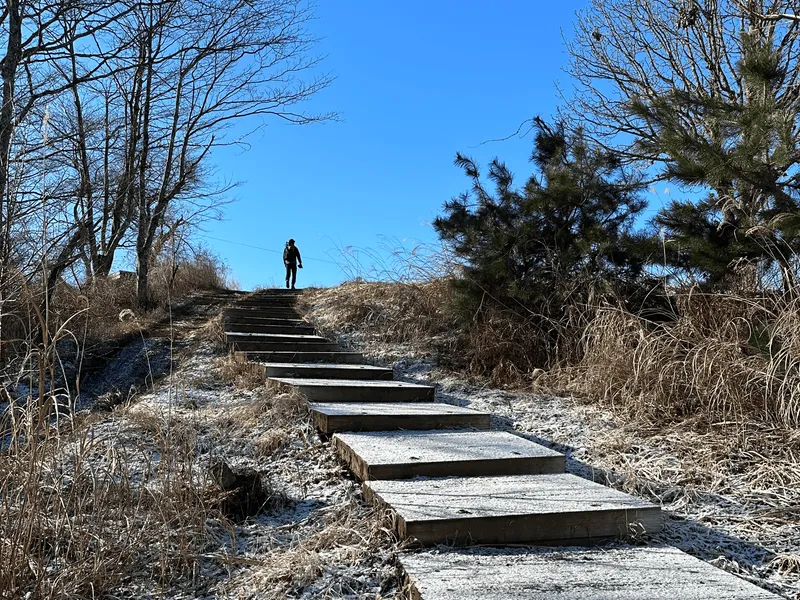
The main trail is to the left of the cablecar station, and begins with a 30-minute walk to the Musashi Mitake shrine.

This part of the hike is all road, and is used by plenty of people who come just to visit the shrine as well.


I came during peak autumn leaves season, so the trees were so beautiful! It was also a lot more quiet than I was expecting, but I think the fact that I got here before 9am contributed to that. If you’re coming by a bit later, and on the weekend, I would expect there to be more crowds, especially during autumn.

The final climb up to the shrine is via a long staircase. About halfway up is the turning off point for Mt Odake, so keep a mental note of its location.

Once you reach Musashi Mitake Shrine, you’ll notice that the shrine is guarded by some wolf statues. The wolf deity Oguchimagami or “Oinu-sama” is said to be enshrined here, which makes this quite popular with dog-owners who come to get their dogs blessed (very cute).


You can have a little wander around the shrine, and then head back down the stairs and turn right at the fork I mentioned earlier to head towards Mt Odake. After a short while you’ll come to another fork in the path.

There are three options before you here:
- Taking the left-most path, a short walk out to a lookout
- The middle path goes down a steeper rocky path to Mitake’s “rock gardens”
- The right path is the most direct route to Mt Odake
I had plenty of time on my hands today, so I decided to take the left-most path to the lookout.
Right next to the fork is also the Nagao Chaya (長尾茶屋). Quite uncommonly, the main thing it sells is wine (and they also have free Wi-Fi).

There are quite a few picnic benches here, so if you wanted a snack break (maybe on your way back from Mt Odake) this would be the main spot to do it.

Heading down a short slope you’ll come to a small open field, which can be used as a helipad in emergencies.

From the field you can get some views of the surrounding mountains - namely Mt Odake and Mt Nabewari on the right-hand side.


And if you head along just a bit further, there’s a hut and a lookout point.

Notably, you can see out to Mt Hinode (日の出山), which is another beginner-friendly mountain you can hike to in the area.

After taking in the views, I headed back to the fork in the road. And here’s where the choose your own adventure begins!
Option A: Take a detour to the rock gardens (recommended)
Taking the middle path in the fork, you’ll be able to take a detour down to Mitake’s rock gardens. This is the route I took back in 2022. Up until this point, your hike on Mt Mitake will have been along roads and relatively flat dirt paths, but from here it will suddenly get quite steep so make sure to come prepared with hiking shoes!

The one reason I might not recommend the rock garden path is if you are not too sure you have enough time, or you are unsure whether you have the energy for it. The most direct route up to Mt Odake will take 4 hours and 45 minutes, and the rock garden detour will add on a little bit to that. If you’re a bit unsure, you can always do it on the way back instead.
Along the way, you’ll pass a waterfall known as the Nanayo Falls (七代の滝).

You’ll also pass the Tengu Rock (天狗岩) which has a chain affixed so you can climb it if you’re daring enough. (There’s a little tengu statue at the top).

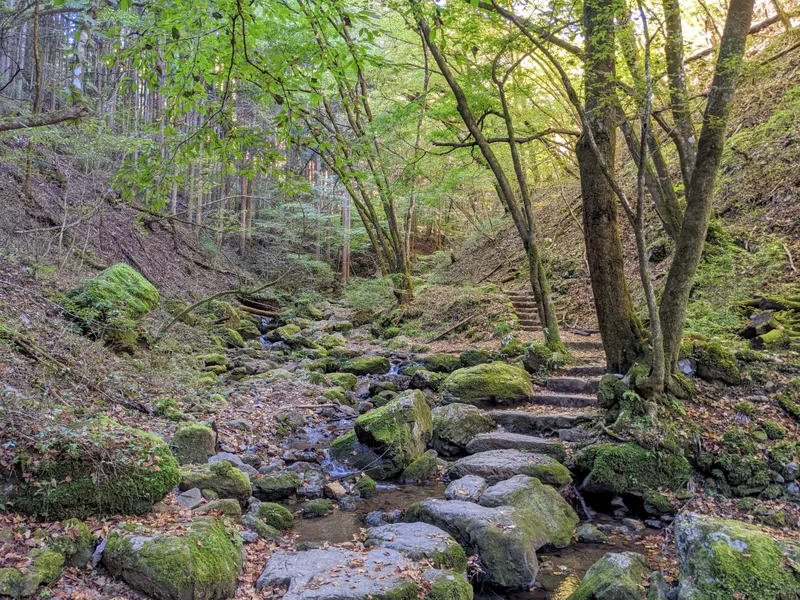
And then you’ll come to the “rock garden” itself.

It’s a nice little path made up of rocks, and you’ll step over some small streams here and there.

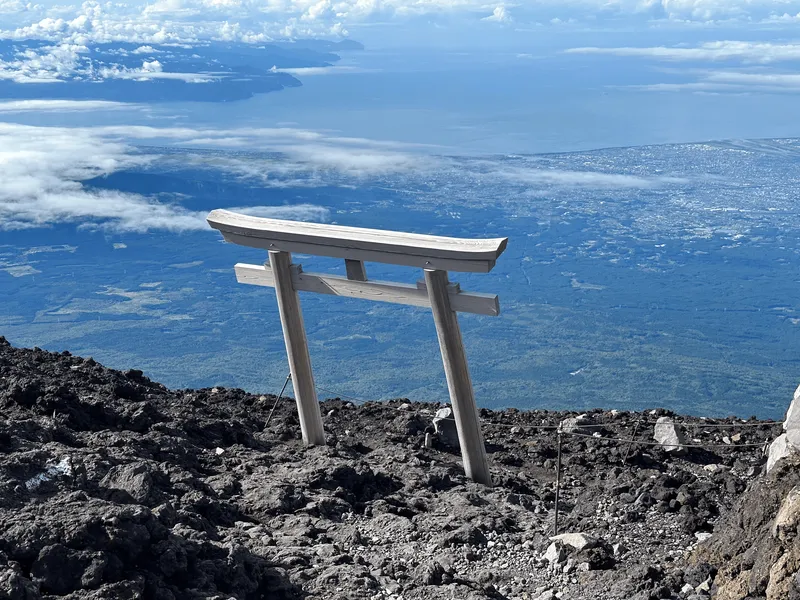
And finally you’ll reach another torii gate, and behind it is the Ayahiro Falls (綾広の滝).

This has some religious significance and is used by the Mitake Shrine for certain rituals.

After this, you’ll finish the detour route and head back up to join the main path to Mt Odake.

Option B: Skip the rock garden, and continue via the straight path
If you’re just interested in hiking Mt Odake for today, or are trying to catch a view of Mt Fuji (your chances of viewing it are higher in the morning), it may be worth taking the most direct route up to Mt Odake. There are quite a few flat dirt paths in this section with not-to-steep inclines, but it is also more boring than the rock gardens.

On this section of the trail I did manage to spot a Japanese serow or “kamoshika”. Unfortunately it quickly bounded off as soon as it spotted me, so I couldn’t get a picture (darn). I’ll admit the first time I ever saw one I got quite spooked as they are quite dark and furry and I thought I was about to get attacked by a wild boar of some sort. But they are actually very timid and quite harmless, so if anything you’re really lucky if you manage to grab a photo of one.

As you head along this path towards Mt Odake, you’ll pass a torii gate where you can take another detour route up via Okunoin-mine (奥の院峰) and Mt Nabewari (鍋割山). You might remember that Mt Nabewari was the peak you could see from the clearing with the helicopter landing pad. The route is a more “traditional” hiking path with tree roots and clambering up over rocks and the like.
I decided to skip it for today, but it can also be a good option to take on the return route to keep things interesting.

There are also quite a few toilets on this hike. A bit more than what you might see on a regular Japanese trail, but I think it speaks to the popularity of Mt Mitake.

Heading up towards Mt Odake
Whether you came via the rock gardens or the flat path, the two trails will join up when you reach this shelter.

If you took the rock gardens detour, you have already encountered a bit of steep descents and climbs, but for those coming via option B, this is where the real hiking begins as there’s finally some more steep sections.


You’ll eventually come to some slightly rockier terrain, which is accompanied by a “danger of tripping” sign.

To be honest, it’s nothing that really warrants a warning sign. If you came into this expecting a hike, you have nothing to be worried about. I would assume that the rock gardens draw a large number of non-hikers, and so they need to be extra careful with the signage for anyone who randomly decides they want to take a detour to Mt Odake without being properly prepared.


Next you’ll come to the Odake Sansou (大岳山荘).

It seems quite abandoned, and there’s a discussion about it on YAMAP back in 2018, so it seems it’s been closed probably even longer than that. Apparently the owner passed away, and they didn’t find anyone willing to take over. A bit of a shame, but understandable if people only tend to do Mt Odake as a day hike. There’s also a toilet building tucked away in the corner next to the Sansou.

From here there’s another torii gate, and then Odake shrine (大岳神社).

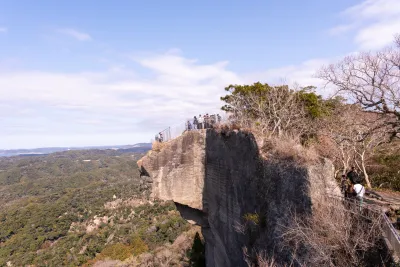
Beyond that, the peak of Mt Odake is less than 10 minutes away via a short but steep path.


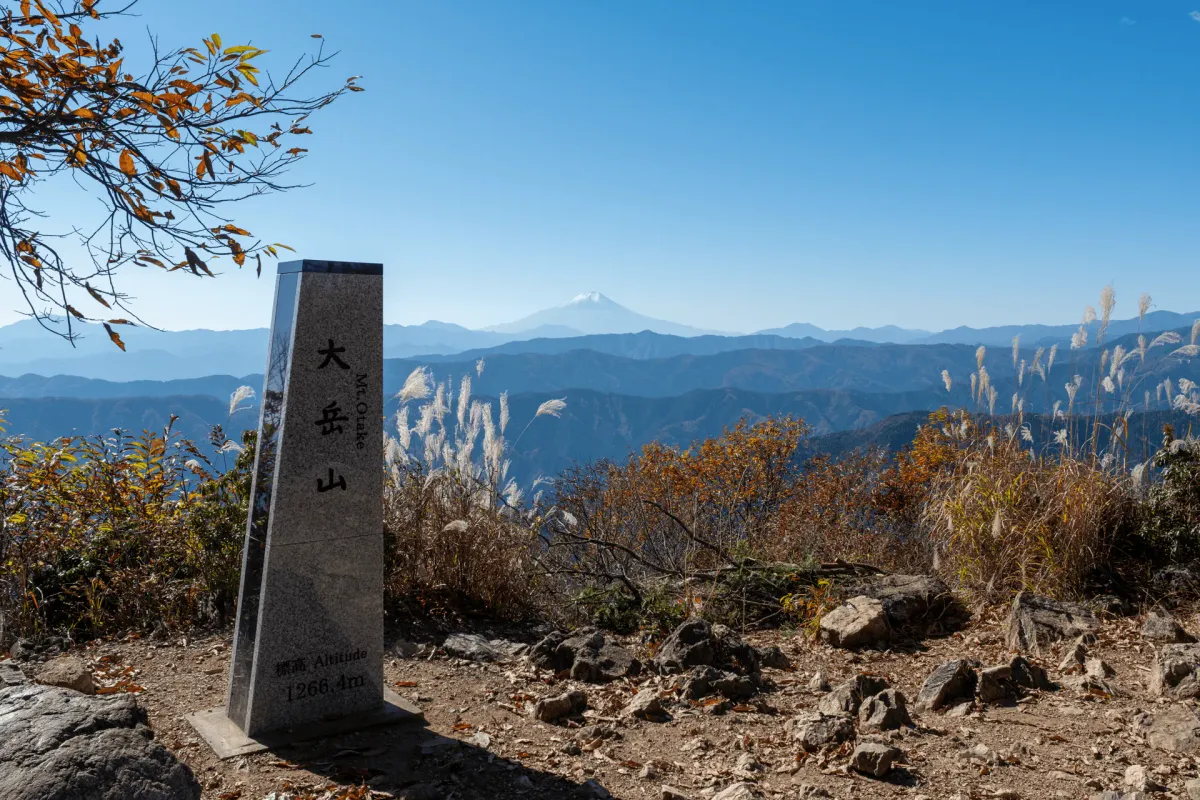
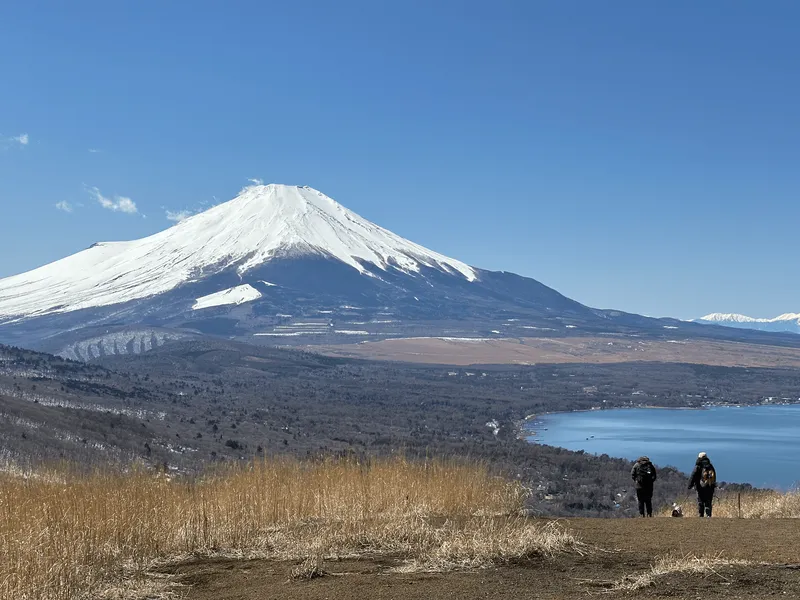
As I approached, I was immediately scanning the horizon for Mt Fuji, and there he was!


Interestingly, all the English signage for Mt Odake I saw has Mt Otake with a “t”, but the standard Japanese pronunciation is with a “d” so I’m sticking with “Mt Odake” for this blog post.
When I hiked up here 3 years ago, there was a man having his lunch right next to the peak marker so he got to be featured in my photo of it.

So I’m glad I managed to finally get a clear photo of it today.

The peak marker is quite a large sturdy one made out of granite, and I’ve seen them on quite a few of the major peaks in the Okutama area. In comparison, most mountains in Japan tend to come with wooden poles for peak markers, or small wooden signs placed on top of rocks or hung around trees.
When on a long hike my mind has plenty of time to wander, and so I got to thinking - how the heck would you get a big slab of rock like this up here? It can only be via a helicopter, right? Once I got home, I gave it a Google, and turns out I was right (source: a random Q&A PDF). Back in 2016 they were dropped off via helicopter on a number of peaks to coincide with Japan’s “Mountain Day” public holiday in August. Very cool.
I enjoyed a snack break in the sunshine here, and then it’s time for another round of “choose your own adventure”
Option A: Descend back towards Mt Mitake (recommended)

From Mt Odake, you can head back in the same direction you came towards the Mitake cablecar. I would recommend this for a couple of reasons:
- It’s a little bit shorter (you’ll save about 60 - 90 minutes)
- The descent trail towards Okutama station is kind of boring
- There’s plenty of yummy food options near the Mitake Shrine and cablecar
- You can also enjoy a walk along the Tama River near the Mitake train station
However you can also make this return hike a little more exerting by going via Mt Nabewari (鍋割山) and Okunoin-mine (奥の院峰). This is the route I took back in 2022, and turns your hike into a loop course back to the Mitake cablecar. Unlike the relatively flat dirt path back to Mitake, this does feature a climb and involves navigating over rocks and tree roots.


Once you pass through the torii gate, you’ll be done with the difficult bits, and be back on your way towards the Mitake cablecar.

You can skip the cablecar if you want - instead it’ll be a 30-minute walk down a winding road back to the bus stop. There isn’t too much to see here, but what I do recommend is skipping the bus trip on the way back.

If you walk, you can get a great view of the Tama River! It will take you about 30 minutes to walk back to the station along the river.

Option B: From Mt Odake, continue your hike to Okutama station
While I would recommend heading back to Mitake if it’s your first time hiking Mt Odake, since I’d already done that course, I wanted to do a bit of a different course (variety is the spice of life) and so that’s why I decided to give this alternative trail a go.
Although there were quite a few people around the peak of Mt Odake, I think the majority of people do head back towards Mitake rather than head down this path so it was quite quiet.

The first section is quite steep, with the fallen leaves underfoot making for a pretty slippery path, so I’m glad I brought along my trekking poles.


I did spot at least 4 other hikers who were hiking up this way in the opposite direction to me. The only reason I didn’t do the course in reverse is that if you think about it, the elevation gain is going to be greater if you only get to use the cablecar on the way downwards. But this can make for a pretty good training course if you want to get some longer hiking in. Going from Okutama station all the way to Mitake station comes to a total of 17km. If you’re planning on hiking the entire course, I would definitely recommend going from Okutama station, since this side of the course has some steeper bits, and it’s usually easier to do the difficult bits as a climb up.
Along the way, you’ll pass the peak of Mt Nabewari (鍋割山).

This Mt Nabewari has an elevation of 1082m, and is not to be confused with the more popular Mt Nabewari in Kanagawa prefecture (elevation 1272m) which sells a tasty bowl of nabeyaki udon at the top.

Beyond Mt Nabewari, there’s a bit more of a climb, and then the long descent continues.


The descent path is mostly in the forest, save for one small lookout point about an hour before the end of the hike.


The hiking path is a little bit more exposed around here, giving you a chance to see bits of the town of Okutama below behind the tree branches.


Eventually you’ll descend to the final point of interest on the hike - Mt Atago (愛宕山).

It’s a little shrine, complete with a pagoda.

Beyond the pagoda is your final challenge for the day - a 188-stair descent down a very steep staircase.


And then you’ll be heading back into the town of Okutama!

As you cross the bridge, you’ll cross the Tama River, which is a long 138km river that flows all the way to Tokyo Bay.

And if you didn’t get to spot a kamoshika, you’ll pass a cute artwork of one on the side of the Okutama Visitor Centre building.

And then finally, you’ll reach the finish line at Okutama station. This is the westernmost train station in Tokyo, and trains only depart from here 1 - 3 times an hour, so it may pay to note down the departure times in case you want to speed up (or slow down) towards the end of your hike. There are a number of food options in the area if you have the spare time as well.

Hiking course options
| Date climbed | Length | Course time |
|---|---|---|
| 2025-11-14 | 11km | 6h20min (the expected time for an average hiker without breaks) |
If you want to hike Mt Mitake and Mt Odake, you have plenty of options for a day hike:
- The shortest: a direct 9km out-and-back from the top of the Mitake-Tozan Railway (i.e. the cablecar) to Mt Odake
- The most interesting: a 12km partial loop course from the top of the Railway, taking detours to the rock garden on the way up, and Mt Nabewari on the way back
- The most elevation gain: a 10km climb from the Senzoku bus stop (千足バス停), coming via Musashi-Itsukaichi station (thanks Markus for the tip!)
- The longest: hiking 17km from Okutama station to Mitake station (YAMAP course is 11km to the top of the cablecar + you can continue your hike and skip the cablecar and the bus on the way down)
I previously did the 12km partial loop course in 2022 (see my activity log on YAMAP) and then this time did the trail from the top of the cablecar to Okutama station (see my activity log on YAMAP).
My personal recommendation would be:
- Start from the top of the cablecar
- Take the rock garden course on the way there
- Head back to the cablecar via the most direct path (save your energy)
- Take the cablecar down, but skip the bus and walk to the station
Skipping the cablecar and walking down is a little boring - there’s not much to see on the route other than trees, and maybe watching the cablecar go by. I would consider skipping the cablecar on the way down only if you had a lot of energy, and were going to be waiting for a while in line for the cablecar anyway.
However for the bus back to Mitake station, if you had the spare time and energy I would definitely recommend skipping this one, and walking back to Mitake station along the Tama River.
When to hike Mt Mitake and Mt Odake
I would recommend hiking the trail between Mt Mitake and Mt Odake between April and December. It’s at its prettiest during the autumn leaves season (late October to late November), for which I’m sure you’ve seen a lot of photos in this blog post already - I hiked in mid-November for reference.
If you come at the beginning of April, you’ll also be just in time for the flowering season so it’s also another great time to visit.


There will be snowfall during the winter season (around January - March). The timings of snowfall will vary year-on-year so if you want to hike during this time I would recommend double-checking the latest trail conditions before your hike on YAMAP.
Public transport access
To begin your hike, you’ll need to use 3 modes of transportation:
- A train to Mitake station (御嶽駅), which takes under 2 hours from Tokyo
- A 10-minute bus ride from Mitake station to the Mitake-Tozan Railway (see timetable here)
- A 6-minute ride on the cablecar (see timetable here)
All your transportation for this trip can be covered by IC/Suica which makes it very convenient. Touch when you get on and off for the train and bus, and you only need to touch on for the ropeway.
Access to Mitake station
Google and other transport apps can give you a number of combinations to get to Mitake Station, but I would say the easiest is via the JR Chuo line. This runs directly from Tokyo station, and requires just 1 transfer at Ome (青梅) station onto a smaller train (don’t worry, it’s on the same platform so you can’t miss it). If you are needing to transfer from somewhere else, you can also transfer onto the Ome line at Shinjuku or Tachikawa station.
If you are travelling on the weekend, your journey will be a tiny bit faster if you get the Holiday Rapid Okutama train. However one thing to note here is that the train actually splits in two at Haijima station (拝島駅). So you’ll want to make sure you are on the correct half of the train that heads towards Okutama when this happens (don’t zone out!)
Mitake station is rural enough that there are no conbinis in the area - so make sure to stock up on snacks beforehand. There is some food sold at the top of the cablecar station (at least on weekends) and also a decent ramen spot at Mitake station if you’re looking for something to eat before heading home.
Access to the Mitake-Tozan Railway

Once you make it to Mitake station, exit the station, head left and cross the road to reach the bus stop. From here you can hop on a 10-minute bus to the Mitake-Tozan Railway cablecar. The bus accepts IC / Suica and departs once or twice an hour.
You’ll want to try and time it so that you can get off the train, straight onto a bus, and then onto the cablecar. If you are coming during a busy season (on the weekend during autumn) it may pay to try and arrive a little early to the station though, so you can make sure you can get a spot on the bus.

Car access
The public transportation access is so good for Mt Mitake, I would not recommend doing this hike by car. The one exception I might make is if you are bringing along your dog - Mt Mitake is very dog-friendly. You can take your dog without a cage onto the cablecar, and get your dog blessed at the Musashi Mitake Shrine as well.
There are about 200 car spots at the bottom of the cablecar (detailed here). Expect to pay up to 1500 yen for a day’s parking.
Seeing Mt Fuji from Mt Odake
If you want to increase your odds of seeing Mt Fuji, you’ll want to go in the colder months as the chances of seeing Mt Fuji are much higher in autumn and spring. You can also check out this “When to See Mt. Fuji?” website which provides a visibility forecast, so you can time your chances if you have multiple days open to do your hike.
Your chances of seeing Mt Fuji are also higher in the morning, so it can be worth having an earlier start to increase your chances.
Read more

Support me
📸 Thanks for reading! If you'd like to read more posts like this one, you can follow me on Instagram to stay up to date on my hiking adventures.
If you found this post useful, you can show your support by buying me a coffee - I write this blog for fun, but coffee is always appreciated! ☕
Recent posts
 hikes
hikesMt Nokogiri: a hike to Chiba's stone quarry
18 Mar hikes
hikesMt Miura-fuji and the Miura Kaigan Cherry Blossom Festival
9 Mar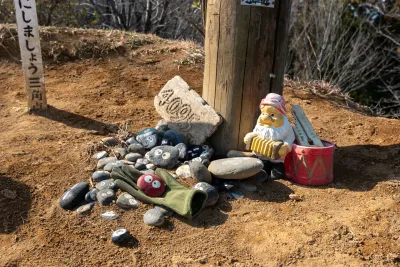 hikes
hikesAkabokko: hiking in Ome
16 Feb
Comments
Leave a comment