Hiking log
- Elevation 2003m
- When to climb June - October
- The most popular course is a 14km, 8.5 hour out-and-back from the Shiori Pass trailhead.
Mountain stats
There are early-morning shuttle buses running on weekends from mid-Sept through October. It will require a stay in the area the night before.
3.5 hour drive from Tokyo to the Shiori Pass carpark. The road is closed between November and April.
Mt Echigo-Komagatake (越後駒ヶ岳, echigo-komagatake), is one of the Hundred Famous Mountains of Japan located in Niigata. There are quite a few Komagatakes across Japan, and this one is named for the Echigo province, which historically is the name for the area that has become Niigata today. This mountain is commonly hiked from Shiori Pass (枝折峠, shiori-toge) which is also famous among photographers for its “waterfall clouds” (滝雲, taki-gumo) phenomenon.
Mt Echigo-Komagatake has a relatively low elevation (2003m) to be hiking it in summer, but I wasn’t keen on the idea of fighting for a car spot amongst the horde of photographers in the peak season of autumn, so I decided to give it a go at the beginning of August. In preparation for an early start to try and beat the heat, I decided to sleep at the trailhead before beginning my hike, and began nice and early at 4:30am.

Within about 10 - 15 minutes of beginning the hike, you’ll pass by the viewpoint for the waterfall clouds.

There are two view points marked with a large sign, but I recommend continuing on with your hike for another 5 minutes, since there is a better vantage point as you climb past the two officially marked ones. I spotted one photographer who had two tripods set up, so I figured that this was a good spot to watch the clouds with the sunrise.

It’s an interesting phenomenon to witness, because if you look in the opposite direction, there are absolutely no clouds to be seen.

What’s unique about these clouds in particular is that there’s a bit of a waterfall effect going on, with the clouds flowing from right-to-left, and then dropping down over the hills. A bit hard to tell in this photo though!

Looking at photos online, it looks like the effect can be a lot more prominent than it was today, but I’m glad I still got to see it at all! I stuck around for a couple minutes to take in the views, and to watch the sun rise.

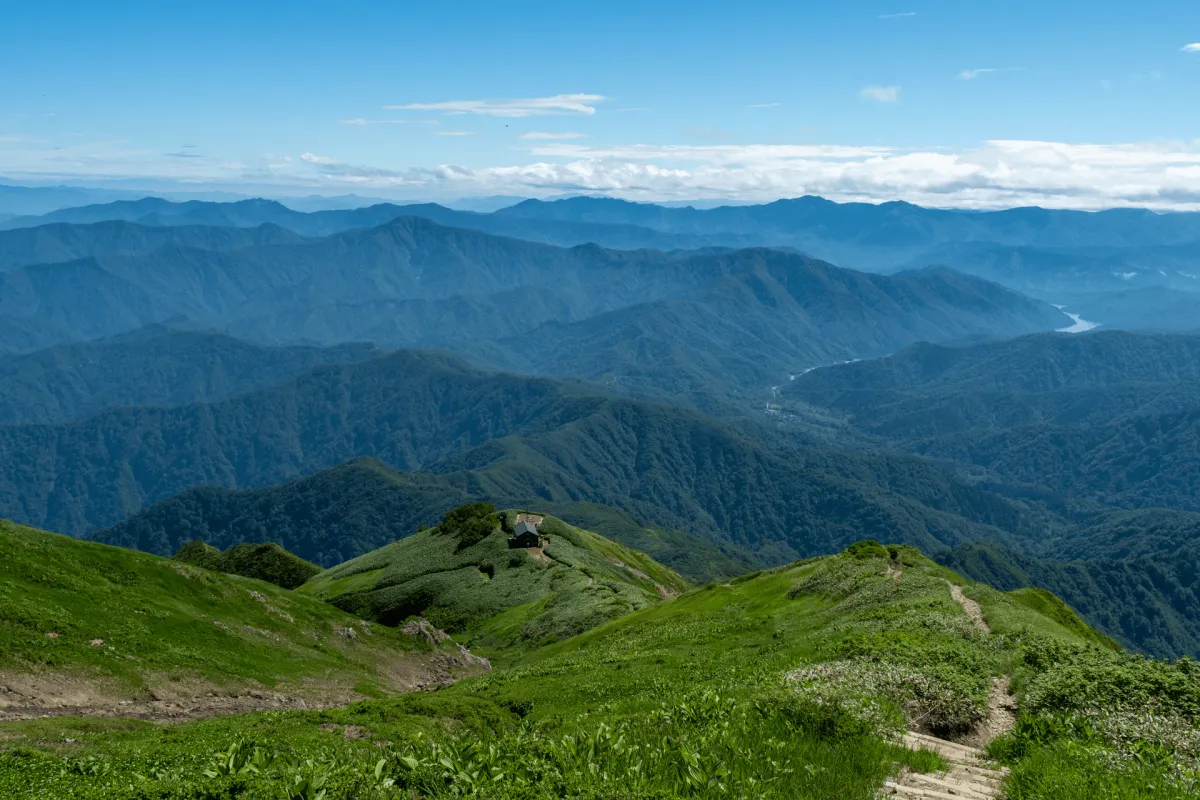
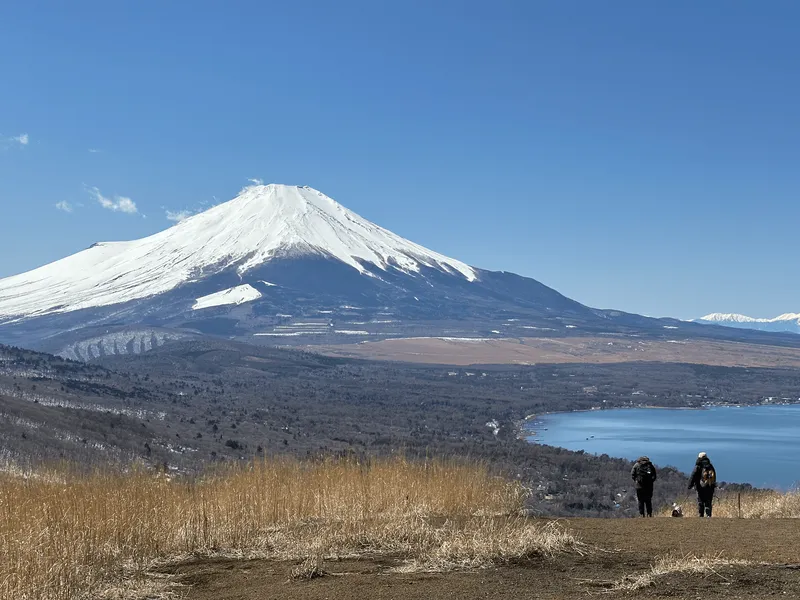
As you continue your hike, the peak of Mt Echigo-Komagatake is already visible right in front of you, lit by the sunrise.

It looked dauntingly far away, but I suppose since the hike is a slightly windy 7km one way, it must only be 5 - 6km in a straight line. Pretty crazy to think you’re going to be able to climb all the way over there.

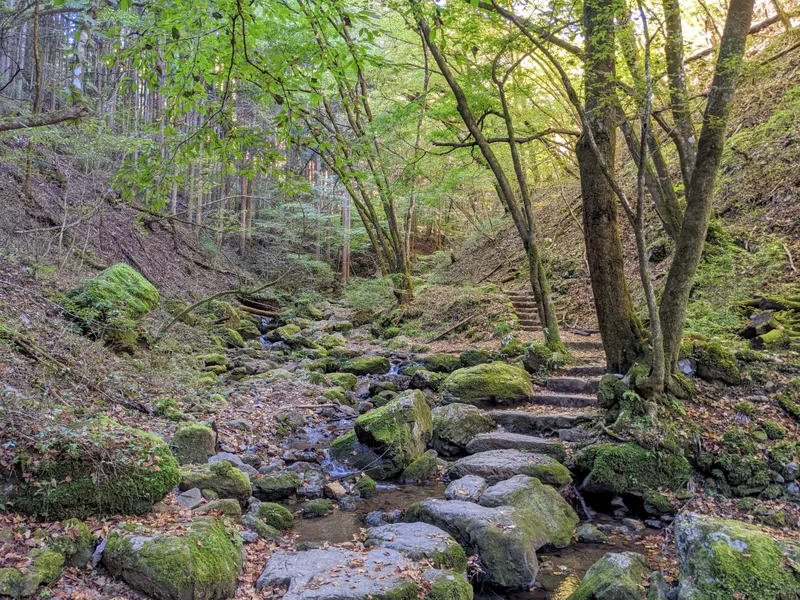
The first section of the trail has you pass through some forested hills. There are some ups-and-downs as you climb a hill, then descend it, and climb another. Having a bit of a descent was pleasant, but I also knew it was going to bite me later on the return, since this is an out-and-back trail.


About 90 minutes into the hike, you can take a 1-min detour out to Mt Michiyuki (道行山, michiyuki-yama). It’s worth it!

From here you get a pretty nice view out to the still-visible waterfall clouds on one side. It was about 6am at this point.

If you were really concerned about the heat, I suppose you could start your hike at 3:15am or so in the dark, and you would be able to perfectly time your hike to catch the sunrise from this vantage point instead.
You also get another clear view out to Mt Echigo-Komagatake on the other side.

Another hour in is the next point of interest on the map, the Mogusa-no-ike (百草ノ池).

Ike (池) means pond and you can see the little blue circle marked on the map, so it’s a bit funny to reach here and there’s no lake to be seen, just a wall of overgrown shrubs. There is a lake though! I lifted my camera over my head to try and get a photo.

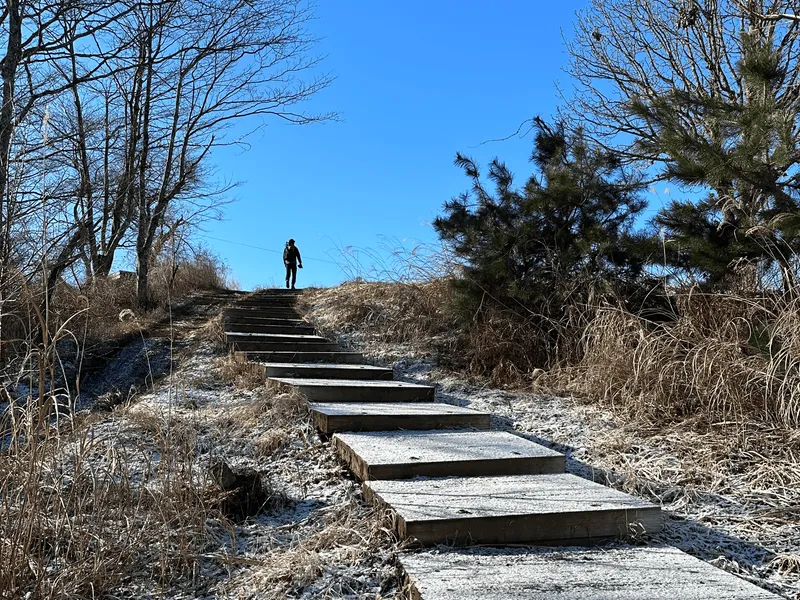
From here there’s the final stretch through some shade and stairs before you’re out onto a very exposed trail.

If you’re looking to take a break from the beating sun, you’ll probably want to make the most of the opportunity here. It was pretty hot, and it probably wasn’t even 8am yet. I plopped down on a rock for about 5 minutes for a break, questioning my life decisions that led up to this moment (ha).

Once you pop out of the tree-line though, you can see down to the lake below!

As you get closer to the peak, you can also see that there is still snow remaining on the side of the mountain as well. As a side note, I recently learned that there was a man in the 1800s who shipped ice from America to India (!). Which was kind of ludicrous to think about, but I suppose it makes sense if snow can persist on the side of a mountain even with the sun constantly beating down in summer.

Even from this distance you could see and hear a little waterfall of the snow melting and trickling down the mountain.


Before the peak itself, you’ll come to a mountain hut, and the climb up to there is over a very rocky surface. Handily, there are rocks spray-painted to mark the way.

And just before 9am I reached the Koma-no-goya (駒の小屋) hut. It seems like this one is sort-of manned with a caretaker, who is only there at certain times. Since the service is very minimal (no food, bring your own sleeping gear) it is very cheap at 2000 yen for the night. There is a toilet onsite too if you need it (100 yen donation).

And directly outside the hut is a water supply, with ice cold water from the melting snow. Very refreshing.

After taking a much-needed break, it’s time to do the final climb. The final stretch took me about 20 minutes.


At the summit there’s a peak marker for Mt Komagatake (no Echigo prefix up here), plus a little dude holding a sword.

And I think if my eyes don’t deceive me, in the distance even the Sea of Japan?

If you look on a map, Niigata is pretty close to the other side of Japan. Pretty cool to think I got here with only a 4 hour drive from Tokyo.
Next it was time to begin my descent, so I headed back down towards the hut. It turned out that a couple of the people that had climbed up around the same time as me (who I thought were regular hikers) were actually doing some sort of maintenance to its outside. Having to climb 4 - 5 hours in this heat and then work is pretty rough!


I had been dreading the rising temperatures, but thankfully some clouds started to roll in as I began my descent, which was perfect timing, really.


Although the initial descent over the rocks is quite steep, the second third of the descent was actually very pleasant as there were a lot of flat stretches with only a gradual decline. I couldn’t let myself get too comfortable though, because I spotted two snakes (!!) on the trail.

This was quite a rare sighting for me - in 3 years of hiking in Japan I’ve only ever spotted one snake. From a quick Google search, there are other YAMAP logs that do mention spotting snakes so maybe they are more common on this mountain for whatever reason.

As you’ll remember me mentioning near the start of the post, the first section of the trail had some up-and-down bits, so as I approached the final third of the descent I knew I still had something climbing to do.


Once you reach a marker for Myojin Pass (明神峠, myojin-toge) you can breathe a sigh of relief, since that’s the last of the climbing over and done with.

And finally, I passed by the same fog-covered ridge I saw on the way up. Looks like a fairly normal set of mountains in the daytime!

Hiking course options
| Date climbed | Length | Course time |
|---|---|---|
| 2025-08-01 | 14.3km | 8h30min (the expected time for an average hiker without breaks) |
I hiked Mt Echigo-Komagatake via an out-and-back course from Shiori Pass (枝折峠, shiori-toge). Scrolling through multiple pages of YAMAP logs, this does seem to be the hiking course that the majority of hikers use by far.
The carpark at Shiori Pass has squat-style toilets (clean, but no running water to wash your hands) plus there is a biotoilet at the hut near the summit.
Looking at the YAMAP page for Mt Echigo-Komagatake, there are two other day hike courses listed:
- A 12.8km, 1750m elevation gain course via the Komagatake trailhead (駒ヶ岳登山口)
- A 17.6km, 1560m elevation gain course via the Ishidaki bus stop (石抱橋バス停)
And one of the longer courses listed on YAMAP is a 30km loop course which has you pass by Mt Arasawa, Mt Nakanodake and Mt Echigo-Komagatake.
As a final side note, the author of the Hyakumeizan book himself did a longer traverse through the three main peaks of the Echigo mountains - Mt Echigo-Komagatake, Mt Nakanodake and finally Mt Hakkai. I was a bit curious what that would be like, and if you search “越後裏三山縦走” you should be able to find logs like this one detailing the hike.
When to climb Mt Echigo-Komagatake
Mt Echigo-Komagatake can be climbed without snow between June and October, although you may need to double-check the conditions if you climb at the beginning or end of that time range. You can check out the latest trail conditions on YAMAP.
Public transport access
Mt Echigo-Komagatake is considered to be one of those mountains which require a car to hike, but thanks to the popularity of the waterfall clouds, if you want to come via public transport you may be in luck, as during autumn they run shuttle buses up to the trailhead from the nearby town. Looking at this 2024 log from Yamareco you could follow an itinerary like:
- Get a Shinkansen and then local train to Koide (小出) station
- From there, get on a local bus to Oyu Onsen (大湯温泉). There are 7 buildings in the area that offer a place to sleep
- Get on the shuttle bus the next morning departing at Oyu Park (大湯公園) towards Shiori pass. They are departing between 3:40am and 6am.
- Make it back down the mountain in time for the one bus that is departing for hikers at 3pm. You don’t want to miss it!
The buses were only running on the weekends in mid-September to beginning of November (see the 2024 page for the Uonuma Takigumo shuttle bus). I couldn’t find any 2025 info yet, but hopefully they are running again this year.
Car access details
The hike starts from the Shiori Pass carpark (枝折峠駐車場). There are a couple of things to keep in mind here:
- This road is completely closed off in winter. In 2024, it was closed from the 4th of November and I think re-opened sometime in spring
- When I climbed, a section of the 352号 road was closed from the 4th of July, due to reopen in September, and during that time the Okudami Silverline (奥只見シルバーライン) was available as a detour route.
The road closures were marked on Google Maps, but it may be worth doing a double-check on the internet that there are no road closures for your intended route.
The Silverline is an 18km long tunnel, split into 9 tunnels with stretches of road in between. The first 7 are very short, and then the 8th and 9th tunnels are 8km and 10km respectively. Note that if you are coming via the tunnel, you will exit the 9th tunnel 2km in and take a right-turn towards Oze. I missed this turnoff and so I ended up doing the full length of the final 10km tunnel, then having to turn around and go 8km back in the direction to the turnoff point.
The tunnel is quite roughly hewn in some bits (it’s not like your regular smooth highway tunnel) and it’s quite an interesting experience. The temperature inside the tunnel drops to 15°C, there’s occasional fog lingering near the ground, and the curves in the tunnel are marked by these huge flashing red arrows. There’s even occasional signs counting down the number of km remaining until you get to see the sky again.

While researching this hike, some YAMAP users mentioned the drive up to the trailhead via the tunnel is quite scary. Honestly I didn’t find it to be that bad at first - I also chose to start my drive from Tokyo in the afternoon, so I think entering the tunnel while it was still light outside helped. I could imagine it would be quite spooky if you started driving through it at night.
I still ended up feeling a bit freaked out by the fact I overshot the exit though - the final tunnel feels more spooky, and I had a mild bit of panic as I started to realise I had missed the turn off, and then had to turn around and drive through it again. (I ended up having to do an unnecessary extra 16km through that tunnel). I was relying on my phone GPS, and it lost connection in the tunnel, which is how I ended up missing the turn-off. On the return journey I used my car’s navi system, and that seemed to have no problem with navigating the tunnel so that is probably your best bet.
Sleeping at the trailhead carpark

For those coming to hike Mt Echigo-Komagatake on the weekend, especially in the peak autumn season, it is generally advised that you sleep at the Shiori toge (枝折峠) trailhead carpark. The reason for this is that the carpark is quite small and the waterfall clouds also attracts photographers, and so it can be especially hard to get a car spot compared to other mountains if you try and drive up in the morning.
It seems like in 2024 they were running the Uonuma Takigumo shuttle bus (うおぬま滝雲シャトルバス) up to the carpark due to the congestion, on the weekends of mid-September to the beginning of November. So it may be necessary to park at one of those overflow carparks and get the shuttle bus up the final stretch of road instead.
I didn’t necessarily have to worry about this, because I was climbing on a Friday in August. Usually I sleep at a nearby roadside station for safety reasons (it’s more well-lit and populated, plus the toilets are nicer) and then drive the final stretch to the trailhead when I wake up the next morning.
However I was a bit hesitant about taking this approach for Mt Echigo-Komagatake. Since it only has a max elevation of 2000m, it can be pretty exhausting to climb in the heat, and the area on the day I hiked was in a bit of a heat wave, with a top of 37°C in the nearby town of Uonuma, and a forecast of sunshine all day. (In comparison, the following week was forecasted for a more reasonable max of 30°C with clouds). And to increase your chances of seeing the famed waterfall clouds, you want to aim for an early start, and I’d rather not miss that opportunity either. So I decided this time around to brave the trailhead carpark so I could have an especially early start.
Reassuringly, if you are with the phone provider Docomo (or its subsidiary Ahamo), the trailhead does have cell reception. There is also a toilet (no running water, though).
When I arrived at the carpark at around 7:30pm on a Thursday night, there were already 3 other cars parked. I think as a solo female hiker, I would feel most spooked if there was only 1 other car in the carpark (imagine being 30mins away from the nearest town with just 1 other person? No thanks) so I was glad for this! The carpark is located at an elevation of 1000m, so even on a hot August’s day, I got a nice cool breeze passing through my car and I got a decent amount of sleep. By the time I woke up the next morning, there were about 15 - 20 cars that had trickled in throughout the night (and some arrived at around 4am as well).
Read more
Support me
📸 Thanks for reading! If you'd like to read more posts like this one, you can follow me on Instagram to stay up to date on my hiking adventures.
If you found this post useful, you can show your support by buying me a coffee - I write this blog for fun, but coffee is always appreciated! ☕
Recent posts
 hikes
hikesMt Nokogiri: a hike to Chiba's stone quarry
18 Mar hikes
hikesMt Miura-fuji and the Miura Kaigan Cherry Blossom Festival
9 Mar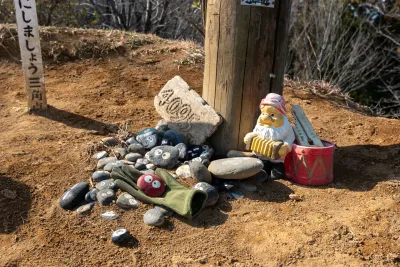 hikes
hikesAkabokko: hiking in Ome
16 Feb
Comments
Leave a comment