- Elevation 2454m
- When to climb Early July - end of October
- Both mountains can be hiked separately as 9-hour day hikes, or you can combine the two for a 2-day 20km+ hike.
Mountain stats
Buses from Myoko-kogen station to Sasagamine trailhead, or from from Sekiyama station to Tsubame Onsen trailhead.
A 3.5 hour drive from Tokyo to the Sasagamine trailhead, with a large carpark available.
Mt Hiuchi (火打山, hiuchi-yama) and Mt Myoko (妙高山, myoko-san) are two of Japan’s Hundred Famous Mountains, located in Niigata’s Myoko-Togakushi Renzan National Park. Although you can climb either of the peaks separately as a day hike, the pair are connected in a unique T-shaped course that allows you to climb both of them over two days with a stay at a mountain hut.

Since the trailhead is a nearly 4-hour drive from Tokyo, I began the drive after work the day before, sleeping in my car at a service station mid-way, before arriving at the Sasagamine trailhead (笹ヶ峰登山口) around 6am.
Day 1: Mt Hiuchi
10.8km, 1265m elevation gain and 473m descent, course time 6 hours
September is typhoon season in Japan, and it’s been quite rainy lately, so I had been anxiously double-checking the weather forecast before this hike. Usually you can have quite a relaxed start to this hike since day 1 is only 6 hours, but with it forecast to rain in the afternoon I decided to start nice and early at 6am.

At the trailhead there’s a box to pay your 500-yen entrance fee, after which you can take one of these cute wooden tokens as a gift. Mt Hiuchi is well-known for its rock ptarmigan (or raichou) population and so the donation goes towards its conservation efforts.

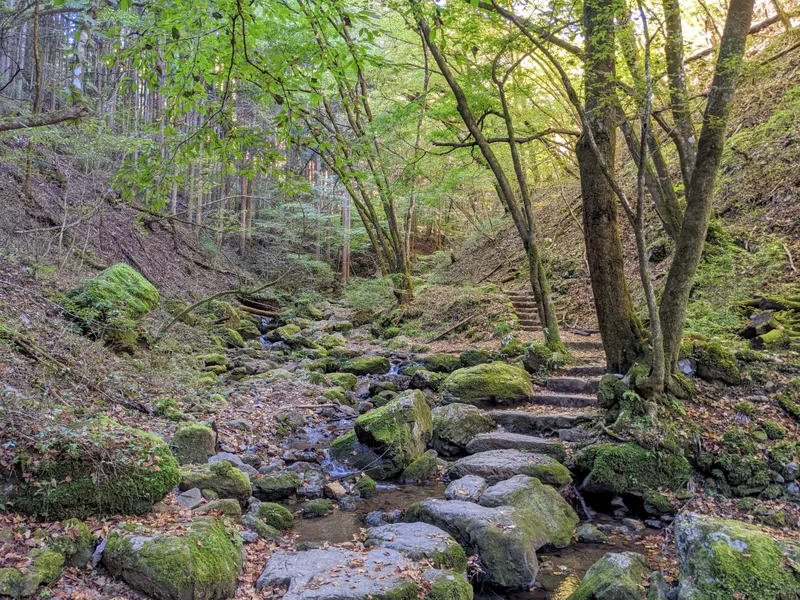
The first 50 minutes of the hike is all along a boardwalk (nice) before you will come to a small bridge and cross the Kurosawa river (黒沢川).

From here it becomes more of a standard hike, with tree roots, and some clambering over rocks. A little steep in bits, but I would say that overall it’s not too difficult of a climb up.


A little after 8am, I made it to the Fujimi-daira (富士見平) intersection. You’ll want to double-check where you’re going here, as the left path heads for Mt Hiuchi and the right for Mt Myoko.

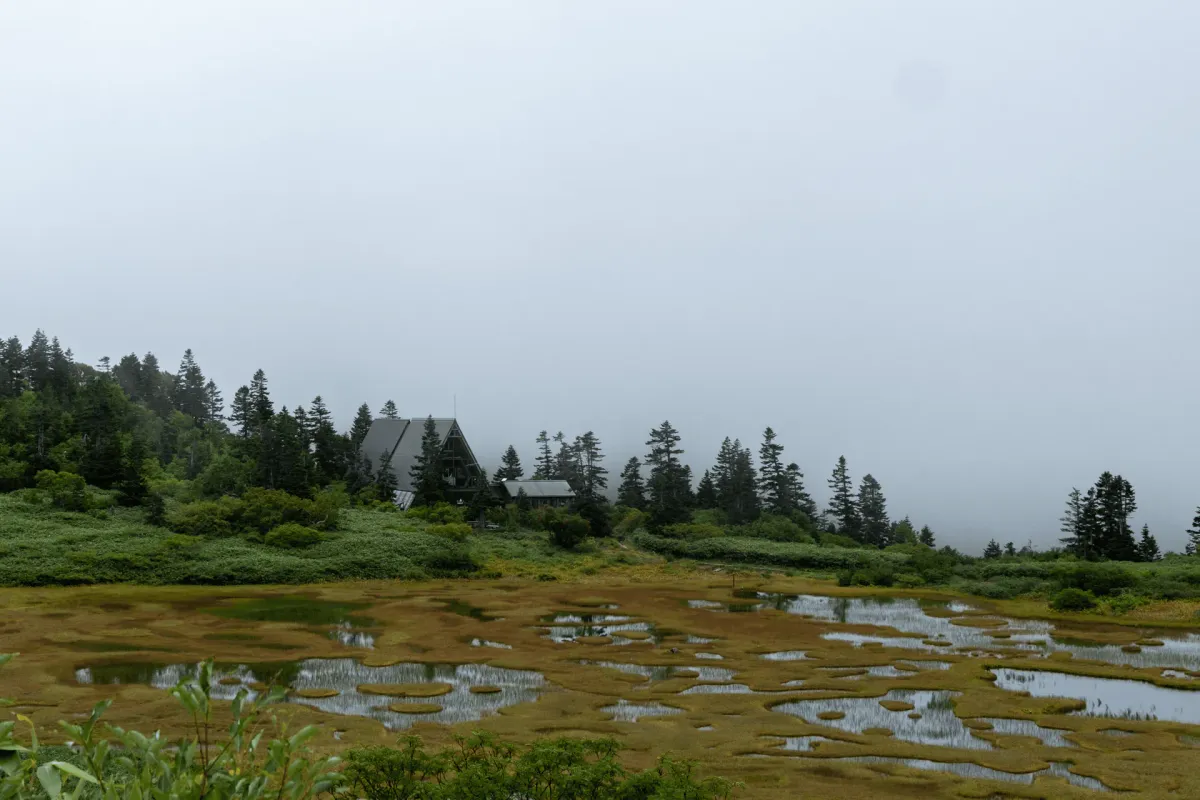
Beyond this point, you’re out of the trees and you’ll get to enjoy a bit more of the scenery. Unfortunately it was pretty foggy today!


As you get closer to the Koyaike Hutte, there’s also the option to do a tiny detour to a viewpoint where you can get amazing views out to the North Alps. But unfortunately I knew there wouldn’t be anything to see today, so I gave it a miss.

At around 9am, I arrived at the Koyaikke Hut.

This marks the halfway point for day 1, and from here you’ll do a 3-hour out-and-back to Mt Hiuchi. If you’re doing Mt Hiuchi as a day hike, there’s the option to drop off your pack here. You’d still probably want some essentials with you (water, raincoat) - so you could either carry your stuff up in a smaller bag if you had a spare one, or you can take your pack but leave some of your heavier items behind here.

If you’re planning on staying at the hut and it’s after 10am, you can check-in and drop off your stuff where you’ll be sleeping. In my case, it was a bit too early for check-in time but I was able to leave some of my stuff inside in their drying room.


Next up, Mt Hiuchi!
With the weather forecast to rain later, it was a pretty gloomy. I can imagine you can get some pretty gorgeous views out to the summit, but today it was mostly covered in fog. I was glad it wasn’t raining at least!


Next you’ll pass the Tengu-no-Niwa (天狗の庭) or “Tengu’s garden”, which is basically a big field with a bunch of rocks strewn about, plus another large marsh. Apparently this area made it onto CNN’s list of “31 most beautiful places in Japan” for its autumn scenery.

It’s still very green in September, but looking at some photos, the autumn foliage looks absolutely stunning. I can imagine though that hut bookings would become a lot harder to get. I definitely wnat to come back sometime - maybe I could try camping.

As you pass the marsh, you’ll start climbing up towards Mt Hiuchi.

Overall this is a pretty comfortable hike up. Unfortunately, apparently there were a bunch of raichou out on the mountain today (as I found out from another hiker the next day) but I somehow missed seeing all of them!


I headed up to the summit, where there was not a thing to be seen.


Funnily I got full bars of reception up here (I’m with Docomo) so it would be a good spot if you wanted to send a quick message to a loved one.
Then I began my descent!

Although I didn’t spot any raichou, I did spot a bunch of birds twittering about. I haven’t been able to figure out exactly what species it was, but it’s apparently some sort of warbler (ムシクイ) which makes sense, because they were quite noisy.


As I headed back down, the fog parted for a little bit, giving me a nearly unobstructed view of the summit.


Back at the hut, I checked in. Some huts will squeeze you in like sardines with futons jammed next to each other, but this place was absolutely luxurious for a hut. You had enough spare space to place your bag next to you, and each section was curtained off so you got full privacy.


It was still only 12pm at this point, so after dropping off my bag, I decided to check out the hut’s cafe. Its speciality is Japanese custard pudding, which unfortunately is a weekend-only thing (and I came on a Friday), so I settled for the sole thing on their menu - some cheesecake. The cake was alright, but the accompanying chai tea (you can choose coffee or hibiscus tea as well) was really good!

There’s also a little guestbook - mostly in Japanese but the occasional German entry too. I left a little “Hi from Australia!” message.

After that, I burrowed into my futon and began writing this blog on my phone. Surprisingly I felt quite cold - I only brought a a thin down jacket and regretted not bringing an extra layer. Mid-September is still quite hot in Tokyo, but with the recent storms and overall gloomy weather it was quite cool on the mountain. Summer always seems to drag on for so long in Japan before the end hits you unexpectedly.
At some point the rain kicked in, and as other hikers trickled in into the afternoon, I could hear them complaining about how wet they got, so I’m glad I finished early. At some point the lights also turned on (they keep the generator off during the day) which made things a bit more bright and cheery.

After dinner, which was two types of curry (unlimited refills!), I felt sufficiently warmed up and crawled back into my futon. As a side note, the toilets here are very clean - actually the same style of washlet toilets like you’d get at home. Which is a very surprising thing to find in a mountain hut. The only downside to this place is there’s no free drinking water, so you have to buy bottles at 400 yen each.
I spent some time reading on my kindle, falling eventually falling asleep after lights out at 8:30. Although you get private “rooms”, it’s not gender segregated so it was a little noisier than I’m used to thanks to the men snoring.
Day 2: Mt Myoko
Day 2: 12.3km, 938m elevation gain and 1730m descent, course time 8.5 hours
The next day, I planned on waking up at around 430am for a 5am start. But I could still hear the rain on the roof outside, and after getting up I could see the weather looked pretty miserable, and the hut had noted on its weather forecast whiteboard that it was forecast to rain until 8am.

I did know that the morning of day 2 was going to have some rain, so I wasn’t surprised by this, but it had been forecasted to be quite light, so I thought it would be okay to set out regardless. Unfortunately, the winds were pretty strong (“Winds howling” as Geralt would say), which I think would have made things pretty miserable so I decided to wait out the bad weather for an hour or two.
A few people decided to brave the weather at 6am, but I decided to wait until 7, and there were a couple of us who set out at around the same time.

Although the wind sounded quite bad from inside of the hut, actually once I stepped outside, it really wasn’t that bad at all? And so I was pleasantly surprised. Albeit very foggy, but the rain had stopped, and as I walked along the trail, the trees did a pretty good job at blocking some of the wind.

The trail first has you do a small climb up to the minor peak of Mt Chausu (茶臼山), before you descend down to the Kurosawaike Hutte (黒沢池ヒュッテ).


As you descend, you’ll eventually see the Kurosawaike Hutte come into view.

It’s quite a unique dome-shaped one with a blue roof. Together with the very triangular Koyaike Hutte, both of these huts have a lot of character.

You might also be wondering why both of these huts are called a Hutte and not a hut - Japanese takes a lot of loanwords from other languages, and in this case, they use the German word for a hut.
I arrived at the hut at around 8am. From here, it’s a 4-hour out-and-back to the peak of Mt Myoko, so it’s a similar setup to how you would hike up Mt Hiuchi and you could consider dropping off your bag here. There is a shed for bags, but it’s only usable by people who stay at the hut - it seems like maybe otherwise you just have to leave your pack on the ground outside. I decided to take all my gear since I didn’t want it to get too wet.

In comparison to Mt Hiuchi which was a very relaxing (albeit still tiring) sort of trail, the climb up to Mt Myoko is a little bit nerve-wracking, so I wouldn’t recommend it for a beginner.

You’ll first climb up to the Okura-Nokkoshi (大倉乗越) and then have a steep descent.

Since it was so foggy, there was not much to see, but there was one point of interest I could see, which was the Chosuke Pond (長助池).


I mentioned that this part of the trail was a little nerve-wracking, and that’s because it was quite narrow in bits so you just have to watch your step really carefully. I wouldn’t go far as to say it’s actually dangerous - you’ll be fine as long as you go slowly. But if you’re the trail-running type, or the kind of person that likes to go much faster than the course time, I would factor in that you are probably going to have to take this 30-minute stretch of the trail at a slower pace.

At one point you’ll pass a rock that says “Caution cliff” in English. It’s a little bit confusing, because it’s not like there is a cliff directly behind that rock or anything, but the Japanese actually says something along the lines of “beyond this point, slip accidents have occurred” (この先滑落事故あり) which is equally ominous. Basically, just be careful on this trail.

At around 9am I finished this descent bit, and made it to the final climb of Mt Myoko. There were some benches here, and a number of people had left behind their packs so I decided to follow suit.

It’s still more than a 2-hour round trip to get to the summit and back down here though, so I would recommend carrying at least a water bottle.
If you’re curious how I carry stuff, I have a Paagoworks sling bag which is really convenient for this.


And so begins the final climb! I found everyone I passed on the trail today was quite friendly - I think there was an extra sense of camaraderie since we had all set out on our hike today even with the possibility of rain, and yet had been lucky enough to dodge it. And also a number of people had probably seen me at the hut as well, so there was a sense of “oh, you’re climbing Mt Myoko as well! Nice!”

The final climb up is quite steep and rocky, but otherwise straightforward (I did slip once and banged my knee a bit - oops).

Near the top, there is a rather spookily chained off shrine.

And around 10:20am, I reached the summit of Mt Myoko! Although this is the official peak of Mt Myoko, it’s interestingly not its highest point.

If you continue another 10 minutes along the ridgeline, you’ll reach the “southern peak” of Mt Myoko, which is marginally higher at 2454m.


And in between the two peaks is also the Nihon-Iwa or “Japan Rock” (日本岩).

It’s just a big rock, but has a rather official-sounding name so I was a little bit curious - it looks like you can climb to the top of it if you have the proper equipment (see here and here). Maybe its claim to fame is just that it’s a really big rock.
After that, I began my descent back down the same way. For a second the fog parted, and you could see out to the green fields of a village below.

Then it was back to pick up my pack, and head back along the narrow and slightly-scary stretch.


With the rain overnight and in the morning, some of the descent back to the hut was quite muddy and slippery so I took things slowly.

It was nearly 1pm once I made it back to the hut, but I knew I was on the final home stretch so I felt good! Beyond the hut was an amazing 30 minute flat walk along a boardwalk.

This felt so good to walk along after all the steep and narrow paths I had to contend with in the morning.

You’ll eventually do a small river crossing. Notably, if you remember that I crossed a bridge near the start of day 1, this is actually that same river!

Once past the river crossing, it’s back to your regular hiking trail with some small rocky bits.

Around 1:30pm I made it back to the Fujimi-daira junction, which is where I took a left turn to head to Mt Hiuchi on day 1. So I knew I was back in familiar territory for the rest of the hike down.

The trail had some rather deep puddles due to the rain.

But it felt so good once I got back on that final long stretch of boardwalk back to the trailhead, and I finished right on 3pm.

Afterwards, I stopped off at the nearest onsen - Naena-no-yu. The Google reviews made it sound like it was a super rural, tiny onsen but actually it felt pretty standard as after-hike onsens go so I would definitely recommend it.

This hike turned out to be a pretty foggy one, so there wasn’t as much beautiful scenery to take in compared to nearly all of the other hikes I’ve done this year.
But today’s hike also felt like a culmination of a lot of different experiences I’ve had over the past couple of years. If I think back to September of 2023, I didn’t even have a driver’s license, and had never done an overnight hike. To think I can now do all of that now (and solo) just feels really cool. So in that sense this hike still felt like a pretty memorable one!
Hiking course options
| Date climbed | Length | Course time |
|---|---|---|
| 2025-09-12 | 23km | 13.5hrs (the expected time for an average hiker without breaks) |
This course was a 2-day, 23km loop hike (see course on YAMAP) that lets you hit both Mt Hiuchi and Mt Myoko. It starts and ends at the Sasagamine trailhead (笹ヶ峰). To save some energy, you can drop off some of your gear at the huts you pass, as you will end up returning back to them.
Alternatively, you can start your hike at the Sasagamine trailhead, and end at the Tsubame Onsen trailhead (燕温泉). This will be the same course on day 1, but on day 2, after reaching the summit of Mt Myoko, you will keep going down to the Tsubame Onsen trailhead, which is on the other side. Looking at a trail log on YAMAP this makes for a slightly shorter hike, so could be a good option if you are coming via public transport.
Day hike to Mt Myoko
If you want to do a day hike to just Mt Myoko, you’ll be wanting to come from the Tsubame Onsen side. You have two main options:
- A 10km, 1400m elevation gain out-and-back course
- A slightly longer 11km loop course
There is an even shorter course (9km, 1200m elevation gain) if you make use of a cable car (via the Myoko-kogen Sky cable). As of mid-August 2025, this trail has been closed off due to part of the trail collapsing, so it cannot be hiked until that is reopened.
Day hike to Mt Hiuchi
If you’re wanting to day hike to Mt Hiuchi - you’ll have one option, a nearly 9-hour, 16km hike out-and-back course. This follows the same course I took on day 1 of my hike.
Staying at the Koyaike Hutte
The Koyaike Hutte conveniently lets you do online reservations, and is rather cheap at only 8000 yen for a night’s stay, or around 10,000 yen if you want a hot meal as well. The hut’s capacity is quite small, and it is quite popular, so you may really struggle to get a weekend reservation, but should be fine if you aim for a weekday instead.
The one warning point for this hut is that there is no free water source. I would recommend bringing extra water. You can pay 400 yen for one bottle of water, but at times they apparently restrict you to 1 bottle per person, so I would keep that in mind too.
Alternatively, you can also camp at their tent site (1000 yen) but this will require a booking as well. Considering it’s only a 3 hour hike from the trailhead to the campsite, I would say this is a great beginner-friendly option for camping and hiking.
Alternatively, you can also stay at the Kurosawaike Hutte, which unfortunately though only seems to take reservations via phone. Looking at this article the interior looks pretty cool though (and they make crepes!)
Public transport access
Sasagamine (笹ヶ峰) trailhead
There is a bus running to the Sasagamine trailhead from the Myoko-kogen train station, which you can see the 2025 timetable of here. It runs during mid-July to the end of October. On weekends, the first bus leaves from the station at 7:20, and arrives at 8:10. On weekdays though, the timetable is more limited, and there is only one bus, leaving at 9:40.
The last return bus is at 4pm on weekends, and at 13:15 on weekdays.
This means that you definitely would not be able to use this bus to do a day hike to Mt Hiuchi on weekdays. On the weekends, it would be a little tight (you have a 8-hour window to do a 9-hour hike) but maybe doable depending on your speed.
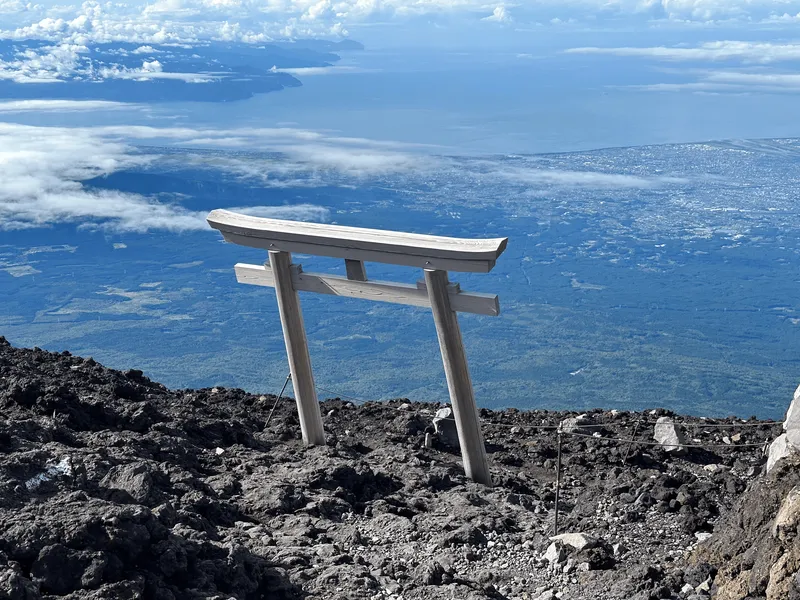
Tsubame Onsen (燕温泉) trailhead
It was a little bit harder to figure out the bus for the Tsubame onsen, but I found this PDF here. It looks to be a 30-minute ride from Sekiyama train station (関山駅). The first bus leaves at 6:15am on weekends, and 7:46 on weekdays. And you would probably want to get on the 4:20pm bus back to the station. If you can manage to get on that earlier bus, you should be able to do Mt Myoko as a day hike, if you can find a place nearby to stay the night before.
If you were to do an overnight hike between the trailheads though, I think the bus timings would work out pretty well and that is probably the best case scenario. If you were coming from Tokyo, note that the Sasagamine trailhead does also have a large camping ground so that could be an option if you were looking for a place to spend the night before beginning your hike.
Car access details
The Sasagamine trailhead has a rather large carpark, which I had no problems getting a spot at on a Friday morning. However, considering it is a popular autumn foliage spot, I can bet you would have to battle for a car spot if you tried showing up in a weekend in October, so I would recommend being careful about that. There is a toilet available at the trailhead.
The Tsubakuro Onsen side also does have a carpark, albeit a bit smaller.
When to hike Mt Hiuchi and Mt Myoko
The hiking season for Mt Hiuchi and Mt Myoko is early July to the end of October (which matches up with when the buses are running). If you come in mid-July to early August, you can enjoy the mountain flowers blooming, while if you come in the first half of October, you can enjoy the autumn foliage.
Read more
Support me
📸 Thanks for reading! If you'd like to read more posts like this one, you can follow me on Instagram to stay up to date on my hiking adventures.
If you found this post useful, you can show your support by buying me a coffee - I write this blog for fun, but coffee is always appreciated! ☕
Recent posts
 hikes
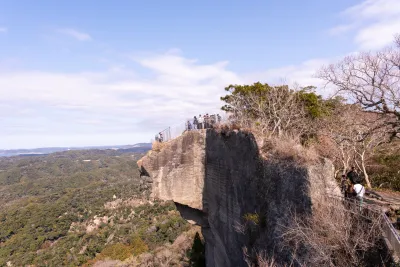
hikesMt Nokogiri: a hike to Chiba's stone quarry
18 Mar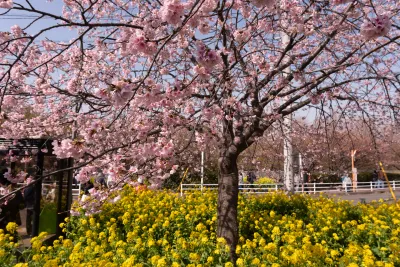 hikes
hikesMt Miura-fuji and the Miura Kaigan Cherry Blossom Festival
9 Mar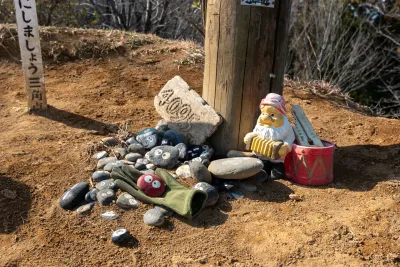 hikes
hikesAkabokko: hiking in Ome
16 Feb
Leave a comment