Hiking log
- Elevation 3193m
- When to climb mid-July - early October
- Hiking Mt Kita is a 10km, 10-hour course from the Hirogawara trailhead, commonly split into an overnight hike with a stay at a mountain hut. Optionally you can also climb Mt Aino for a 17km and 15 hour-long course.
Mountain stats
Buses run from Kofu station to Hirogawara trailhead, approx 4 hours total travel time from Tokyo.
Park at Ashiyasu carpark and take a bus for the final 1-hour leg to the trailhead. First bus at 5:20am.
Mt Kita (北岳, kita-dake) and Mt Aino (間ノ岳, aino-dake) are the two tallest peaks in the Southern Alps. And at 3193 and 3190m elevation respectively, are also the second and third tallest mountains in Japan! Mt Kita can be climbed as a long 10-hour day hike from the Hirogawara trailhead, or as a 2-day hike with an overnight stay at one of the huts along the trail. Mt Kita and Mt Aino are both part of the Hundred Famous Mountains of Japan, so hikers interested in conquering the hyakumeizan will make the optional detour out to the neighbouring Mt Aino as well.
I hiked Mt Kita and Mt Aino in mid-October as a 2-day hike, with an overnight stay at the Kitadake Sansou (北岳山荘). I was blessed with sunshine for both days of the hike, and got some amazing views of Mt Fuji as well.

Even if you come by car, the last leg of your journey will require a bus to the Hirogawara trailhead. I slept in my car at the Ashiyasu carpark, and then took the first bus at 5:20 to the Hirogawara trailhead. It’s a long, 50-minute trip along a windy and bumpy road - quite a way to be woken up in the morning with all of the jostling. The Hirogawara trailhead has a nice visitor centre (even equipped with coin lockers), befitting Mt Kita’s status as one of the more popular peaks in the Southern Alps.

As I crossed the long suspension bridge to begin my hike, I could already see the peak of Mt Kita in the distance. I’d been wanting to climb this mountain for a while now, so it was pretty exciting to think that I was finally going to be up on that peak.

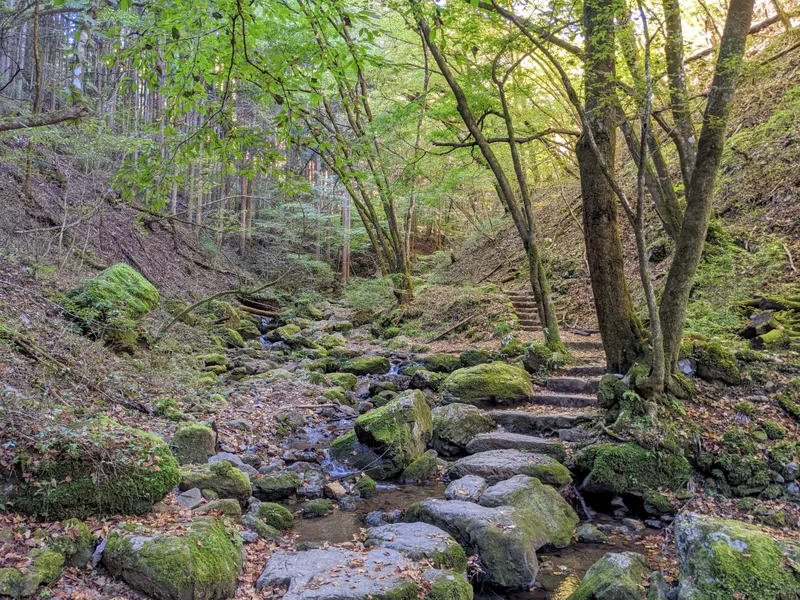
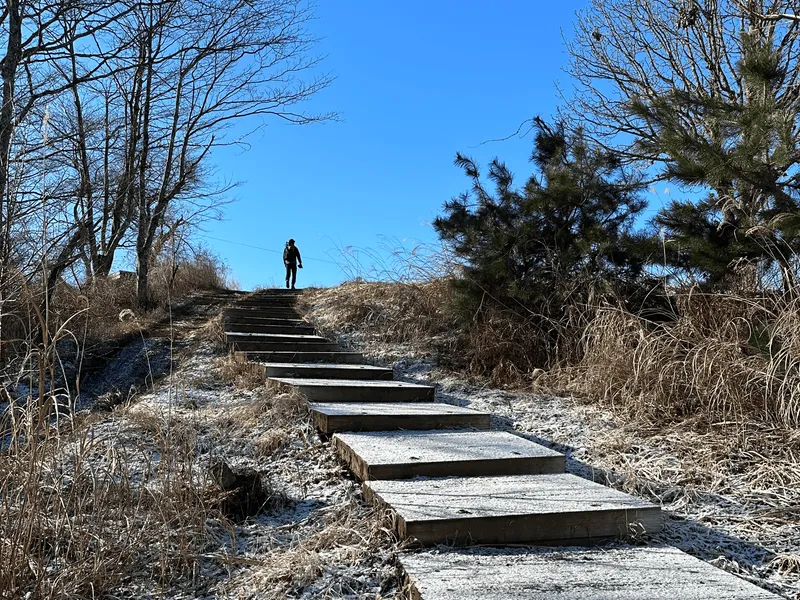
The first 2 hours of the hike are all within the treeline as you steadily gain in elevation up to the first hut along the route. Although I started my hike on a Friday, the bus had been squeezed full of hikers. And as we all started near the same time, there were plenty of people about on the trail.


Reaching the Shirane-oike hut
At 8:30 and after 2 hours of hiking, I reached the Shirane-oike mountain hut (白根御池小屋). If you’re having a later start to your hike, this can be a good finishing point for day 1, before you make the climb to Mt Kita on day 2.

And from the hut, you can also see up to the peak of Mt Kita! There was some really pretty autumn foliage framing it as well.

Passing the hut, you’ll come to the Shirane-oike pond, plus a junction where you can take a left or a right turn. The left path is a slightly more technically challenging climb via the Happonba Col, and will take you in a more circuitous route up to Mt Kita, while the right path is the more direct route. I took the right on the way up, and came down via the left.


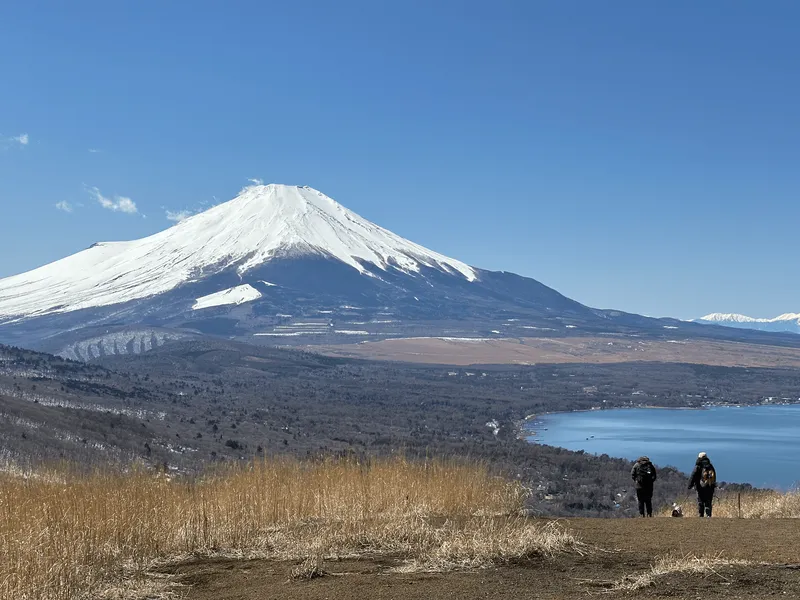
As you gain in elevation and look back towards the mountains visible in the opposite direction, you can also see out towards Mt Hououzan (鳳凰山), another one of the big mountains in the Southern Alps.


Today I was blessed with absolutely perfect weather. Blue skies with not a cloud in the sky, and since it was mid-autumn the temperature was not too hot either. As you gain in elevation, there’s views in all directions - including out towards Mt Senjo.


Kata-no-koya hut
After another two hours of hiking, I reached the second hut on the trail, the Kata-no-koya hut (肩の小屋). Kata means “shoulder”, so it’s like the little hut sitting on the shoulder of Mt Kita. If you are looking to do an out-and-back of Mt Kita, this is the closest hut to the peak.

The sign outside the hut - “北岳に来ただけ” or “kita-dake ni kita-dake” is popular on Japanese social media for its play on words.

The rough translation is something like “I came to Mt Kita (and that’s all I did)” - like it’s not a big deal that you ended up here, or that coming here is all you were able to accomplish. From the hut there was some super strong winds blowing, so I decided to press on, and held onto my hat as I made the final 30 - 40 minute climb up to Mt Kita.


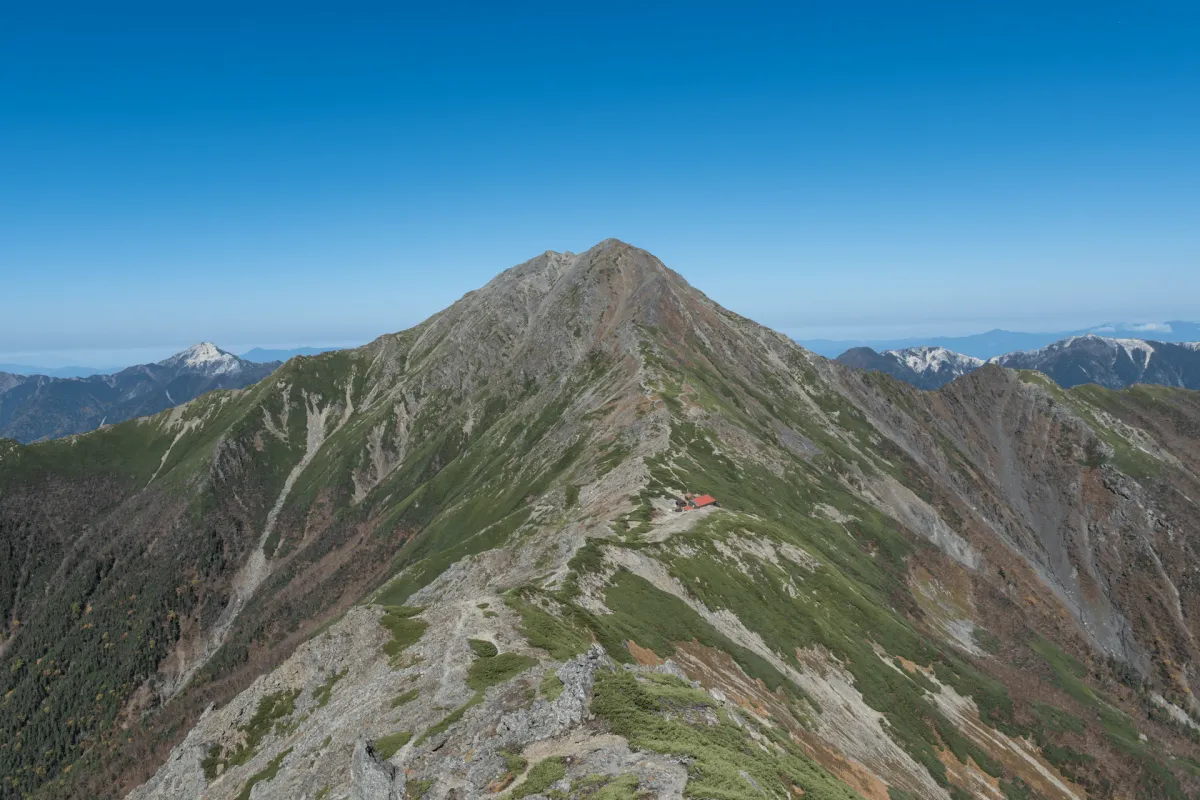
Reaching the peak of Mt Kita
And at around 11:15am, I reached the summit of Mt Kita, the second tallest mountain in all of Japan! At 3193m, it’s nearly 600m shorter than Mt Fuji (which is at 3776m), so really Mt Fuji has everyone beat by a fair margin.

This was my 63rd hyakumeizan, but funnily enough even though 10 of the hyakumeizan are in the Southern Alps alone, this was actually my very first one. The Southern Alps tend to have a bit of a reputation for being a bit harder than mountains in the Northern Alps (of which I’ve climbed a few). The courses around here are either too long for a day hike, or just require a bit more logistics planning public transport-wise so I’ll admit I had been putting them off a bit.


Of course you can see Mt Fuji clearly from the peak too, but I got a bit too excited with the summit marker and forgot to take a photo from here!
Next it’s a descent down to my hut for the night.

And as you descend, you can see the peak of Mt Aino stretching out in the distance in front of you. The hut is located on a dip in the ridge between Mt Kita and Mt Aino.

Reaching the Kitadake Sansou

At 12:30, I reached the Kitadake Sansou (北岳山荘) and checked in. My official plan was to climb Mt Aino on day 2, but I had secretly hoped that if I could arrive at the hut early enough on day 1, I could also finish off the climb to Mt Aino today, and it seemed like that would be possible. This way, I could have a more relaxing hike on day 2.

I dropped off some of my gear at the hut to make my backpack lighter (sleeping clothes and food for day 2) before setting out.

Climbing to Mt Aino
The trail out to Mt Aino and back should take around 3 hours, so if you are planning on climbing it on day 1, it’s best if you can make a start on it before 1pm.


Even if you don’t have strong plans on climbing all the way to Mt Aino, just climbing up for the first 30 minutes is well worth it for the views you can get out to Mt Kita. This is really my favourite shot of the whole hike. Mt Kita looks a lot cooler from this angle!


Before Mt Aino, you’ll reach the peak of Mt Naka-shirane (中白根山, naka-shirane-san). From here you’ll have some ups and downs as you do a ridgeline walk out towards Mt Aino.

If you did this hike on day 2 with fresh legs, it probably doesn’t feel that long, but I felt pretty tired after climbing all morning so this trail felt longer than I expected.


Reaching the peak of Mt Aino
I reached Mt Aino at 2:15pm. My 64th hyakumeizan! Funnily, it used to be considered the fourth-tallest mountain in Japan at an elevation of 3189m, with Mt Oku-hotaka (in the Northern Alps) taking third place with a mere extra metre at 3190m. However Mt Aino was re-measured in 2014 and gained a metre, bumping it to a tied third place.


Then it was time to make the return descent back to the Kita-dake sansou.


As I approached the hut, a cloud of fog suddenly rolled in.

I had had such clear weather today that seeing this made me feel extra lucky for the good weather that I got - I could have easily been doing this hike on a cloudy or low-visibility day.
As the sun slowly sunk, it got colder and colder (today’s temperature low was 1°C). Once I returned to the hut I snuggled into my futon until it was time for dinner

I shared my table with a couple of other solo hikers, and gave a friendly nod to the guy next to me - we both realised we had done much of the initial climb to Mt Kita at around the same pace - but otherwise all ate our dinner in silence (I was hungry! And also I’m a bit anti-social like that).

After dinner, it was back to bed. I’ll admit I slept okay, but not the greatest. Not sure why, considering how exhausted I was.
Day 2: Sunrise from the Kitadake Sansou
The next morning, I could hear the rustling of everyone packing up and getting ready to head out from around 4am - 5am. Some people plan to hit Mt Aino on the morning of day 2, so to make good time they set out before the sun rises.

Since I had already done Mt Aino the day before though, I was able to take things more leisurely, albeit trying to rush out to try and make it in time for the sunrise just before 6am.


And then it was time to head back to the Hirogawara trailhead. First you do have to climb back up Mt Kita a little bit before you take a turn at a junction point.


Descent via the Happonba Col
After about 20 minutes of hiking up Mt Kita, you’ll reach a wooden sign indicating the right turn you can take towards the Happonba Col (八本歯コル). This route lets you skip climbing up to Mt Kita by taking a detour around the side of the peak, and so I thought would make for a bit more of a relaxing day 2.


Maybe I should have done a little bit more research, because it didn’t turn out to be that relaxing.


This was probably the most technically difficult part on the course - you had to keep your brain switched on a bit to figure out which rocks to scramble down on, and there was a very long series of ladder-stairs that you have to climb down. It was a bit too steep to treat it like a staircase, so you should climb it down like you would a ladder.


Once you made it past the ladder-stairs, your next challenge was a long descent on a rather gravelly and slippery trail. Some hiking poles come in handy here.

The one thing to note on this descent course is while you start in the middle of the valley with a small stream on your left, there is a point where you are supposed to cross left over the stream and onto the hiking path that goes well left of it. Even if you miss the turn-off, you can still continue down the middle - I did see a number of people doing this, although I’m not too sure how walkable the trail was. If you’re using a hiking app like YAMAP you should be able to easily verify if you are on the trail or not.

Once I made it down through the Happonba Col, I took a breakfast break at around 8am.

Once off the gravel field, the path from here was a little bit more smooth sailing, albeit with a small amount of climbing. I think this is more what I had in mind for what a descent off Mt Kita was going to look like!


And then the Shirane-oike hut started to come back into view. You’ll remember this is the hut I passed on day 1.


The wind was very, very strong here so I skipped stopping here, and kept on going past the hut and back into the forest.

Beyond the hut is the final descent which should take you around 2 hours. I zoned out here and didn’t really take any photos.


I made it back to the trailhead around 10:30am, anticipating being able to catch the next bus at 11:00. As I approached the end of the trail though, a man in slacks and a white shirt came bustling up towards me - letting me know that there was a microbus ready to depart. It seems like these run ad-hoc based off of whenever they fill up, and I was fortunately just in time, since they decided to depart with me as the second-to-last seat.

Once I got on we set off. The road goes back towards the suspension bridge before it turns into a tunnel, and as we approached the bridge, the driver suddenly parked the bus and hopped off. We were a bit confused, but then saw him power-walking up towards the bridge to flag down yet another hiker who had also just finished his hike. The lucky guy snagged the last seat on the bus (also - what a nice driver!)
With the hour-long bus drive back, I made it back to the carpark at 11:30am. The highway traffic back to Tokyo was pretty light (it tends to get super congested by about 3pm) so with a rather smooth run of the roads, I managed to make it back home around 2pm. It felt so good to be home - after a long hike I really appreciate the simple things. Like a hot shower, and my couch.
Hiking course options
| Date climbed | Length | Course time |
|---|---|---|
| 2025-10-17 | 17km | 15h (the expected time for an average hiker without breaks) |
Climbing Mt Kita
The most direct route to Mt Kita is a 10km, 10-hour course from the Hirogawara trailhead, which comes with 1771m of elevation gain. The course is available on Alltrails. To do this direct course, you would have two options:
- A long day-hike. This is only viable if you are able to get the first bus in the morning and arrive at the Hirogawara trailhead at 6:15am. Even so, this probably requires you to sleep in your car or stay at a lodge in the area near the bus stop the night before. With a decent pace and if you can finish the hike in the course time of 10 hours, you will be able to get the last bus back from the trailhead at 16:40. I would only recommend this if you are quite sure in your hiking ability.
- An overnight hike with a stay at one of the huts along the trail - I have details on the mountain huts below.
Climbing Mt Kita together with Mt Aino
If you want to also climb Mt Aino, there are a couple of variations you can take. The course I followed is 17km and 15 hours, and is mostly an out-and-back but with a small loop section in between the Shirane-oike hut and Mt Kita. You can see a map of it on YAMAP. Even just with this course there are a number of ways you could do it. There are three key decisions you need to make:
- Whether you split this course over 2 days or 3 days. If you are arriving later in the day on day 1 (and can’t get the first bus in the morning) it is probably worth doing over 3 days and spending an extra night at a hut.
- Which direction you do the loop. After you reach the Shirane-oike hut, you can either take a right turn to go straight up to Mt Kita, or take the left turn to go via the Happonba Col. If you take the Col route up, you will bypass Mt Kita and will do it on the final day of your hike as part of the return hike.
- What day you want to climb Mt Aino. You’ll probably spend a night at the Kitadake Sansou, so depending on what time of day you check-in, you could climb it straight after you check-in on the same day, or save it for first thing in the morning the next day. You could base this choice on the weather conditions as well - if it’s rainy the first day, you might want to put off Mt Aino until the next day. And vice versa - if it’s forecast to rain on day 2, you might want to tackle Mt Kita and Mt Aino in one go on day 1.
The Happonba Col will have snow remaining in July, so in that case I would recommend considering doing the direct out-and-back course to Mt Kita and Aino, and skipping the loop altogether. I also recommend just doing the direct course if you are not too sure of the conditions in general. e.g. in July 2025 there was some rockfall on the trail near the Col and hikers were warned away from using this route.
If you are taking the direct route, when you reach the junction at the Shirane-oike hut, you will want to take a right turn. After climbing Mt Kita and Mt Aino, on your return hike you will again climb up to Mt Kita, before descending back to the trailhead. This lets you skip the Col.
Either way, if you are hiking out to Mt Aino, you will most likely want to stay at the Kitadake Sansou (北岳山荘) as it is at the most reasonable location on the hiking course.
A digital map is also available here.
When to hike Mt Kita
The hiking season for Mt Kita is mid-July through to early October. In early July, there can still be snow remaining on the trail, especially on the Happonba Col side. I hiked Mt Kita in mid-October, but this was really the end of the season, and whether you would be able to hike it without snow just depends on the yearly conditions. e.g. in 2022 the first snow was recorded on the 6th of October.
If you want to research the trail conditions before your hike, I would recommend using the hiking app YAMAP. In particular, you can see here to see the latest trail logs of people who have climbed Mt Kita, so it’s a really useful source to see what the trail is like.
Also note that the mountain huts and busses are only in operation between the end of June and the beginning of November.
Mountain huts on Mt Kita
There are 4 mountain huts available along the course up to Mt Kita:
- The Hirogawara trailhead itself has a hut called the Hirogawara Sansou (広河原山荘). This can be a good option if you are planning on arriving in the afternoon at the trailhead, so you can have a nice-and-early start the next day. Note the last bus up to the trailhead leaves Kofu station at 2pm and arrives at the trailhead just before 4pm so you would need to make it onto that final bus.
- The Shirane-oike-goya (白根御池小屋). You will reach this hut 3 hours after beginning your climb from the Hirogawara trailhead. This can be a good option if you can get a start on your hiking before noon, but won’t have time on day 1 to reach the summit of Mt Kita. If you are camping and don’t want to lug your tent and gear all the way up to Mt Kita, on day 2 you could leave your tent setup here and do an out-and-back to Mt Kita before packing up your gear and then heading back down to the trailhead.
- The Kata-no-koya (肩の小屋). This is 40mins before the summit of Mt Kita, so would be ideal as the halfway point if you are planning on doing an out-and-back course to Mt Kita and have an early start. They have an English website available where you can book here, and also support payment via Paypal.
- The Kitadake Sansou (北岳山荘). This is the hut I stayed at! After summiting Mt Kita, you’ll have about an hour’s descent to reach this hut. If you are only going to climb Mt Kita, then this one is a little out of the way and does add a bit of extra time on your hike, but is ideal if you are also looking to climb Mt Aino. If you are planning on staying here, it would be best to have an early a start as possible (i.e. getting on the first 5:20am bus) to reach it in time.
The Kata-no-koya hut has its own reservation website in English here. The other three huts operate off of the same minamialps-yoyaku.jp website where you can easily see all of the openings. Make sure you choose the right hut on the left-hand sidebar, and whether you are doing a hut stay (山小屋泊) or tent stay (テント泊).
Making a hut reservation can be quite competitive in the summer months. For example, when I checked out the website in early July, every day (including weekdays) was already booked out from late July and for all of August. However cancellations do come through, so it can be a matter of refreshing the website to try and grab a spot off of someone that has cancelled.
In comparison, when I checked out the hut availability last-minute in mid-October, there were plenty of spots available, even on weekends. This is really the end of the hiking season though, so it can get quite cold, and you are also at risk of maybe having to cancel your hike if the snow sets in before this time.
Tent camping at the mountain huts
All 4 huts also offer the option to camp in your own tent. However the Kata-no-koya hut is the only one that does not require a reservation. All other huts require a reservation, even if you are camping, via their website here.
Lodging options at the Ashiyasu carpark
If you are coming by car the night before to the Ashiyasu carpark but don’t want to sleep in your car, you can also stay at the 白峰会館温泉ロッジ, which only costs 4500 yen per person for the night. The one limitation is that the check-in time finishes at 18:30, so it would depend how early you can make it to the carpark. Another option in the area is 民宿旅館なとり屋, which lets you check in as late as 9pm.
Public transport access
If you are coming to Mt Kita by bus, you will want to get a direct bus from Kofu station (甲府駅) to the Hirogawara (広河原) trailhead. The bus timetable can vary on weekdays and weekends, so I would keep that in mind.
Firstly, if you are coming from Tokyo, the earliest train leaving Tokyo station at 4:59am would get you to Kofu station at 7:43am. But looking at the 2025 bus timetable PDF, the first bus you would be able to catch leave at 9:05am, so you can aim to get the 6:39am train out of Tokyo to make it in time for that bus. With the bus taking just under 2 hours from Kofu station, you will get to the trailhead at 10:55am. In that case, your best bet would be to hike 3 hours up to the Shirane-oike-goya and stay there for the first night.
Alternatively, you could arrive at Kofu station the night before, in which case the first bus departs at 4:35am. This early bus operates every day in mid-July to mid-August, but otherwise only operates on weekends (denoted by the double circle on the PDF linked above).
The buses accept Suica IC cards (tap when you get on and off), but you do have to buy a separate 300 yen paper ticket which I think goes towards maintaining the roads. You will need to buy this from a ticket booth before you get on the bus.

Car access details
If you are coming by car, you will need to park your car at the Ashiyasu carpark (芦安駐車場) and get on a bus for the final 1-hour leg of your journey. I made the drive up to the carpark in the dark, which was a little nerve-wracking as it is quite a windy and narrow road at times, but luckily not too long. There are a bunch of “no personal cars allowed” (マイカー制限) signs on the drive up which spooked me a little - I was like “am I allowed to drive up this road?” but you don’t have to worry, this is just mentioning that you can’t drive beyond the Ashiyasu carpark. If you did try, there would be a gate stopping your way.
There are a couple of overflow carparks. When I arrived before 9pm on a Thursday night, the main one next to the bus stop was half-full, and more cars pulled in during the night while I was asleep.

Even though the first bus wasn’t until 5:20am, by 4:00am I could already hear some eager people waking up, and by 30 minutes before the bus actually departs people had lined up to reserve their backpacks for a spot on the bus. It’s a long drive, so you want to hope you can get a seat on the bus, and not have to stand crammed in with everyone.
Along with the first scheduled bus, I think there are ad-hoc microbuses shuttling people up. I’m not too sure how it works, but I suppose if you woke up early enough and snagged a seat on that, you could depart a little before the main bus does (when I walked past it, the microbus driver was already telling everyone it was full).
Otherwise, remember to buy the 300-yen paper ticket for the road donation, even if you have a Suica card. I would recommend bringing enough spare cash for the bus ride just in case though - it’s 1700 yen one way. I managed to get a spot on the microbus on the drive back down, and that was cash-only.
Read more
Support me
📸 Thanks for reading! If you'd like to read more posts like this one, you can follow me on Instagram to stay up to date on my hiking adventures.
If you found this post useful, you can show your support by buying me a coffee - I write this blog for fun, but coffee is always appreciated! ☕
Recent posts
 hikes
hikesMt Nokogiri: a hike to Chiba's stone quarry
18 Mar hikes
hikesMt Miura-fuji and the Miura Kaigan Cherry Blossom Festival
9 Mar hikes
hikesAkabokko: hiking in Ome
16 Feb
Comments
Leave a comment