Hiking log
- Elevation 1967m
- When to climb June - October
- There is only one course, an 8-hour out-and-back with 1400m of elevation gain.
Mountain stats
A local bus from Muikamachi station to Shimizu, and then a 2km walk to the trailhead. Will require an overnight stay at a campsite or nearby guesthouse.
3-hour drive from Tokyo to the Sakurazaka carpark. 500 yen parking fee.
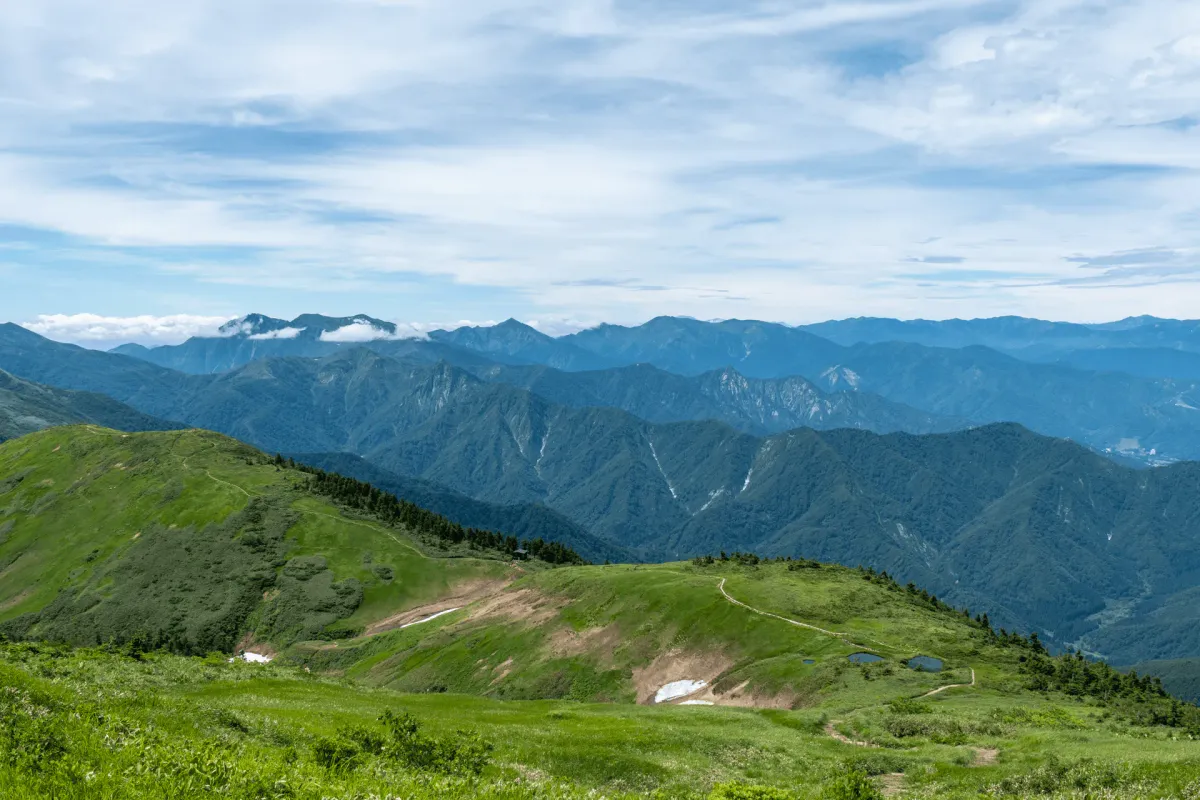
Mt Makihata (巻機山, makihata-yama) is one of Japan’s Hundred Famous Mountains, straddling the border of Gunma and Niigata prefectures. Hiking this mountain in mid-July turned out to be the perfect time, as I got to enjoy the yellow nikko-kisuge flowers near the summit of the trail. With a hiking course time of 8 hours, it is quite long, but the views from the top are well worth the effort.
Factoring in the 3-hour drive from Tokyo, it’s a bit too long to attempt as a day trip, so I drove out the night before, slept in my car, and then began my hike the next morning at around 5:30am. There were a couple of other hikers getting themselves ready to set out, but since it was a Friday, the carpark overall was still pretty empty.

I managed to set out before the other hikers, and got to enjoy most of the hike up alone on the trail.

The first trail marker you’ll come to is about an hour into the hike, marking that you’ve reached 1128m of elevation. The carpark starts you at an elevation of 738m, and the peak is up at 1967m, so you’ve done a little bit less than a third.

I can imagine if you did a good job of timing your start, you could get a pretty good view of the sun coming up over this ridge.

About 90 minutes into the hike, you’ll reach the 6号目 marker, where you get another chance at a view - and it’s a pretty good one!

It’s not Mt Makihata, but Mt Waribiki-dake, which is one of the minor peaks directly next to Mt Makihata. You can still see some snow down the side of the mountain as well.

Some mountains in Japan like Mt Makihata have these “号目” (pronounced “goume”) markers. They somewhat mark out your progression on the trail. I think you could say that 6号目 means you are roughly 60% of the way there, but I’m not too sure if it’s actually accurate or a little more arbitrary than that. Usually the 9th “号目” marker will be the last one you see, since the 10号目 is the summit itself. Either way though, it’s nice to have a couple of waypoints along your hike up, I find it to be a bit more motivating to have that sense of progress.

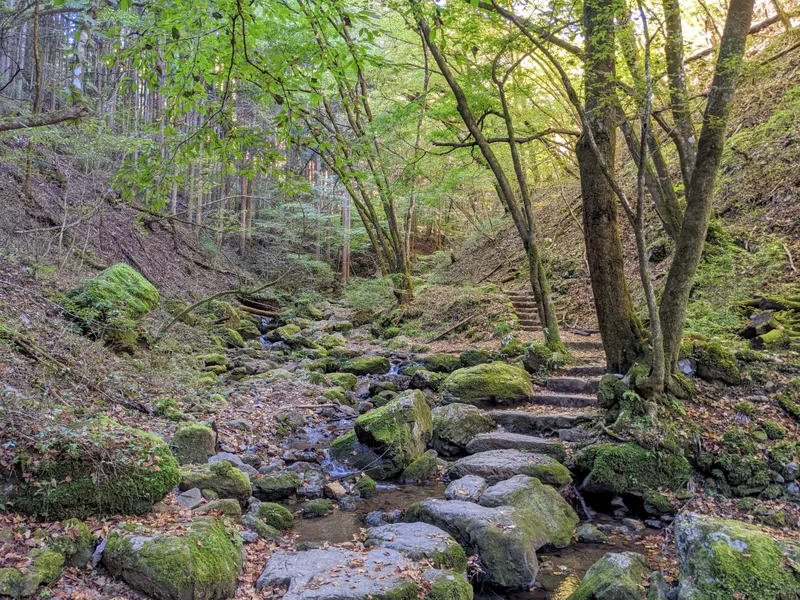
Once you get up to the 7号目 marker, you’ll finally be above the tree line, where you’ll stay for the rest of the hike. This is the first wide-open space you’ll have access to, so it’s also a good spot for a longer break. There’s also a flat area just ahead of here, perfect for a tent if you were so inclined.

Now that you’re above the trees, you can see out to what is possibly Mt Tanigawa behind the clouds in the distance there, which is probably the most famous mountain in Gunma.

Also on display are some stripey-looking mountains, which are probably ski fields. Niigata is a bit of a skiing hotspot (great for day trips or a weekend getaway from Tokyo) and has a number of popular ski resorts, like Maiko and Gala Yuzawa.

Between the 7th and 8th 号目 is probably the steepest section of the course, with a couple of steep clambers up over tree roots and the like. I was focusing more on climbing so I didn’t take any pictures.

But luckily from the 8号目, you will be blessed by a really nice set of stairs. It’s a nice reprieve from having to stumble over rocks and tree roots. Some of the steps had shiny plaques to indicate when the staircase was built, and as you keep climbing you can see the date get closer and closer to this year, so it seems like they are progressively building small chunks of them over time.


Eventually you’ll make it up onto the ridgeline. If you look to your right, you’ll see a long extended ridge, and the bit that is slightly higher than the rest of it is the peak of Mt Makihata.

Rather than heading directly towards the peak, you’ll take a C-shaped route to the left from here, before eventually the ridgeline curves around to come up to the peak.

If you come in July, you’ll start to see more spots of yellow as little patches of nikko-kisuge flowers pop up. These are a type of mountain flower that only bloom at higher elevations in July, and so I inadvertently managed to time my hike quite well to spot these.


The next stop on this course is the 9号目 marker and Nise-Makihata (or “fake” Makihata). From a quick Google search, it seems it was maybe named that way since people tended to mistake it for the peak of Mt Makihata itself.

Next the course dips a bit in elevation, taking you down to an refuge hut, before it curves to the right and you start to make the final climb up to Mt Makihata.

With much of the trail now spread out before me, I could start to see a couple of hikers climbing in the distance ahead of me as well, who must have had an earlier start.

A type of cottongrass was also growing in a field off this side of the trail. First time seeing this one!

At the bottom of this little descent lies a refuge hut. I didn’t check out the inside, but apparently it’s quite clean.

After a quick break here, it was time for the final climb up to Mt Makihata. With the great views from 7号目 onwards, I was in pretty high spirits. The great scenery on this mountain definitely made it feel like it was worth the climb.

And before I knew it, I reached the peak marker for Mt Makihata.

A bit confusingly, this spot is not the highest point on the trail, and is marked as having an elevation of 1930m on the map. I suppose having the marker here might make it easier for people to take a photo, since it’s already a fairly wide-open space.

From here you’ll continue along the path to the right of the peak marker for another couple of minutes to reach the real peak.


And this is it, the peak! Pretty underwhelming.
This course is an out-and-back, so reaching this cairn of rocks will be your turnaround point if you’re short on time or stamina. But a lot of people tend to extend the course by another 40 minutes to visit the neighbouring peak of Mt Ushigadake (牛ヶ岳). And with such great weather today, I can understand why - after such a long climb, you want to make the most of the scenery before you head back down the mountain.

There’s a tiny bit of a descent and then another climb to reach Mt Ushigadake, but it’s not too bad.

There are some more opportunities to spot patches of snow and nikko-kisuge flowers along this trail too.


Once you make it to Mt Ushigadake, there’s a tiny toppled stone that marks the peak.

The views from here are okay but you can continue along the trail for another 5 minutes before you hit a dead-end.


It was just before 10am by this point, so I had spent about 4.5 hours climbing. It was finally time to head back! Although it was fairly sunny, the wind was actually quite strong along this ridgeline so the walk didn’t feel too hot.

Another point of interest on this ridgeline is this trio of pools (ponds?), which I’ve tended to see a lot of photos of on YAMAP.

I had actually been keeping my eyes peeled for it during this hike, and thought I had somehow missed it - but it was only on the return path that it becomes a bit more obvious that this is a face.

You’ll notice though how few people there are in my photos - it was a pretty quiet hike today! As I began to descend, I did pass a couple more groups of people that were on their final climb up as well, but overall we were all pretty spread out.
I think maybe it’s a combination of it being a slightly harder mountain, plus it’s a weekday, and it’s not the peak autumn season.

Back at the 7号目, I took one last snack break before I began my descent.

I made good time, and finished my hike right on 1pm. Thanks to the early start and the wind near the summit, the hike didn’t feel too hot, but I did manage to get a tiny bit sunburnt on my arms (probably should have applied a bit more sunscreen).
To be honest I had been a bit worried about how I would do on an 8 - 9 hour day hike considering how tiring I had found Mt Jonen to be the weekend before, but I felt pretty good on this hike, and managed to do it a little faster than expected in under 8 hours.
The views were well worth the effort. This was a good one!
Hiking course options
| Date climbed | Length | Course time |
|---|---|---|
| 2025-07-18 | 10.7km | 8h (the expected time for an average hiker without breaks) |
The only hiking course for Mt Makihata is an 8-hour out-and-back course, beginning at the Sakurazaka carpark (桜坂駐車場). You can optionally also continue your hike to the neighbouring peak of Mt Ushigadake (牛ヶ岳), which brings your hiking time closer to 9 hours and adds an additional 1.5km to your hike. As well as being available on YAMAP, the course I took is available on AllTrails as well.
If you’re doing it as a day hike, you’ll want to start as early as you can (6am, if not earlier) so you can get most of your climbing in before it gets too hot.
There are some nice toilets at the trailhead carpark. And also some at the refuge mountain hut near the summit, although I was not brave enough to take a look at their condition.
Although most people do Mt Makihata as a long day hike, there’s the option to turn it into an overnight stay, using the refuge hut (which is quite clean) or by bringing your own tent. There is a water source marked on the map near the hut as well.
As I found out afterwards, there is an alternate course where you can climb via the Nukubi-zawa (ヌクビ沢) stream. It seems to be a rather technical course, and only for people who know what they are doing (i.e. not regular hikers). It wouldn’t be something I would recommend to anyone reading this. It looks like the course is closed as of July 2025 due to the still-remaining snow, although looking at YAMAP you can see the occasional person has decided to climb it anyway. I think the official opening season for this course might only be in autumn, looking at last year’s logs.
When to hike Mt Makihata
Looking at YAMAP, Mt Makihata is most popularly hiked in June (once the snow has begun to melt) and in October (probably to enjoy the autumn season), so I would say you could hike this any time between June and October, although I’d double-check the snow conditions on YAMAP depending on when you climb. Being able to see the nikko-kisuge flowers was a nice highlight for me, so I would recommend trying to time this hike for around mid-July if you are interested in seeing them in bloom.
Public transport access
The nearest bus stop to Mt Makihata is the Shimizu (清水) bus stop, with buses running from the nearby Muikamachi (六日町) station. In 2025 the first one for the day departs from the station at 08:15 and gets to Shimizu at 8:50am, and there are three more at 11am, 2pm and 4:50pm. It looks like your return bus options are only at 08:55am and 2:40pm.
This PDF has the timetable for 2025, and if you’re reading this later than that (or the link has expired) the most up-to-date bus timetable should be available from the Minami Echigo bus company’s website. The bus starts at Muikamachi station, so you’ll be looking for the PDFs underneath the Muikamachi (六日町) section, and more specifically the 六日町~沢口~清水線 route. The Shimizu stop is at the end of the line.
From the bus stop, it’s a 2km walk uphill to get the trailhead’s carpark.
So with these timings, it’s not really feasible as a day hike with public transportation, even if you happened to live in Muikamachi (let alone coming all the way from Tokyo). So you would need to figure out plans to either sleep somewhere the night before and/or on the trail itself. There’s a campsite near the trailhead - the Makihata-sanroku Camping Ground (巻機山麓キャンプ場) which would be one option.
Alternately if you’re not a fan of camping, you can stay at one of the guest houses near the bus stop. There is a list of five of them here and you can see a hiking diary where someone stayed at the Shimizu-ya lodge. They only take reservations via phone call, so you probably would need to speak Japanese to make a reservation.
Looking at the hiking diary mentioned above, in previous years the final bus back was running after 5pm, which made it easier to finish the hike in a day, but in 2025 unfortunately the last bus departs at 2:40pm so it may be a bit of a tight squeeze to finish in time to get on it, and you may need to spend an additional night up near the summit depending on your pace.
Car access

If you’re coming by car, you can park at the Sakurazaka carpark (桜坂駐車場). This is split into two parking lots, so if the first one looks full, you can head a little further up the road to check out the second.

The carpark costs 500 yen to use which you pay directly to its caretaker, who sits in a little building by the carpark. He wasn’t there when I arrived early on a Friday morning (understandable) but he was there when I got back from my hike so I paid him then. If he’s not there in either the morning or afternoon, you can drop the cash directly into the post box attached to the building.
I chose to do this hike on a Friday, and the carpark was less than a third full, I think. It’s so much nicer than having to deal with the stress of finding a spot on a weekend!
If you’re doing this as a long day hike and coming from somewhere further away like Tokyo, you’ll either need to wake up super early to drive here, or come here the night before and sleep nearby. As well as the campsite and guesthouse options I mentioned in the public transport section above, if you come by car then sleeping in it is another option. If you want to sleep in the trailhead’s carpark, the caretaker seems to be fine with this, and you only have to pay the 500 yen once if you stay overnight (as reported by another hiking log I read).
Personally I prefer somewhere where there’s more people, so I opted for the Minamiuonuma Roadside Station, which is right near the highway exit and about a 30-minute drive from the trailhead. It’s quite a large roadside station, and even for a Thursday night there were probably at least 20 cars parked with people sleeping there as well. I slept pretty well this time (unlike the last time at Mt Ena). Although it was only 25°C, it was still quite hot at first without proper air circulation, so I may need to invest in a portable fan.
Also note that the nearest conbini is a 7-Eleven that is a 7 minute drive in the opposite direction of the trailhead, so it may be worth buying food the night before to save you some time in the morning. There did seem to be a Lawson closer by as well, but it was closed due to some construction. The 7-Eleven is technically on the highway, so I was a bit confused why Google Maps was leading me there, but there is a backroad that lets you access the 7-Eleven without entering the highway itself, so you don’t have to pay the tolls.
As you head towards the trailhead, you’ll pass a small town with a lot of rice fields. I even managed to spot a massive eagle! Unfortunately my camera was packed away inside of my bag, but here’s a zoomed in picture from my iPhone.


Read more
Support me
📸 Thanks for reading! If you'd like to read more posts like this one, you can follow me on Instagram to stay up to date on my hiking adventures.
If you found this post useful, you can show your support by buying me a coffee - I write this blog for fun, but coffee is always appreciated! ☕
Recent posts
 hikes
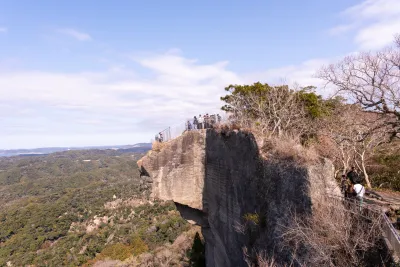
hikesMt Nokogiri: a hike to Chiba's stone quarry
18 Mar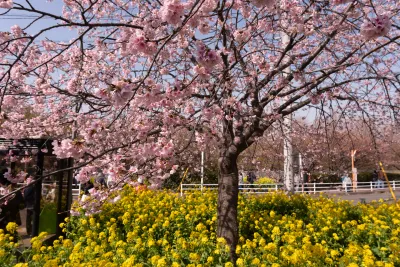 hikes
hikesMt Miura-fuji and the Miura Kaigan Cherry Blossom Festival
9 Mar hikes
hikesAkabokko: hiking in Ome
16 Feb
Leave a comment