- Elevation 3180m
- When to climb mid-July to beginning of October
- A 3-day, 43km course with 3800m elevation gain. Can be shortened or lengthened depending on which peaks you want to climb.
Mountain stats
An overnight bus from Shinjuku can drop you off at the trailhead by 6:40am.
Not recommended to come by car, but could choose to do an out-and-back from either trailhead.
At the end of August I did a 3-day hut-to-hut hike through the North Alps of Japan, passing by two of its Hundred Famous Mountains - Mt Kurobegoro (黒部五郎岳, kurobegoro-dake) and Mt Yari (槍ヶ岳, yari-ga-take). This was a 43km course with 3800m of elevation gain - my toughest hike to date!
The specific course we followed is known as the Nishi-Ginza Diamond course (西銀座ダイヤモンドコース). It’s a bit of a niche one, but still popular enough to have its own Wikipedia page in Japanese, although I couldn’t seem to find any English references to it.
Day 1: Climb from the Oritate trailhead
17.7km with 1975m elevation gain and 985m descent. Expected course time of 10.5 hours
Taking an overnight bus from Shinjuku, we started at the Oritate trailhead at around 7am. I also did a hike last year to the North Alps (to Mt Washiba) and this was the trailhead we finished at, so the climb up was over familiar terrain. I remember feeling absolutely exhausted when I descended via this route last year, and it felt oh-so-long. In comparison this was a bit more of a pleasant climb.


As you climb, there are a couple of signs warning you not to sit down and get out your food in the clearing due to bears.

A black bear was seen entering someone’s tent just a few days earlier at the Taro-daira tent site (a little bit ahead on the trail) so this was not a completely unfounded concern! Although bear sightings on the Japanese mainland are quite rare for hikers, they seem to be on the rise this year.


I was dutifully taking pictures as we climbed, but to be honest I had been feeling a bit nauseous since getting off the bus in the morning, and didn’t really have an appetite - which wasn’t a good sign. I was trying to force some food in me, because hiking burns a lot of calories and it’s pretty hard to hike on an empty stomach, but it was a bit of a struggle.

Once you’re out past the initial climb in the forest, a long set of stairs stretches before you. It’s pretty beautiful, and luckily not too hot thanks to the clouds.


Reaching the Taro-daira mountain hut

At around 10am, we reached the Taro-daira mountain hut (太郎平小屋) where we sat down for a break. There’s quite a few hikers about here, as this is a junction point for a number of trails and mountains - namely Mt Washiba and Mt Yakushi.
There’s a toilet (paid) and a free water source here as well, so we made sure to re-fill all our water bottles. I usually bring along 2L of water for a day’s hike, but today was going to be quite long, so I made sure to refill all my bottles here.

At this point we had a little over 7 hours to go to reach our hut for the night. I knew that if I pressed on, I would have to commit to hiking through the remaining 7 hours, since there wouldn’t really be anywhere else to stop along the way (or exit points to bail out from).

Obviously from the title of this post you can gather I hiked the whole thing - but at this time I was really indecisive on what to do! The nausea I was having wasn’t too bad, but I wasn’t sure if it was going to get better or worse. But after a bit of a break, I was able to get a bit more food in me and felt myself perk up a bit, so decided to commit to it. I knew that if I didn’t feel any better on day 2, I could skip climbing Mt Yari and descend down to the trailhead via an alternate route, so that reassured me a bit as well.


So onwards we went!

At first you’ll get to enjoy a bit of a flat stretch of path, before it starts to get steep. I was a little bit intimidated by the 1900m of elevation gain on day 1 of the course, but actually by the time you’ve reached the hut you’ve already done 1000m of it, so only 900m to go!


The next point of interest is Mt Kita-no-mata (北ノ俣岳, kita-no-mata-dake) which sits at an elevation of 2662m.

And just beyond that, you can faintly see out to the peak of Mt Kurobegoro in the distance.

After another series of small climbs and descents, you’ll come to a rather rocky Mt Akagi-dake (赤木岳).


You can see there’s a little trail heading to the left of it (which I’ve realised in hindsight). As you climb up though, there aren’t really any helpful spray painted signs marking which way to go, so we actually went right. This ended up being the long way around! And we had to kind of wobble our way over some really large rocks. We didn’t try to get to the top of the peak itself - there isn’t a peak marker up there.

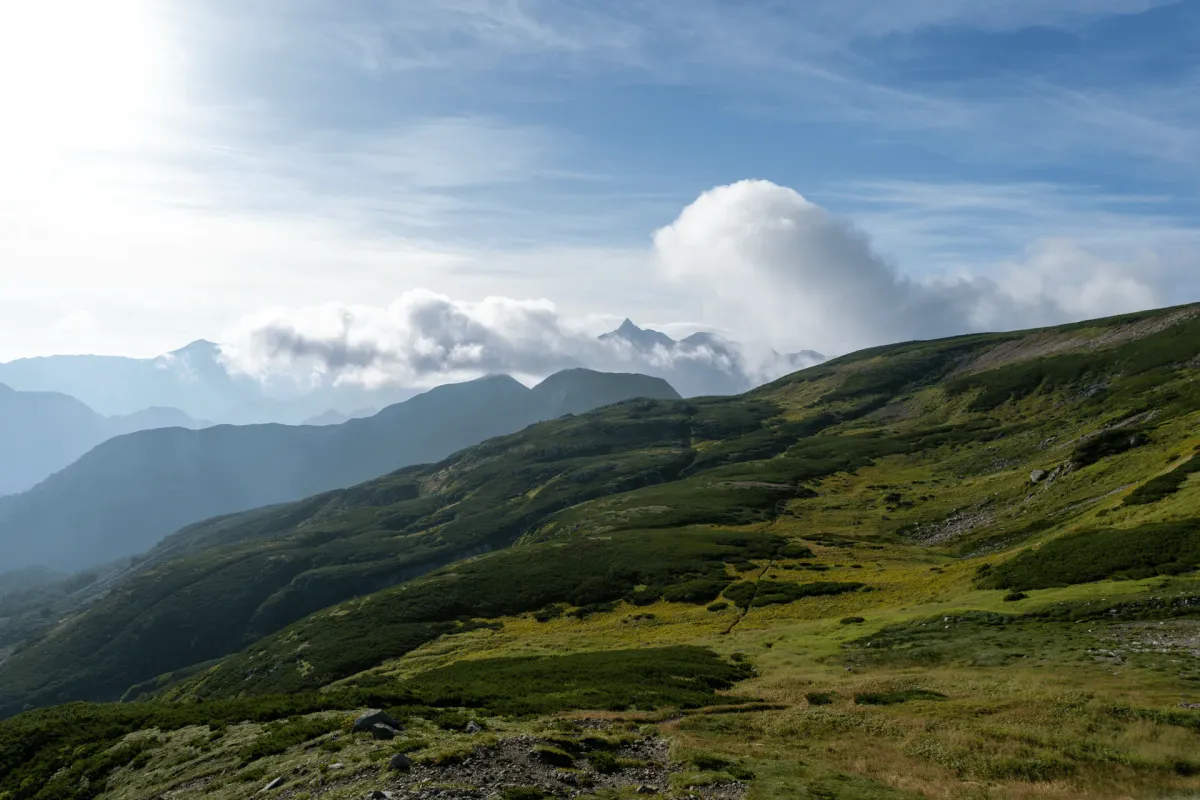
Beyond the rocks, the clouds properly parted for a bit, giving us our first clear view of the peak of Mt Kurobegoro.


Before the peak of Mt Kurobegoro itself, you’ll get up onto its ridgeline, known as Kurobegoro-no-kata (黒部五郎の肩) or “Kurobegoro’s shoulder”.


Mt Kurobegoro
A bit before 3pm we made it to the junction point, Kurobegoro-no-kata.

The climb up to the peak is on the right, and the trail down to the hut is on the left, so we dropped our packs here (or as the Japanese say, デポ or “depo”).


The detour to the peak and back only takes 25 minutes, so a bit after 3pm, we made it to the peak! Although it’s quite late in the day, there was one other guy at the peak around this time, plus another who we had passed at the junction point.

From the peak, you can get views out on the descent trail down to the hut below.


Our rough plan for the day was to arrive at the hut by 5pm. Japanese hikers generally have it drilled into them that they should be off the trail by 3 or 4pm at the latest for safety reasons. My friend who had chosen the trail and organised the hike (a big thank you to her!) did have some hopes of being able to save some time so that we could finish around 4pm, but we ended up being pretty on-schedule.

As you descend down into the valley, you can see up to what is known as the Kurobegoro Cirque. Now a cirque is not a term that I’ve ever encountered outside of hiking in Japan (other than the Cirque du Soleil, I guess) but the dictionary definition is “a hollow area almost surrounded by steep slopes at the top of a glaciated valley”.
The Japanese actually call it a カール or “kaal” which comes from the German translation for cirque, a “Kar”. The more you know!

The final 90 minute descent to our hut was quite tiring. I personally feel like descents almost feel worse than climbing - with climbing you don’t really have the luxury to think about anything other than breathing and walking, but with descents the trail seems to go on and on.


Kurobegoro hut (黒部五郎小舎)
Finally at 5pm we reached our hut for the night, the Kurobegoro hut.


The hut sits at an elevation of 2350m and was pretty cozy. My favourite hut stay so far was at the Sugoroku mountain hut last year, and this one is run by the same company so I suppose they know what they are doing.

The room we stayed in had a capacity of 6, spread out across 2 levels. I love smaller room sizes, because it generally ends up being a lot quieter. Maybe because of its remoteness, or because it was a Thursday night, today we just had the 3 of us in the room - my friend and me on the bottom, and one lady on the top.

The dinner was so good - soba, tonkatsu, and unlimited refills of rice and miso soup. The other guests were amazed at the side of “salmon sashimi” (and I saw a Google maps review mentioning it too) being available in a mountain hut considering how you can’t fly in fresh supplies every day. But actually it was smoked salmon, dunno if that falls into the sashimi category.

Unfortunately though with my appetite problems, I picked at my meal a bit and probably ate half. I felt so bad wasting the food! After a long day’s hike, we were pretty exhausted and asleep by 7:30pm. I slept really well that night.
Day 2: Traverse to Mt Yari
12km with 1695m of elevation gain and 958m of descent. Expected course time of 9 hours.
Day 2 had us waking up at 3:30am for a 4am start. It’s quite early, but gives you a chance to get as much walking in as you can before the sun rises and it starts to get hot.

We started in darkness, save for the stars in the sky and the occasional glimmer on a distant ridge of a hiker’s head-torch. Can’t imagine what time they started, if we were seeing them up there already.


After about 90 minutes of climbing, we sat down to enjoy our packed bento from the hut. Unfortunately the nausea was still there on day 2, so I could only eat a small amount.

It really felt like we were in the middle of the Alps - we just had famous peaks all around us.


This part of the course with the Mitsumata-renge-dake (三俣蓮華岳) intersected with the course we took last year, so as we passed through the fog, my friend and I reminisced over how we got to see Mt Yari from around here last year.

And then as we started our descent down towards the Sugoroku mountain hut, we could see Mt Yari in the distance!

I think this was my favourite view of the entire hike. Mt Yari is such a recognisable icon of the North Alps, so it was pretty exciting (and daunting) that I was finally going to be climbing it.

We passed some pretty-looking purple flowers, which my friend told me were poisonous.

She didn’t tell me its name, although even if she did tell me the Japanese word for it I wouldn’t have recognised it - but a later Google as I was writing this post told me it was monkshood / wolfsbane which I had heard of (probably in fantasy stories, to be honest), and is pretty darn poisonous.

There were quite a few hikers we passed as we descended towards the Sugoroku hut, all heading in the opposite direction. I would guess that all of them had stayed at the hut for the night, and were now possibly heading out towards Mt Washiba. Quite a few of them had very light gear, so I would guess maybe they would do an out-and-back course before heading back to the hut for another night.
Sugoroku hut

We stopped off at the Sugoroku hut (双六小屋) for a refill of our water bottles (free drinking water!) and I was able to polish off more of my bento breakfast, which was a reassuring sign.

As I was sat at the hut’s benches, I could see the staff boarding up the windows for some reason. One of the staff came up to me and asked me in English “Can you speak Japanese?” Naturally I replied “yes” in English but maybe I should have replied in Japanese - because then he started trying to figure out how to explain to me, in English, that he needed me to move because a supply helicopter was coming in. (I put him out of his misery and told him I could speak Japanese, in Japanese).

We were about over with our break anyway, so we headed on up the next mountain. We kept turning back, hoping to spot the helicopter coming in, but it seems like it got delayed because we kept climbing until the hut was out of view, and the helicopter never came.


As we were climbing, we spotted a female raichou (Japanese rock ptarmigan) and her chick! I did not notice it at all, so I’m lucky my friend noticed it and pointed it out to me.

Another hiker was coming down the trail, so we pointed the birds out to him as well and we stood around, the 3 of us taking photos.
Then we were up onto the next peak of the day, Mt Momisawa-dake, which was covered in fog.

I assume on a clear day, Mt Yari is a constant presence on this trail as you head towards it, with it slowly growing larger and larger. But the upside of fog is that it’s less hot, so I’m happy with the tradeoff.


I also managed to get a photo of this Alpine accentor.


I’ve seen them a number of times on the mountains - usually they flit about at quite a distance from humans and are quite tiny so I’ve never gotten a good photo, but unusually these ones were pretty tame and happy to pose.

This middle section of the trail is just a lot of little ups and downs as you cross mountain after mountain.


At 10am, we finally got another view out to Mt Yari!


And then we had our second raichou sighting of the day!

This one was my first time ever seeing a male - which you can distinguish from the females by a red patch on its forehead. He was together with a female raichou, and they seemed to be eating a plant (or possibly the flowers off of it).
Beyond this point, it started to get a bit rocky. There were two chain climb sections, although nothing too scary.

The final approach for Mt Yari comes into view, which is a 500m elevation gain hike up a long ridgeline.


We had been climbing for a solid 7 hours at this point so I was struggling a bit, and was taking it pretty slow. My back was hurting from carrying a pack around all day too.

And then finally, Mt Yari!

For some reason I don’t think I’d ever seen a photo of Mt Yari from up close, so it felt really good to finally put a face to the name.


Mt Yari
We dropped our packs off at the Yari mountain hut, and decided to immediately tackle the peak while the weather was good. Note that everyone wears helmets on this climb - if you don’t own one, you can rent one for 500 yen from the hut.

This one’s a pretty vertical climb, with chains and ladder sections. Luckily there’s separate ascent and descent routes so there’s not too many traffic jams.

It’s a little bit nerve-wracking though!


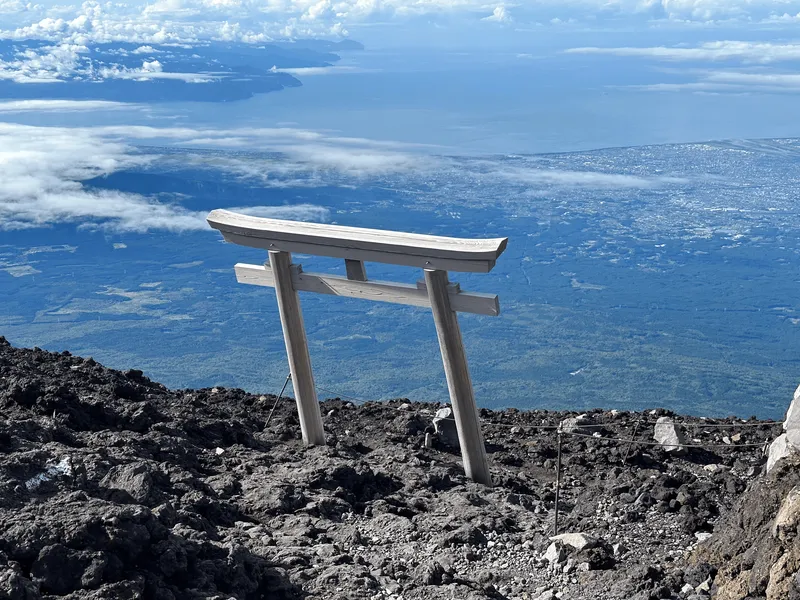
There’s a little wooden shrine at the peak, plus a wooden sign you can pick up to take a photo.

We had followed up a group of 6, so we had to wait patiently in a line for everyone to get their chance with the peak photo.

The descent felt less scary than the ascent, but I had this old man behind me who was super fast at descending and right on my toes and that put a bit of pressure on. I did offer to let him go ahead of me but he wouldn’t take me up on it! Not sure if he was trying to flex on me about how fast he was.

Yarigatake-sanso Lodge
After descending, we checked in at the Yarigatake-sanso Lodge (槍ヶ岳山荘, yarigatake-sanso). The English support was really good here - the best I’ve seen at a hut so far.

Although I had never heard of Mt Yari before beginning to climb the hyakumeizan, I suppose for those interested in the North Alps of Japan, Mt Yari is is a pretty iconic peak, and so is really popular. There were plenty of people here, Japanese and foreigners alike. Actually when we arrived, it was a bit of a shock at first - compared to how quiet all of the other huts have been that I’ve stayed at in the North Alps, there were so many people about, and it was quite noisy. I suppose it’s like the Mt Fuji of the North Alps?

The room setup for the hut was 16 beds to a room, in rows of 4 over 2 levels. I think there were about 9 of us in here tonight, including a rather rowdy group of 4 ladies. They were having a discussion about what time to get up the next morning, factoring in that they needed time to put on their makeup!

After sumitting Mt Yari, it was still only around 2pm. The hut serves a variety of really tasty desserts (which they announce on loudspeaker as soon as they have prepared a fresh batch of them) but I decided to save my stomach for dinner and curled up on the futon with my kindle. The announcements were all done in both Japanese and English, and the English was really good. I think I almost detected a touch of an Australian accent as well so it was kind of fun to hear the announcement each time.

The dinner was Chinese-style (or at least the Japanese-ified version of it). Quite different from the traditional Japanese fare you’d get at a mountain hut. As usual, the miso soup and rice are unlimited servings. Luckily my appetite had returned, so I was able to eat all of it!
We were back in bed and asleep before 8pm. My sleep was so-so on day 2 - I think because I wasn’t as exhausted as I was on day 1.
Day 3: Descent to Shinhotaka ropeway
13km, with 2100m of descent. Expected course time of 6 hours.
For our final day of hiking, we had plans to sleep in a bit since we were in no hurry to get down, but as everyone’s alarms started ringing at 3:30, and the lights in the room automatically turned on at 4am it was hard to get much sleep after that. Technically each row of futons in the room has a curtain you can draw to block out the light and get some privacy, but our curtain was busted and couldn’t extend out all the way, so we got a nice direct beam from the ceiling light into our eyeballs (since we were on the top bunk).

But that gave us time to get outside in time for the sunrise around 5am. There were plenty of people climbing up to the peak to get a view from the top as well.


After taking in the sunrise, it was time to descend. Once you walk along the side of the building, you’ll pass through the tent site before taking a right onto the descent path.

The tent site for Mt Yari is pretty crazy. It almost seems like they are haphazardly jammed in amongst the rocks, but they are actually marked out with rope (and there was only 42 spots).

Alternatively, down below the peak of Mt Yari there is a second hut (the Sessho hut) with a more normal field-type setup.


The first stretch of descent is quite rocky, so you just have to pick your way over the rocks and make sure you don’t step on any too-wobbly ones. As we descended, we had a couple of people pass us to head up. It was before 7am at this point, which means they must have started hiking super early to already make it all the way up near the peak!


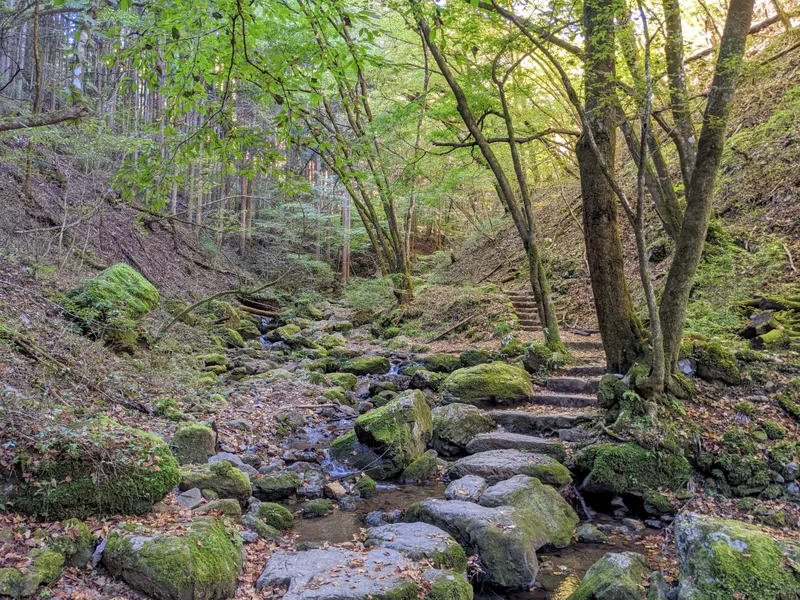
Once you’re passed the rocky field, it’s into the treeline, still with a fairly rocky path.

After 2.5 hours of descending, the Yari-daira mountain hut (槍平小屋, yari-daira-goya) came into view. This has a water source and toilet. We had descended about 1000m of elevation by this point, so it was sort of like the halfway point.

There were plenty of people taking a break at the hut - all were heading up. This was a Saturday, so prime time for a Mt Yari climb.

Beyond the hut you get a blessedly smooth stretch of boardwalk, but soon it’s back to rocky bits.


As we passed the last trickle of hikers heading in the other direction (presumably all the way up to Mt Yari) it was interesting to see the contrast between those hikers we saw right near the peak versus the ones we saw nearer to the end of the trail (end for us, start for them). You might simply expect that the people you encounter near the peak of Mt Yari would be the most tired (having hiked the longest distance) but I suppose actually the fact that you can get to the peak that quickly and early must mean you have a lot of stamina. Which was in contrast to those that were already struggling closer to the start of their hike.
It’s definitely a tough one to attempt in one go - 2100m elevation gain in one day is no joke. Of course, I’m sure some people who start later in the day just head to the Yari-daira hut and stop there for the night before attempting the summit the next day.
Another point of interest we came to on the course is this huge rock field.

I had seen on the map that a lot of the trail goes alongside a river, so in my mind I had half-hoped (naively) for a nice easy path but in this case, river = lots of rocks.


Existing the boulder zone, you’ll pass an almost crumbling (!) hut with the corner foundations exposed. It’s named as 滝谷避難小屋, which confusingly has three different readings (Takiya, Takitani or Takidani refuge hut) depending on which site you source your info from.

Not sure exactly when it crumbled, but it might be quite a recent development.

Beyond that, the path becomes a little harder to follow at times, so we played our usual game of “find the pink tape”, as it’s what is used to mark trails in Japan.


Then we came to another rock field, but this time with a bridge you can handily use to cross over most of it (you can hop off of it and use the rocks in the last bit).

And finally, at 10am, a road!

We were encouraged to see a bicycle parked here, since it meant the road must continue to the end of the trail.

The road is over 5km, so there is a ways to go though. But the thought did come to mind, why not put a shuttle bus on? It would save people a lot of pain and make what is a pretty hard hike a little bit easier. But I suppose if the Mt Yari hut has no problems reaching full capacity, and there’s plenty of people on the mountain already, you don’t really want to encourage more people to come by putting in buses.


Finally, around 11:15, civilisation came into sight!

Our onsen of choice was the Nakasaki-sanso (中崎山荘) onsen.

Onsens are such a great part of Japanese hiking culture, After 3 days, it felt so good to wash all of the grime off.
After the onsen, you’ll be happy to know I absolutely demolished a bowl of ramen. Whatever sickness had plagued me on days 1 and 2 had completely disappeared.
Hiking course details
| Date climbed | Length | Course time |
|---|---|---|
| 2025-08-21 | 43km | 25.5h (the expected time for an average hiker without breaks) |
The course we did is known as the Nishi-ginza Diamond course that follows the following route: Oritate trailhead > Taro-daira hut > Mt Kurobegoro > Kurobegoro hut > Sugoroku hut > Mt Yari > Yari-daira hut > Shinhotaka onsen. It’s not a super popular course, but you will still bump into plenty of people doing a variety of other courses across the North Alps.
Although days 2 and 3 felt fairly manageable, day 1 is quite long (10.5h hours) and you have a bit of a delayed start, since the bus drops you off at 6:40am. That would make me hesitate to recommend this course if you aren’t too sure of your stamina. To make this course easier, you could split it out into a 4-day course with a stay at the Taro-daira hut on day 1. The hut is a bit awkwardly positioned though - this would mean your day 1 hike is only 3 hours, and then day 2 is 7.5 hours. In that case though, possibly you could skip the overnight bus and and arrive a bit later in the day to begin your hike.
Another thing to keep in mind with a long hike like this one are escape points (in case of bad weather, or if you don’t feel well). You have two options:
- The Taro-daira mountain hut on day 1: if you don’t turn back here, you really have to commit to climbing to the Kurobegoro hut since there’s no where else to stop along the way. The Kurobegoro mountain hut is the furthest point from a trailhead on the course, so you need to have the confidence that a) you can reach it as well as b) being able to continue on from it the next day.
- The Sugoroku mountain hut: on day 2, you’ll descend down to the Sugoroku hut, before beginning a series of climbs over multiple small peaks and then finally up to Mt Yari. If you want to bail on Mt Yari, there’s a trail from the Sugoroku mountain hut > Kagami-daira mountain hut > Shinhotaka onsen trailhead which is mostly a downhill descent. You may need stay at one of the huts along the way, but the Kurobegoro, Sugoroku and Kagami-daira huts are conveniently owned by the same company so you might be able to talk to the folks at one of the huts to figure out hut vacancies and what to do.
If you’re looking to check off as many Hyakumeizan as you can, there’s also an option to extend your hike even further to 5 days. The Taro-daira Mountain Hut is the junction from which you climb up to Mt Yakushi, so you could do an out-and-back to Yakushi before continuing out onto Mt Kurobegoro and Mt Yari. Maybe you could also squeeze in Mt Washiba and Mt Suisho as well.
Mt Kurobegoro courses
If you’re mainly interested in Mt Kurobegoro, you’ll probably be wanting to do an out-and-back from the Oritate trailhead. The most direct route is a 2-day out-and-back course (16hrs, 30km, 2400m elevation gain).
Alternatively, you could also combine it with a detour to Mt Yakushi (21hrs, 37km, 3100m elevation gain) to turn it into a 3-day hike.
Mt Yari courses
The most direct route to Mt Yari is an out-and-back via the Shinhotaka onsen (14.5hrs, 27km, 2300m elevation gain). This seems kind of rough to do as as a day hike, so you can break it up either with a hut stay at the Yari-daira hut, which is about 5 hours into the hike, or at the halfway point at the Yarigatake-sanso Lodge. I did see some tents at Yari-daira, and so presumably you could sleep one night in the tent, hike Mt Yari and then come back to your tent for another night before descending.
Alternatively, there is also a out-and-back via Kamikochi (17.5hrs, 41km, 2200m elevation gain). And of course you could combine both trailheads (start at one and end at the other) as well. You can see another hike report about that course here.
Mountain hut info
Kurobegoro hut (黒部五郎小舎)
Super cozy! This was a great hut.
- Can book online on their website, 14,500 yen with 2 meals included (dinner and morning bento)
- Beddings come with a sanitary mesh cover on the pillow and the top of the futon blanket
- Toilet smelled a bit but was overall pretty clean
- Booked 2 months in advance, no issues with booking on Thursday night, and it didn’t really seem like it was anywhere near full
- Row of sinks right outside of the toilets is all drinking water
Yarigatake Sanso Lodge (槍ヶ岳山荘)
A little bit on the noisy side, seems very popular with Japanese and tourists alike.
- Can book online on their website, 14,000 yen with 2 meals included (dinner and morning bento)
- No sanitary covers on the beddings, although they seemed clean enough. Might want to bring along a sleeping bag liner but I was too dirty/tired to really care.
- Can only book 1 month in advance, but we were able to grab a booking for Friday night with no issues
- Toilet smelled a bit more / was a bit dirtier than the Kurobegoro one. Actually it had a bit of a weird set up where you were supposed to seat your butt right at the back if you were doing number two, and perch on the front if you were peeing, since the toilet hole is split into two sections.
- Water from the taps at the toilet is not drinking water, drinking water is available from the sinks on the first floor next to the vending machines.
Toilets and water re-fill spots along the trail
The following huts had free water and toilets (100 - 200 yen donation):
- Day 1: Taro-daira (太郎平小屋) - about 3.5 hours into the hike
- Day 2: Sugoroku (双六小屋) - about 4 hours into the hike
- Day 3: Yari-daira (槍平小屋) - about 2.5 hours into the hike.
I refilled my water bottles on day 1 and 2 but didn’t need it for day 3.
When to climb Mt Kurobegoro and Mt Yari
Both mountains are around the 3000m mark, so can be hiked without snow from mid-July to the beginning of October. Your biggest bottleneck might be getting a hut booking (especially for Yari in August), so try for weekdays if you can. Alternatively you could also try booking at the nearby Sessho hut.
If you scroll down on the English page for the Yarigatake lodge, there’s some handy photos showing how the mountain looks between the seasons.
Public transport access
Both the Oritate trailhead and the Shinhotaka trailheads have good public transport access via the Maitabi Alpen buses, which are overnight highway buses that take you from Shinjuku to the trailhead and back again.
For the Oritate (折立) trailhead:
- A Maitabi (毎日アルペン号) highway bus departs at 11pm from Shinjuku, which gets you to the trailhead at 6:40am
- A local bus runs to/from Toyama station (bookings required) where you can then get a Shinkansen back to Tokyo
The Taro-daira hut (nearest to the trailhead) does have information about bus timings etc and the phone number to call, so you should be able to get their help if you find you need to bail out unexpectedly.
For the Shinhotaka onsen (新穂高温) trailhead:
- A Maitabi Alpen highway bus departs at 2pm and will get you back to Shinjuku after 7pm. 2pm gives you plenty of time to sleep in, stop off at the onsen, and grab lunch before hopping on the bus back to Shinjuku.
You can also get a return bundle from Maitabi which saves you 2500 yen compared to buying the tickets separately. We paid 22,000 for the round trip.
The Maitabi buses depart from the west bus stop at Shinjuku station. There are 3-seater and 4-seater variants - the 3-seater ones are a bit more luxurious, with charging outlets and more space, but realistically I find it near-impossible to get any sleep on these regardless of how roomy it is. The buses make multiple stops at highway service stations to let people take pee breaks, and the bus’s overhead lighting is turned on at these times, and so I would recommend bringing an eye mask or a hat to cover your eyes if you want to try and sleep through it.
Car access details
A car makes doing a point-to-point hike pretty impossible - so you would need to park at either the Shinhotaka or Oritate trailheads and choose an out-and-back from there. Both trailheads have large carparks, although Shinhotaka is a 4 hour drive from Tokyo, and Oritate is 6 hours since you have to take a winding route around to the far side of the North Alps - so I’d opt for Shinhotaka if you are coming from Tokyo.
Read more
Support me
📸 Thanks for reading! If you'd like to read more posts like this one, you can follow me on Instagram to stay up to date on my hiking adventures.
If you found this post useful, you can show your support by buying me a coffee - I write this blog for fun, but coffee is always appreciated! ☕
Recent posts
 hikes
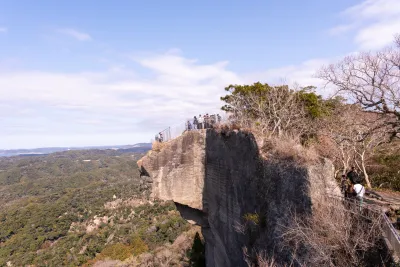
hikesMt Nokogiri: a hike to Chiba's stone quarry
18 Mar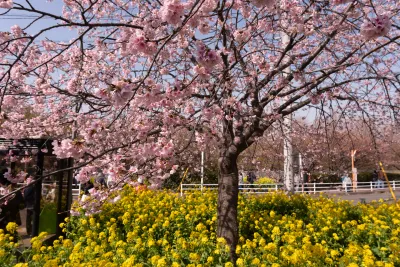 hikes
hikesMt Miura-fuji and the Miura Kaigan Cherry Blossom Festival
9 Mar hikes
hikesAkabokko: hiking in Ome
16 Feb
Comments
Leave a comment