Hiking log
- Elevation 1252m
- When to climb April - November
- The shortest route via the cable car will take 3.6km in a little over 3 hours. You could skip the cable car in one or both directions, bringing your hike up to 6 hours in total.
Mountain stats
75 minutes by train from Tokyo to Isehara station, then a 30-minute bus to Oyama Cable bus stop.
Public transport is recommended due to Mt Oyama's easy access, but paid parking is available near the bus stop.
Mt Oyama (大山, oo-yama) is one of the peaks in the Tanzawa mountain range in Kanagawa. Amongst Tanzawa’s mountains, Mt Oyama is the most beginner-friendly, with cable car access making it a 4-hour and 5km course to the summit and back. If you’re lucky, you’ll spot Mt Fuji from near the summit, and there’s some really pretty photo opportunities if you come during the autumn leaves season in mid-November.
Even if you’re not up for a hike to the summit, visiting the Oyama Afuri Shrine via the cable car can make for a great little day trip, and there’s some nice food options near the shrine as well.

Mt Oyama is accessible first via a train to Isehara station (75 minutes from Tokyo) and then a 30 minute bus to the Oyama Cable bus stop. From here you have a 20-minute walk up some stairs to the cable car station.
Note Mt Daisen in Tottori prefecture has the exact same kanji reading as Mt Oyama (大山) so make sure not to get the two confused.

Along the way, you’ll pass some local souvenir shops - none were open since I started my hike a little before 9am but you could pick some snacks up on your way back!
The stairs also come with some fun little trivia questions to break up the monotony.


Once you make to the cable car station, you can opt to take the cable car up to the Oyama Afuri Shrine and start your hike from up there. I decided to skip the cable car - it turns the 4-hour hike into a 6-hour one, which feels like the right amount of exercise for me.

Beyond the cable car station, the path will split into the “onna-zaka” and “otoko-zaka” - or the “woman’s climb” and “man’s climb”. Kind of sexist, but you’ll occasionally see it on hiking trails in Japan - the “woman’s climb” is the easier one (rude).

If you were planning on doing this entire hike without the cable car, I would generally recommend doing the harder trail (the otoko-zaka) on the climb up, so you can have a bit more of a relaxing descent on the onna-zaka.

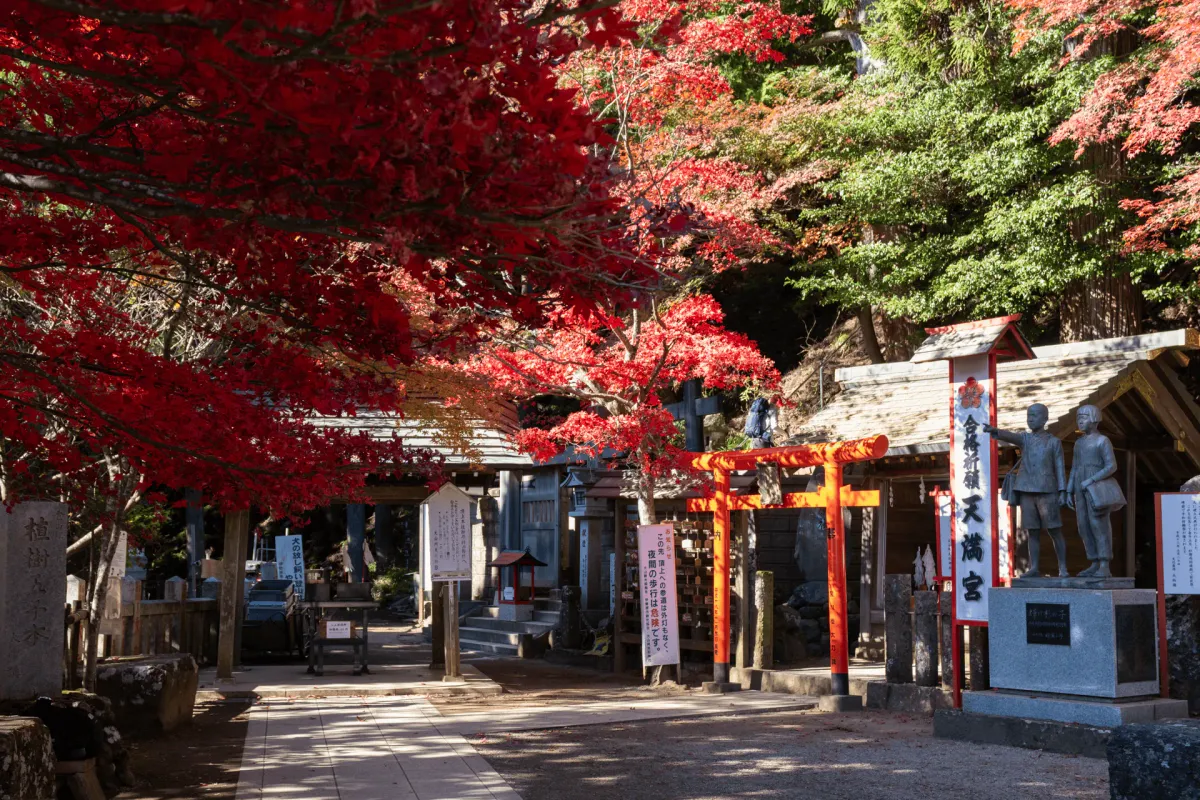
However partway up on the onna-zaka trail is the Oyama-dera Temple. This is quite a popular photo spot, so I wanted to stop by in the morning - I assumed it would get crowded in the afternoon if I tried to visit it on the way back down.

The temple is dedicated to a deity called Fudo, and so the long staircase up to the temple is lined with Fudo statues. What makes this spot really popular though is the Japanese maple trees that also line the staircase - their red leaves match perfectly with the red bibs around the statues’ necks.

But even at 9:30am on a Friday, I was surprised to see quite a few people here already taking photos. I actually managed to perfectly time this hike to catch the red leaves of the maple, and it’s a really beautiful photo spot. I bet this place would get super crowded on the weekend.


If you want to test your aiming skills, you can participate in “kawarake nage” and attempt to throw some ceramic plates down through the hoop below for good luck.

Once I had enough red maple photos, I headed on. The next bridge I crossed, randomly, had quite a big bottle of salt sitting on it.

Tanzawa is actually quite notorious for its mountain leeches (or “yamabiru”) in the summer months so the salt is there in case you need it to help get the leeches off you. Apparently putting salt on leeches while they’re sucking your blood causes them to vomit on you though and you’re not supposed to do that (a fun fact I learned while writing this post).

I also got a glimpse of the Oyama Cable Car going up amongst the trees. As well as taking you up to the Oyama Afuri Shrine, the cable car does have a station near the Oyama-dera temple if you want to visit the fudo statues without the climb.

The climb continues up towards the shrine, with you eventually joining back up with the otoko-zaka.


Along the way you’ll pass a ramen shop called the Sakura-ya (さくらや). This is my fourth visit to the area but I’ve never eaten here, so I decided today’s mission was to check it out on the way back.

Once you pass the Sakura-ya, you have one final staircase to climb before you pass through the torii gate and reach the Oyama Afuri Shrine.

Apparently this was a tourist spot as far back as the Edo period (!) so there’s quite a lot of history here.

One highlight near the shrine is the matcha tiramisu sold at the Saryo Sekison teahouse.

I reached here just before 10am so there was a long line of people waiting for the teahouse’s 10am opening time. It’s quite popular.

If you can get a spot out on the teahouse’s balcony, it’s really relaxing to be able to enjoy the sunshine and a yummy matcha tiramisu. I wouldn’t want to wait in a long line for it, but it’s worth it if you can come at a less-crowded time.


To the left of the shrine is where the main hiking trail begins for Mt Oyama.

There’s a little 100 yen donation box at the trailhead entrance - so make sure to bring along a 100 yen coin (it is optional).

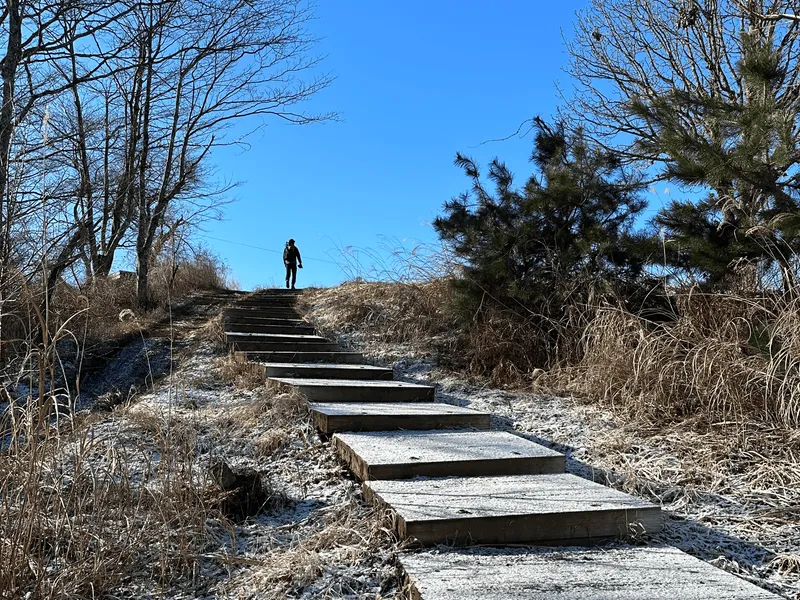
The trail starts off with a long staircase.

And beyond that extends into your regular Japanese hiking trail - with stairs made out of rocks, but the occasional boardwalk too.

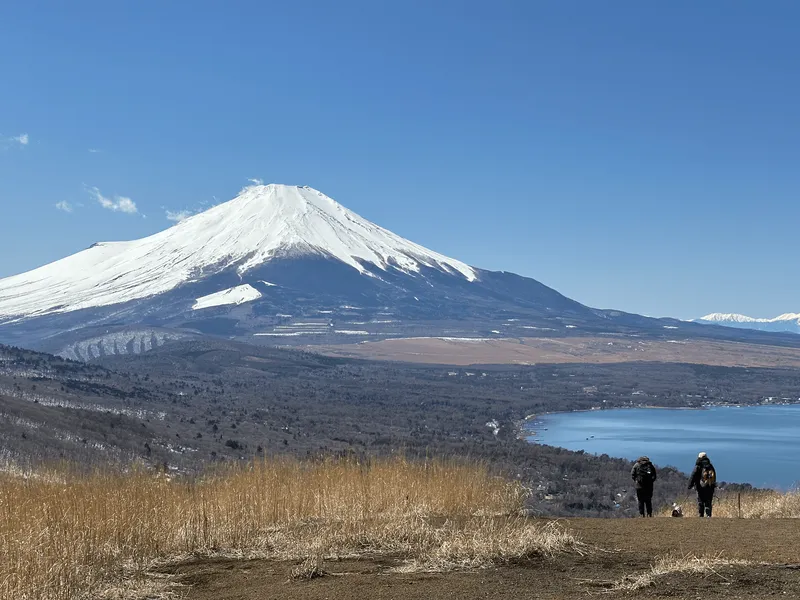
Today was my lucky day, and I even got an absolutely clear shot of Mt Fuji from part-way up the trail, at a spot aptly named the Fujimidai (“place where you can see Mt Fuji”).


As you keep climbing, you’ll notice another trail merging in with yours coming from Yabitsu-toge. This is another trailhead commonly used to climb Mt Tonodake. The hike isn’t too long if you start from that trailhead, but the downside is the travel time is a bit longer (the bus to the trailhead takes 50 minutes) so I wouldn’t necessarily recommend it for your first time hiking Mt Oyama.

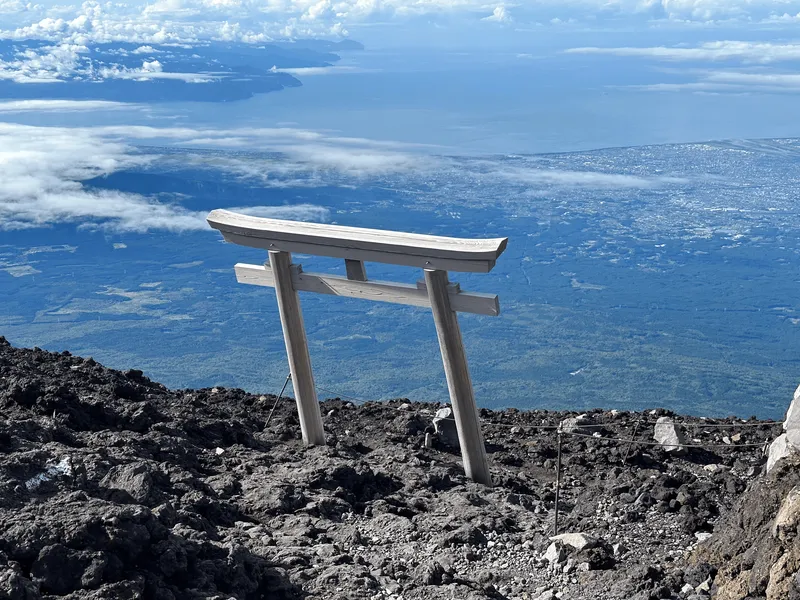
Just to the left of this torii gate is another chance to get a view of Mt Fuji, if you missed it the first time.

And then once you’re through the final torii gate (I’ve lost count of how many there were!), you’ll just about be at the summit. If you come via cable car, expect the hike up to take a total of 2 hours, and without it, closer to 3.


There were plenty of people at the summit - it’s definitely a very popular time of year to climb Mt Oyama.

Once you’ve had a lunch break, you have two options for your descent. You can take the same route back to the shrine, which will take you 80 minutes, or you can go on a slight detour path via the Miharashi-dai (見晴台) which will take you 2 hours.

As you start your descent towards Miharashi-dai, there’s actually another rest spot here, which tends to be a bit quieter than the one up at the peak marker, so this could be a better spot to take a break.

You’ll cross a metal-grate staircase, which you might think is just made out of metal so it’s more sturdy, but it’s actually there as a deer deterrent to try and prevent them from eating the vegetation up near the summit.

It was a beautiful day - the view as you descend is actually out towards the sea in the distance, although it was a little bit too hazy to quite make it out.

You can also see out to a large road, which is probably the Tomei Expressway, a highway linking Tokyo and Nagoya.

And if you squint, you can actually see down to the roof of the shrine below as well.


Although there was plenty of autumn foliage still on display near the shrine, the autumn leaves drop off the higher in elevation you go, so there were none left here near the summit.

Although there is one small bit with chain, I would say this descent path is actually quite walkable and pleasant. If you’re up for a 4-hour loop hike, I would definitely recommend doing your descent this way, rather than back down the shorter route.

About 75 minutes into your descent you’ll make it to the Miharashi-dai (見晴台). There’s a set of benches and tables here and quite a few people sitting about. I would suspect some people walk to up here from the shrine and then turn back around and head back down without summiting Mt Oyama.

And the reason I would guess at that is the remainder of the trail is really quite pleasant! Not too many particular steep bits, just a lot of smooth trail. So I did see quite a few people coming up past me in regular non-hiking gear as well.


And another highlight on today’s hike was a group of 4 deer that I spotted off to the left of the trail.

One of the four was a bit smaller than the rest, and had some little horns sprouting in - he was quite active, and would occasionally stick his face into the other deer to get their attention.

If you read my last week’s post on Mt Mitake you’ll remember I spotted a Japanese serow - generally I find that the mountains in Tanzawa like Mt Oyama tend to have deer, while the Okutama mountains like Mt Mitake are where you are more likely to spot the serow.

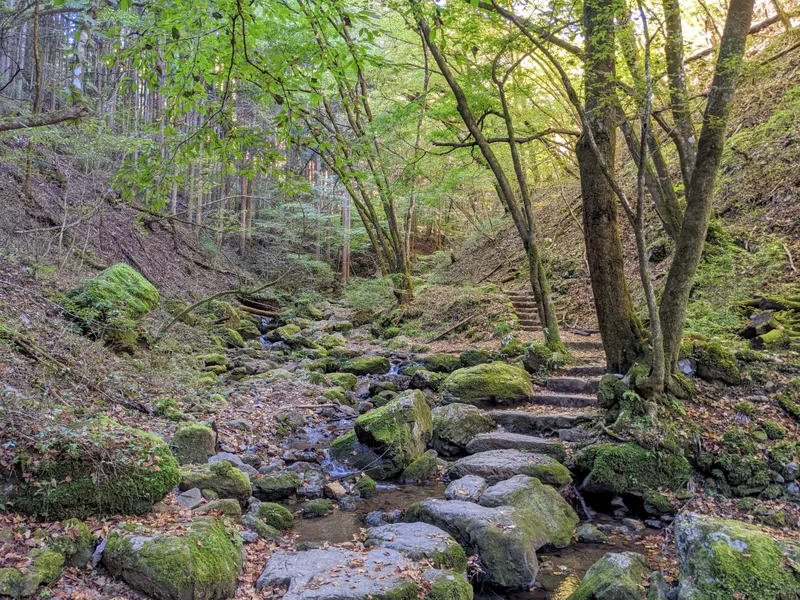
As you keep on the descent, you’ll pass a slightly dilapidated shrine and a waterfall.


And then finally, a staircase which leads you back up to the main shrine area.

If you want to head straight back down the mountain (via the onna or otoko-zakas) you can just take the left turn down the path here. In my case, I was ready for some ramen so I took the stairs up.


I’ll admit the ramen wasn’t mind-blowing, but hey, we’re on the side of a mountain here so it’ll do in a pinch. I’m sure it would taste great especially if you needed to warm up after a cold hike. Mt Oyama is also famous for its tofu, so I might recommend trying one of their tofu dishes if you are looking for something different.

But what I find really interesting about this ramen shop is that if you look closely at the pink banner outside the store, it seems to spell ルーメソ or “ru-me-so”.
Now this isn’t actually a Japanese word at all. Actually, it’s a banner with the word ramen (ラーメン) but they’ve turned the banner 90 degrees and flipped it to its reverse side to funnily make it read like this made up word. Apparently it was originally done as a mistake, but they decided to keep it that way.
It’s quite an iconic part of Mt Oyama at this point, and the sign is popular on social media - to the point where you can buy rumeso keychains at the cash register as well.

Once I filled up on ramen, it was time to finish off the descent. I took the “otoko-zaka” path back down.

The trail is just a continual set of steep staircases, and can be a little tiring on your knees. There’s not too much to see either - so if you’re looking for a more scenic or interesting way to end your hike, I would recommend giving the cable car a go instead.


I finished my hike around 2pm, and hopped on a bus back to Isehara station. My legs were pretty tired, so I’m glad I managed to get a seat on the bus back.
When to hike Mt Oyama
You can hike Mt Oyama without snow generally between April and November. Snowfall varies year-on-year, so there may begin to be some snow near the summit towards the end of November. If you’re climbing in the winter months and want to double-check the conditions, you can see the latest YAMAP logs for Mt Oyama here.
The Tanzawa region is also known for its mountain leeches in the summer months, and as Mt Oyama is a relatively low elevation mountain, I wouldn’t necessarily recommend climbing it in the summer since it can get quite hot.
If you want to see the red Japanese maple trees near the Oyama-dera you’ll want to come in mid to late November. For reference, my photos are from the 21st of November 2025. Also Mt Oyama does a night-time light-up festival towards the end of November to also coincide with the maple trees, so that may be something to visit if you are interested in a night-time visit (expect large crowds, though).
Hiking course options
| Date climbed | Length | Course time |
|---|---|---|
| 2025-11-21 | 7.5km | 6h (the expected time for an average hiker without breaks) |
There’s lots of options of how you could climb Mt Oyama, but here are a few:
- The shortest route: Using the cable car in both directions, and then an out-and-back from the shrine to the summit and back, expect it to take 3h15min over 3.5km
- Skipping the cable car, and taking the loop course via Miharashi-dai: this is the course I took, and I would recommend it if you want to get a bit more exercise in. The most skippable part of the course is the otoko-zaka, so maybe you could enjoy a ride on the cable car for either the ascent or the descent.
- Via Yabitsu-toge: if you like starting and ending your hike at different places, you can start from the Yabitsu-toge trailhead and end at the shrine. I’ve detailed how to get to Yabitsu in my hike on Mt Tonodake. It’s a bit more of a hassle to get to Yabitsu though, and you’ll be battling for a seat with all the hikers going to Mt Tonodake, so I’m not sure I’d recommend it.
Your chances of seeing Mt Fuji are higher in the morning, so if the Fuji view forecast is looking good and you want to spot it, I would recommend starting early, and taking the cable car on the way up to increase your chances.
Public transport access
You’ll need to take at least two modes of transport to hike Mt Oyama:
- A train to Isehara station (伊勢原駅)
- Then a bus to Oyama Cable (大山ケーブル)
- And optionally, a cable car to the Oyama Afuri Shrine
Taking the train to Isehara station
Isehara station (伊勢原駅) is a 75 train ride from Tokyo, and will require a transfer onto the Odakyu line at Shinjuku station. Shinjuku is the first station on the line, so if you’re lucky you’ll be able to snag a seat.
A bus to Oyama Cable bus stop
From Isehara station, turn right as you exit the ticket barriers and take the north exit out of the station. The bus stop for bus that takes you to the Oyama Cable (大山ケーブル) bus stop will be directly in front of you as you walk out of the train station. The bus takes IC/Suica, and you tap both when you get on the bus and off.
You can see a timetable for the bus here but it departs as many as 4 times an hour on the weekends, so I don’t think you need to be too concerned about your arrival time. Certain buses (marked with a red 直 mark on the timetable) will be a little quicker and take a non-stop trip to the Oyama Cable stop.
Even on a Friday morning the bus was packed full with a mix of hikers, sightseers and even just locals in the area who had to contend with trying to get off of the bus mid-way on the route.
Taking the Oyama Cable Car
Once you get off of the bus, there’s a 20 minute walk before you reach the cable car station. The cable car departs every 20 minutes, and you can see the timetable here. The website mentions that they accept all forms of payment (Suica, cash, credit card, PayPay) but that you need to buy tickets from their machines, so there’s no tapping on.
The ticket costs 640 yen one way, or 1,270 return. You can also get off at the Oyama-dera temple mid-way, which costs 360 yen or 700 yen both ways.
Buying the Tanzawa-Oyama free pass
If you want to save some money, the Odakyu train company offers a “Free Pass” which you can buy on their website. It costs 2,520 yen for all-included transport from Shinjuku station (train, bus, cable car) which apparently will save you 710 yen. I didn’t use it - probably should’ve researched this one in advance!
Car access details
Mt Oyama has pretty decent public transport access, so I wouldn’t recommend coming by car. If you do want to come by car though, there’s about 100 spots over 2 separate car parks, and the fee for 1 day is 600 or 1000 yen depending on which one you get a spot in.
Read more
Support me
📸 Thanks for reading! If you'd like to read more posts like this one, you can follow me on Instagram to stay up to date on my hiking adventures.
If you found this post useful, you can show your support by buying me a coffee - I write this blog for fun, but coffee is always appreciated! ☕
Recent posts
 hikes
hikesMt Nokogiri: a hike to Chiba's stone quarry
18 Mar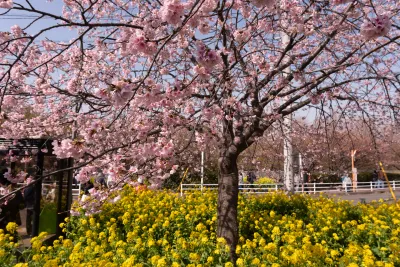 hikes
hikesMt Miura-fuji and the Miura Kaigan Cherry Blossom Festival
9 Mar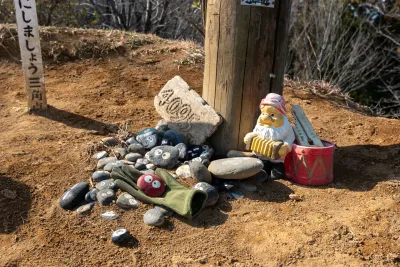 hikes
hikesAkabokko: hiking in Ome
16 Feb
Comments
Leave a comment