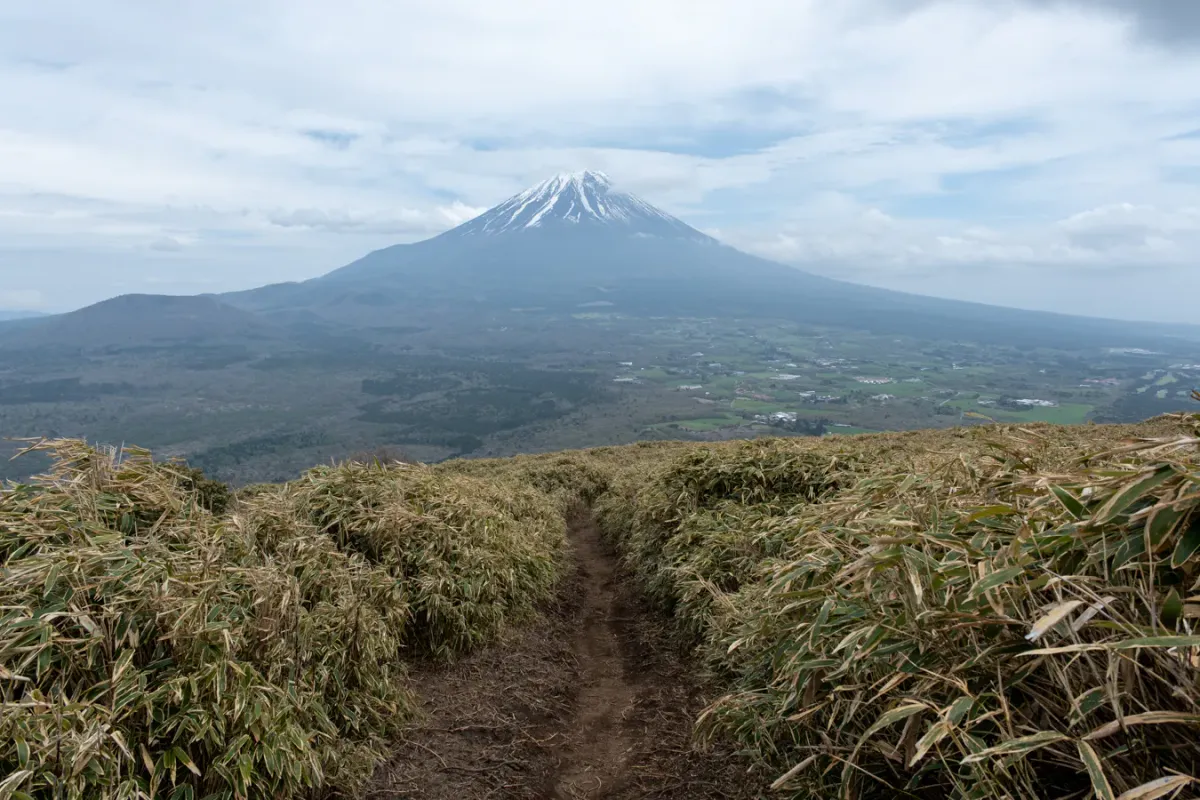
Mt Ryugatake (竜ヶ岳, ryu-gatake) is a 1485m high peak next to Lake Motosuko, one of the Fuji Five Lakes. The main hiking course is a short 3-hour loop, making it one of the more beginner-friendly hikes in the Fuji Lakes area. You’ll get great views of Mt Fuji from the peak and partway up the trail, not to mention the mountain is rather cute when viewed from a distance, as it’s rounded and covered in sasa bamboo leaves.
The one downside in my opinion is that Mt Ryugatake is a tiny bit more inconvenient than some of the other hikes in the Fuji area. The bus to the trailhead takes up to an hour from Kawaguchiko station, and there is only one return bus an hour, so you have to do a good job of timing your finish as well. If you don’t mind that I still think it’s a great hike though, especially if you’re looking for something shorter.
Hiking Mt Ryugatake: a quick summary
2 - 3 hours from Tokyo to Kawaguchiko station, then 45 - 60 minutes by bus to Lake Motosuko.
- Loop hike from Lake Motosuko easy Train + bus4 hrs · 6.5 km · ↑ 621m
- via the Shibazakura Festival medium Train + bus5 hrs · 10 km · ↑ 633m
Checking out the Shibazakura Festival

Traditionally Mt Ryugatake can be hiked as a loop course from Lake Motosuko, but I did a variation of this by first making a detour to the nearby Fuji Shibazakura Festival, and then hiking up via an alternate trailhead.
If you’re planning on doing this as a regular loop hike (i.e. not via the festival) you can jump forward to my section on reaching the peak, as the rest of the trail is the same from there.
Getting on the express shuttle bus from Kawaguchiko station to the Shibazakura festival, I arrived at the festival at around 10am. I had managed to time this hike pretty well and came at the peak blooming time for the shibazakura, plus a nice view of Mt Fuji as well.


Shiba-zakura literally translates to “lawn cherry blossom”, and is named since it’s pink like the flowers of a cherry blossom tree, although it’s not actually a cherry blossom variant. Instead it’s a flower from North America called the moss phlox that has been imported here.


It’s hard not to just spam you with these photos - it makes for quite a pretty photo of Mt Fuji, if you don’t mind all the people.
The area is also home to a “Peter Rabbit English Garden” which includes a couple of statues from the Peter Rabbit children’s series (it’s quite popular in Japan).


I suppose they need something to try and attract people in the off-season. It seems like they also do a rainbow flower festival in the summer.
After I’d taken my fill of photos it was onto the main event - the hike! This is a bit of an unorthodox route, so you’d really only want to be taking it if you are visiting via the festival. Leaving the festival, you’ll need to walk to the trailhead which is a 2km walk along the main road.

Along the way you’ll get another great view of Mt Fuji on your left.

Eventually once you pass a gas station and see this red building, you’ll need to cross back over the road to get to the trailhead.

This is also the starting point for the trail up to Mt Amagatake and so there is a small carpark near the road here, although there were no cars parked here today. Overall it is a pretty quiet trailhead, and especially considering I was hiking it on a weekday (and it was already past 11am at this point). I only ended up seeing two or three people on the hike up.

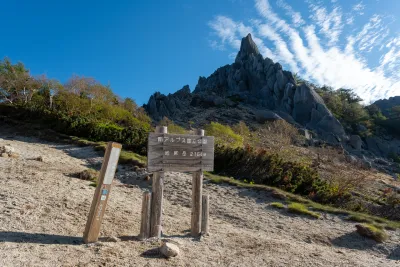
Passing Asama Shrine, you’ll head down another stretch of road (blocked off to cars, though) before you’ll reach a toilet block.


From here you can see the peak of Mt Amagatake on your left, plus the peak of Mt Ryugatake on the right.

The actual climbing starts beyond this point, so this is a good stopping point if you want to remove a layer of clothing or have a snack before continuing.

The trail up follows a series of switchbacks, and you’ll want to follow the signage for Hashita Pass (端足峠) if you can see it, or otherwise Lake Motosuko (本栖湖).


Once you reach Hashita Pass, there’s a 4-way intersection - one takes you up to Mt Amagatake, the other down to the lake. Of course, you’ll want to take the course to Mt Ryugatake.

And beyond this point, the view opens up a bit and you’ll get another chance to see Mt Fuji!

It was starting to look a little bit cloudy so I wasn’t too sure how the view was going to turn out, but I got pretty lucky today. Between the trees, you can also see the zig-zag path you’ll take up to the peak of Mt Ryugatake.

And in the opposite direction of Fuji, I spotted the snow-capped peaks of the Southern Alps, including Mt Kita.

You’ll continue on a switchback path through the field of sasa bamboo, which continues mostly all the way up to the summit.


Reaching the peak of Mt Ryugatake
Around 12:30pm, I made it up to the peak of Mt Ryugatake. The hike up here was fairly quiet as I came from a less popular trail, but at the summit and on the descent there were plenty of people about as the loop hike is quite popular, even on a weekday.

It was quite windy so I plopped down in a corner hoping that the sasa bamboo would block the wind (it did not). After a quick lunch break, I headed on with my descent down to Lake Motosuko.

If you are doing the loop course, this descent path that I took will be what you will climb up by, so you can try and visualise it in reverse in your head.

A short way down from the summit you’ll come to a junction point - if you’re doing the loop, you can head down the left path, which takes you through a forested trail, and then down past the lake. Otherwise the path on the right is the more interesting one, as you get a bit more opportunity to view Mount Fuji, and is the one I took.
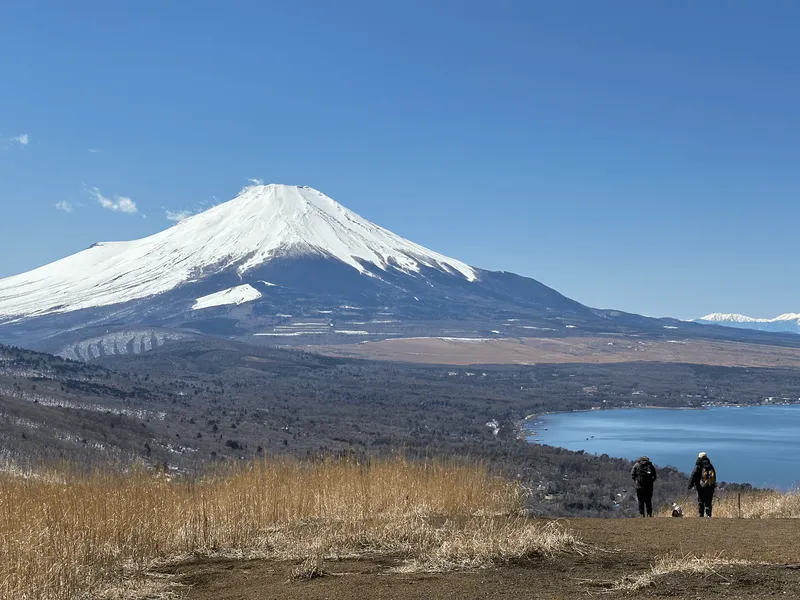
Late April and early May is one of my favourite times of year to see Mt Fuji, since he’s still capped in snow but you get that nice contrast with the newly green fields below as the temperatures start to warm up. Unfortunately though the visibility rates do start to drop so it does become a bit harder to time a hike to get this good of a view.


You’ll come to a random little hut partway down the trail - I suppose if the weather got real bad you’d have a small amount of protection here.

The other fun part about this hike if you do it at this time of year is you can also see the Shibazakura festival in action down below.

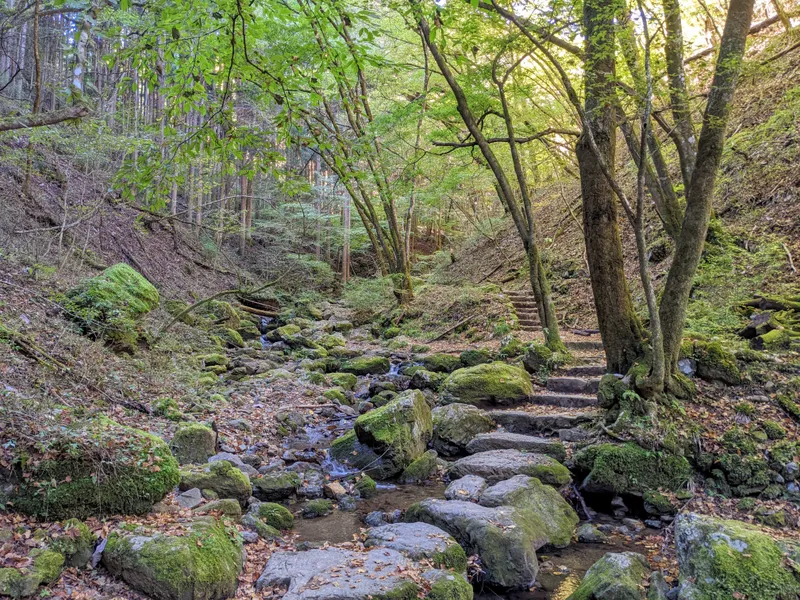
As you keep descending, you’ll enter a forested stretch.

There’s a section where you can see Lake Motosuko on the left as well. The water was really blue - such a pretty lake - and I spotted a couple of wind-surfers out on the water.


The rest of the trail down is in the forest, before you reach the road that passes by the campground.

There’s a number of walking paths around here which can make things a little confusing but I opted to just stick to the road to make things easier.

As you pass by the campground entrance, there’s a small pathway that leads to the lake’s edge if you have time to check it out.


The road to the bus stop hugs the side of the lake, so you could walk along the edge of the lake if you wanted (albeit it’s a little bit rocky) or just head back along the road.


Lake Motosuko is very quiet and rather underdeveloped compared to the likes of Lake Kawaguchiko - I quite like it!
Eventually the hike ends at the Lake Motosuko bus stop. There’s a couple of shops and a restaurant here if you need something to kill time before the next bus.


Doing the loop hike from Lake Motosuko
As a side note, if you were looking to do the loop hike variant instead, you’ll get off at the Lake Motosuko bus stop near the restaurants and head down towards the lake and campsite. Somewhere near the campsite there should start to be markers pointing out the trailhead, but I would recommend using a hiking GPS app (Yamap or Alltrails) to make the whole thing easier.


The hike up for the loop course is the same trail I took on my descent. Then once you’ve reached Mt Ryugatake, you’ll retrace your steps back down the mountain a bit until you get to the junction point, and take the left turn.

The loop course ends a bit further along the lake shoreline, so you can enjoy walking along the lake and back in the general direction of the campground and bus stop.

Camping at the Motosuko Camping Ground

The last time I hiked Mt Ryugatake in 2024, I spent the night with some friends at the Motosuko Camping Ground (本栖湖キャンプ場) the night before our hike. You can see their website here but for tent camping it doesn’t require a booking. Since it’s near the lake, it’s pretty popular with families and non-hikers so I would say it’s a bit more on the rowdy side than compared to a campsite in a more remote location that is only used by hikers.
Also as a side note you won’t be able to see the lake from where you sleep - basically it’s a sprawling campground in a forest, so you can take your pick of a camping spot from in between the trees.
There are spots available where you can park your car next to your tent, or otherwise there’s a carpark where you can leave your car and you can bring your camping gear in yourself (which we opted to do because the spot we found was quite tree-rooty and a bit hard to drive over with a car).
Around this time of year it drops to around 10 degrees at night, so it’s not super freezing but you’ll want to bring enough cold weather gear to get a cozy night’s sleep.
Hiking course options
The standard loop course to climb Mt Ryugatake, starting at the edge of Lake Motosuko. Take the course in a counter-clockwise direction. If you are coming by bus, the nearest bus stop is about 1km / 15 minutes away, so you’ll have to add that onto the total walking time.
Alternatively instead of doing a loop, you can just do this as an out-and-back and take the same trail back down, as the views on the climb up are much better than the descent course on the loop. Especially if you couldn’t really get a view of Mt Fuji on the climb up, I’d recommend heading back down the same route to maximise your chances of spotting a glimpse.
The AllTrails course linked is for the out-and-back.
This course is specifically if you are visiting the Shibazakura festival, which runs in late April / early May each year. The festival runs an Instagram account which is where they report the latest conditions and when the flowers are in peak bloom.
After visiting the Shibazakura Festival, you’ll head out onto the main road and walk 2km down the road towards Asama Shrine and to the trailhead there. Hike up Mt Ryugatake, and then take the path on the loop course back down to the lake.
If you’re looking for a longer hike, there’s a couple of other options like a longer loop course via Hashita Pass (5h, 10km). Or for those interested in peak-bagging, a long traverse that hits Mt Ryugatake, Mt Amagatake and Mt Kenashi in one go (nearly 10h and 14km).
Public transport access
Regardless of which course you’re hiking, you’ll first need to get to Kawaguchiko station. I’ve outlined on my Kawaguchiko hikes page how to get there in more detail - your options are highway bus, express train, or the local Fujikyu train line. If you put this course into Google Maps, it will probably recommend taking the highway bus to Kawaguchiko station, and then transferring to the local bus.
However the highway buses can be delayed a bit if there is traffic, so if you are taking the highway bus I would recommend factoring that in (i.e. you might miss the connection with the first local bus - assume you will get on the next one after that).
The local buses from Kawaguchiko station run every 30 - 60 minutes. You can see the timetable on Google Maps. It’s a bit confusing, but there are two separate bus services that are running:
- A local bus heading towards Shin-Fuji (富士山) station. Departs from the #4 bus stop, takes 45 minutes. Get off at Motosu Entrance (本栖入口)
- Blue Line sightseeing bus heading towards the Motosu Visitor Center. Departs from the #1 bus stop, takes 60 minutes. Get off at Lake Motosu (本栖湖)
The stops you get off at are a tiny bit different since they’re on different lines, but it’s only a couple minutes walk between them so practically it’s the same.
If you are taking the Blue Line bus there and back, there is also a 1500 yen 1-day pass, which is good value considering the bus fare is 1470 yen one way.
Same notes apply as above for getting to Kawaguchiko station. From there, right at the back of the bus rotary (ie closest to the road) is a little booth that sells bus tickets to get on the Fuji Shibazakura Liner (富士芝桜ライナー) which is an express bus that goes straight to the festival. Alternatively you can buy the bus tickets online if you search for the “しばチケ”.
The first bus of the day departs at around 8:35am and takes around 40 minutes. Unfortunately though on the day the line was long and they put on backup buses, so I ended up getting on at 9:15am. The festival website will have the latest timetable.

The tickets are a bit confusing - I ended up buying a combined bus and entry pass for 3,000 yen, which covers a return trip on the express bus as well, which I didn’t end up using. I’m unsure if you can get a one-way on the express bus (probably not).

But also - if you read the fine print on the back of the ticket, you can seemingly use this ticket to get back to the station if you go to the Motosu Entrance (本栖入口) bus stop and take a local bus. However this only runs every 2 hours, and I ended up coming in the hour window between that, so I just coughed up the extra money to get on a Blue Line bus instead.

Both courses end at the Lake Motosuko bus stop, from where you can catch a local bus back to Kawaguchiko station. The last bus of the day leaves at 4:43pm, so make sure not to miss it.
Also note the information about the two separate bus lines (local line and Blue Line) also applies here in reverse - one leaves from the Lake Motosuko bus stop, and the other one from the Motosu Entrance (本栖入口). Practically speaking, you should just get whichever one comes first - since they each come every 2 hours, but overlap such that a bus will come every hour. If you bought a 1-day pass though, I’m unsure if you can use both buses or if you need to get on the Blue Line one.
Car access details
Mt Ryugatake is also accessible by car, although I’m not too sure on how easy it would be to park your car on a busy weekend. The closest carpark you can see on Google Maps is here, which is apparently a tiny one which can fit 10 cars at most. Closer to the bus stop there is also another carpark here which is just for general use if you’re coming to visit the lake, so that might be another option.
When to hike Mt Ryugatake
To avoid snow, you’ll be looking to hike Mt Ryugatake between April - December. Personally April - May is the sweet spot for me - before it gets too hot, but while the chances of seeing Mt Fuji are still reasonable. I wouldn’t recommend climbing this in summer as you can imagine the direct sun exposure near the peak would make things quite hot. Note that the campground re-opens in March each year, so you won’t be able to camp in the winter months.
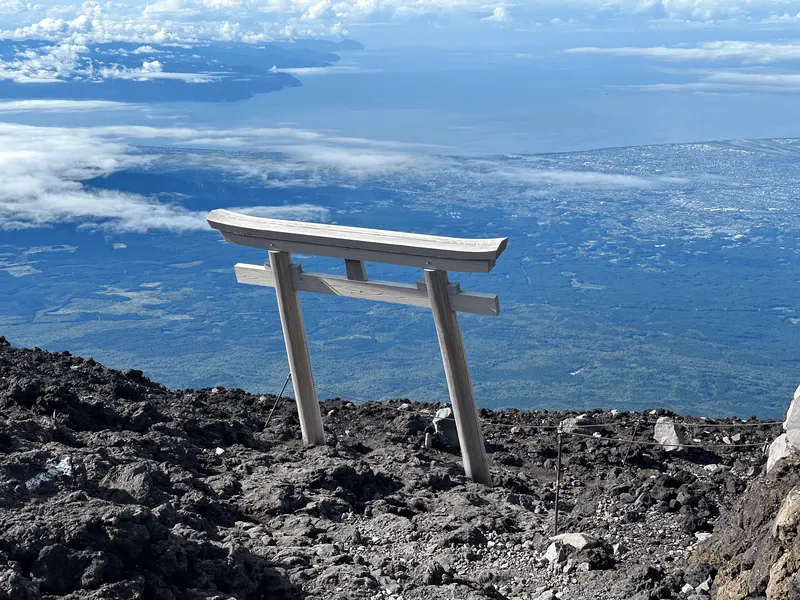
Also of note is a phenomenon known as the “Diamond Fuji”, where you can see the sun rise directly behind the tip of Mt Fuji (sort of like a diamond on a ring). Mt Ryugatake is a prime spot to view this during late December through early January, and so it becomes a very popular hike around this time. People will start their climb up in the dark to watch the sunrise.
You can check out the latest trail conditions on YAMAP here.

Read more
Recent posts
 hikes
hikesMt Houou: an overnight hike in the Southern Alps
22 Jun hikes
hikesMt Omuro: hiking Izu's extinct volcano
17 Jun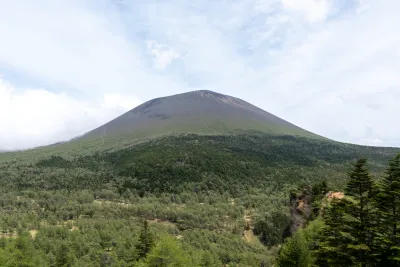 hikes
hikesMt Asama (Mt Maekake): hiking Karuizawa's active volcano
31 May
Leave a comment