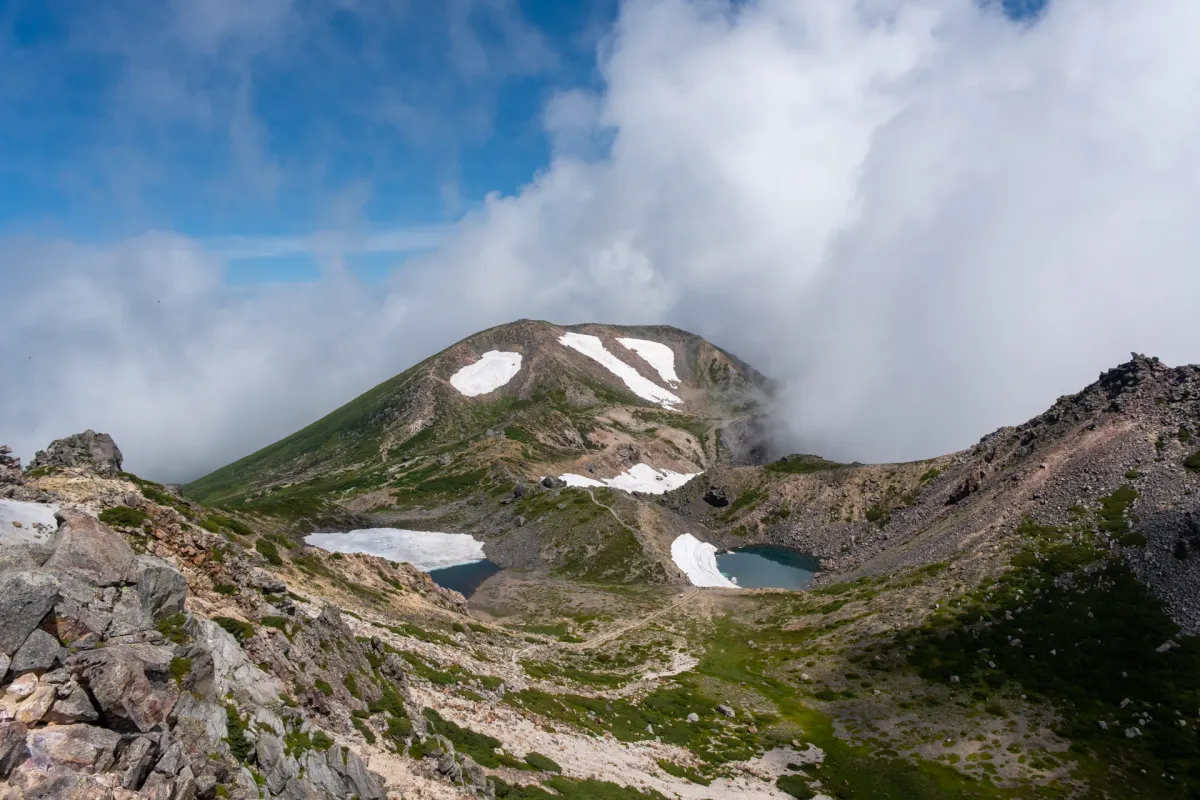
Mt Haku (白山, haku-san) or quite literally “White Mountain” is a 2702m elevation mountain located on the borders of Ishikawa and Gifu prefectures. We hiked Mt Haku as a day hike in mid-July, which turned out to be the perfect time to enjoy the alpine flower fields that line the trails.
As well as being one of Japan’s Three Holy Mountains (along with Mt Fuji and Mt Tate), Mt Haku is also one of Japan’s Hundred Famous Mountains. This list is based on a book written by author Kyuya Fukada - and as he grew up in Ishikawa, Mt Haku was actually his home mountain. The book is a series of short essays on each of the hundred mountains, and the introduction to the essay for Mt Haku had particularly stuck with me:
“A mountain watches over the home village of most Japanese people. Tall or short, near or far, some mountain watches over our native village like a tutelary deity. We spend our childhood in the shadow of our mountain and we carry it with us in memory when we grow up and leave the village. And however much our lives may change, the mountain will always be there, just as it always has been, to welcome us back to our home village.”
And so I was glad to finally get the opportunity to climb a mountain held in such loving esteem by Fukuda himself.
Hiking Mt Haku: a quick summary
From Kanazawa station, take a 2-hour bus to the Ichinose Visitor Centre and then another 20 minute shuttle bus up to the Bettodeai trailhead. Also accessible by car.
- Mt Haku out-and-backhardBus8.75 hrs·12.3 km·↑ 1524m
- Mt Haku loop coursehardBus9.5 hrs·13.1 km·↑ 1578m

There’s a couple of trailheads to climb Mt Haku, but the most popular is the Bettodeai trailhead (別当出合登山口) which is where we started our hike. At the trailhead is a toilet and taps with drinkable water (last chance for a refill!), before you start your hike through a wooden torii gate and then along a suspension bridge.


It was quite a busy day for hiking as we came in the middle of a 3-day long weekend, but with the long 9-hour course, you find that everyone naturally spreads out along the length of it so luckily it never felt overly crowded.

The first couple of hours has you climbing up through a forest. Since Mt Haku is such a popular mountain - first being climbed for religious reasons all the way back in 717 - the trail up is very well-maintained and there’s even portions that are lined with quasi-rock stairs to make the climb up easier as well. However since we did this hike in a bit of a heat wave (it reached a max temperature of 35°C in the city below that day) it was rather tough-going.
Setting out at 5:45, within about 30 minutes we reached the first waypoint - Nakahanba (中飯場) which comes with a small clearing and toilet block (depending on the time of year, it seems this may be closed).


Continuing our climb up, I was fortuitous enough to spot a new species of bird - a Grey Bunting (クロジ).

He was screaming his head off, which made it easy to grab some pictures.


I was quite curious about this distant structure on the side of the hill, which seemed to almost look like part of a ropeway?

From a quick Google, it seems to instead be the remnants of a structure that was used to transport up building materials (possibly to help build the mountain hut buildings up near Mt Haku’s peak).

Also I couldn’t help but take a photo of this weird sign.

It just says “it’s dangerous so don’t enter here” but it was the first time I’d seen a picture of a little kid being used. I suppose it provides a bit more emotional impact.

The second waypoint we passed was the Jinnosuke refuge hut (甚之助避難小屋). Another set of toilets are available here, and there were plenty of people taking a break.

Beyond this point, as we entered into the fog, the sides of the path were covered in alpine flowers. They reach peak bloom in July so we really came at just the perfect time.
 Fragrant orchid (テガタチドリ)
 Karamatsusou (カラマツソウ)
 Fischer's ragwort (オタカラコウ)
 Nikko-kisuge (ニッコウキスゲ)
 Bistort (イブキトラノオ)
 Shimotsukesou (シモツケソウ)
 Hakusan geranium (ハクサンフウロ)
 Bistort (イブキトラノオ)
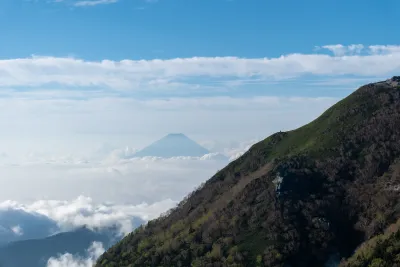
Even with all the fog, getting to see this huge variety of flowers kept us pretty entertained. It slightly cleared up for a brief moment to give a better view of the surrounding ridgeline.

We also passed the enmei-sui (延命水), or “life-prolonging water”. As I learned later, it’s said that one sip of this grants you 3 extra years of life. Too bad I didn’t take a sip!


The next waypoint is the Kuro-boko-iwa rock (黒ボコ岩).

It’s a piece of lava that was flung from Mt Haku when it previously erupted - which I learned there is a specific Japanese word for - kazandan or “volcanic bomb”.

From here you can get a good view of all your fellow weary hikers climbing up. This rock is also the junction point for the return path - on your descent you can take a separate path down from here.

Continuing on beyond the volcanic bomb rock is a short-but-comfortable stretch of boardwalk. Even in mid-July there’s fields of snow remaining on Mt Haku’s summit (although luckily mostly away from the hiking trails).

Then, a short climb over a hill.

Eventually we came to a granite marker marking the final bit of the “pilgrim’s path” up to the summit of Mt Haku. From here in the distance, you can actually see up towards the peak on a clear day.

No such view to greet us this morning, unfortunately, but here’s a slightly clearer view I got while beginning my descent later that day.

Before the peak itself is the Hakusan Murodo Visitor Centre, which sits at an elevation of 2450m.

The toilets here are the cleanest I have ever seen on a mountain (I think they had washlets too). There is lodging available here if you’d like to make this into an overnight hike. And they sell snacks, merch and bottled drinks as well.

It even comes with a post office if you wanted to send off some mail. As Mt Fuji also has a post office at the peak, unfortunately Mt Haku is definitely beat on trying to get the “highest post office in Japan” record.

Heading through the Visitor Centre, behind it is a torii gate and small shrine building. Passing through it, you will begin your final climb up to the summit of Mt Haku.

The actual summit of Mt Haku itself is home to a shrine, while the building here is the prayer hall (祈祷殿).

I suppose employing priests to conduct prayers at the peak itself is a bit more of a hassle, so this is a more convenient location to do it.
As a side note, I mentioned earlier that Mt Haku is one of the 3 Holy Mountains alongside Mt Tate and Mt Fuji. Mt Haku’s Murodo Visitor Centre sits at an elevation of 2450m - and quite coincidentally, Mt Tate also has a location named Murodo which also sits at 2450m. I think the elevation being the same is a complete coincidence, but the naming being the same does have some meaning behind it.
A murodo (室堂) was historically where pilgrims could rest before making the final push to the summit of the holy mountain, so it makes sense that both Mt Tate and Mt Haku would have been home to one of these.

Heading down the path to the right of the shrine, from here it’s a final climb up to the highest peak of Mt Haku, Gozenga-mine (御前峰).


Looking back as we climbed, I could see down to the red roofs of the Visitor Centre and mountain huts.

One notable point on the climb up was the Aoishi or “blue rock”.

If you look closely, there seems to be someone carved into the rock here.

Which from research could possibly be a carving of a Buddhist monk named Nichiren.

Continuing our climb up, we could see the gold-lined roof of the peak’s shrine come into view.

Someone had put some of his stuff down on the edge of the shrine to randomly take a phone call. Japanese people are usually quite quiet about waiting for people to get out of the way, but this time a fellow photographer was quite forthright in asking him to “move your shit” (in more polite terms, of course).

This building here enshrines three deities - Kukurihime-no-mikoto, Izanagi and Izanami. Izanagi and Izanami are rather famous figures in Japanese mythology - creators of Japan, parents to sun-goddess Amaterasu and others - and notably, are both siblings and married (hmm).
Kukurihime seems to be a rather niche goddess in comparison, but her claim to fame is that after Izanagi and Izanami fought, she helped repair their relationship and so she is known as the goddess of matchmaking.

The peak itself was rather busy as our arrival coincided with a large tour group lining up to get their photos taken.

From the peak of Gozenga-mine, you can see out to other peaks on Mt Haku, plus lakes and remnants of snowfields.

From the peak, taking the same route back down will be the most direct way to descend if you are short on time. Alternatively, you can do a short loop hike to get your fill of the surrounding scenery before heading back.


There was a tiny bit of snow lingering at this point in mid-July, so we had two short snow crossings, but nothing that requires crampons. If you come a bit earlier in the season (late June, early July) the snowfields will probably be a bit bigger.


The midday sun was beating down on us rather strongly, so we found the perfect rock to take a bit of a break.

We had bought a bunch of snacks from the supermarket the day before, and as an aside these soy sauce-flavoured mini quail eggs were pretty good.


There’s an optional detour you can make to another peak, Onanji-mine (大汝山, 2,648m) but we decided to give it a skip.


Continuing on with the loop, the red roofs of the Murodo Visitor Centre eventually come back into view.

And another flower species to check out!

From here, it was time to begin our descent. You can take the same Sabo Shindo (砂防新道) route back to the trailhead, or an alternate Kanko Shindo (観光新道) trail.
I’ll admit I was a little worn out from the heat. I had heard the route we climbed up was the most beginner-friendly and I was leaning a little towards doing that same route back for an easier descent. But we decided to go with the Kanko Shindo for the descent as my husband had overheard some university students talking in the line for the shuttle bus about how the views were better on this route.


And this descent was the highlight of the hike for me. No question Mt Haku is a gorgeous peak, but I am also a little spoiled by some of the peaks I have hiked in the Japanese Alps. On the descent, partway down you pass this flower field which was insane - the prettiest I have seen on any mountain in Japan.

There’s what feels like an uncountable variety of flower species on this descent, and to not spam you too much I only took photos of the ones I found the most interesting.
 Toriashishouma (トリアシショウマ)
 Maybe the hakusan-bofu (白山防風)
 Alpineringed pink (タカネナデシコ)
 Scabiosa japonica (マツムシソウ)


 Japanese burnet (カライトソウ)
 Peking spurge (タカトウダイ)
 Saxifrage (ダイモンジソウ)
 hawkweed oxtongue (コウゾリナ)
 Lousewort (エゾシオガマ)
 Vetch-leaf sweetvetch (イワオウギ)
 Kurotouhiren (クロトウヒレン) - pre-bloom
Beyond the flower field, the other main waypoint is the Tonogaike refuge hut (殿ヶ池避難小屋).

 Tateyama-utsubogusa (タテヤマウツボグサ)
 Yotsuba-shiogama (ヨツバシオガ)
 Kugaisou (クガイソウ)
 Japanese thistle (ノアザミ)
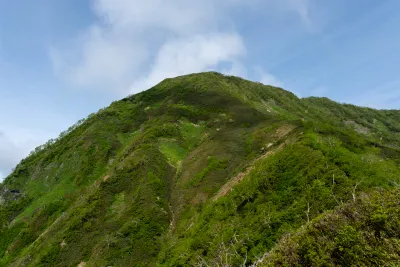
As we continued to descend, I had assumed that we would enter a long forested stretch to finish off the hike, but rather surprisingly we got to enjoy a rather long and scenic ridgeline hike. The fog continued to persist a bit so it wasn’t the clearest of views, but still quite a pleasant walk nonetheless.


The descent ends with a rather steep rocky staircase.


And a bit after 3pm, we made it back to the torii gate that had marked the start of our day’s hike.

We had just about drunk all of our water, so the free drinking water from the taps came in very handy here to refill our water bottles. We had to line up a bit for the shuttle bus, but got back down to our campsite around 4pm.

Hiking course options
The main hiking course starts from the Bettodeai trailhead (別当出合登山口). However on weekends, the 6km of road up to the trailhead is closed off to the general public, and so your nearest starting point is the Ichinose Visitor Centre (市ノ瀬ビジターセンター). From here your two options are to either walk uphill (which will take more than an hour) or pay 1000 yen to get a shuttle bus up the road.
This is the shortest and most direct hike for Mt Haku. Starting at Bettodeai trailhead’s suspension bridge, you’ll head up to the peak of Mt Haku, following the course I took in this blog post. Once you reach the peak of Mt Haku, you take an identical course back down to the trailhead.
A slightly longer hike if you have more time and energy (and well-worth it).
Starting at Bettodeai trailhead’s suspension bridge, you’ll head up to the peak of Mt Haku, following the course I took in this blog post. Once you make it up to the peak of Mt Haku, you take a short loop hike around the surrounding lakes, before descending back down the same route to the trailhead.
The short loop around the summit may have some snow remaining on the trail depending on how early in the season you hike it (late June - early July).
This was the course we took.
This hike starts off the same as the previous two courses. On your descent, instead of taking the same course down, you instead head down via the Kanko Shindo route which provides some scenic ridgeline views.
Overall, the descent course via the Kanko Shindo may be a tiny bit harder than the Sabo Shindo, and take a little longer, but is a good alternative if you don’t like taking the same course on the way there and back.
And as a final note, there are also 2 more trailheads available if you are interested:
- Sarukabe trailhead (猿壁登山口)
- Hirasedo trailhead (平瀬道登山口)
When to hike Mt Haku
Mt Haku can be hiked (mostly) without snow between mid-July and early October. It seems the last remnants of snow will remain on the short loop hike around the summit even until late July, but is on rather flat ground so does not require crampons. If you want to hike earlier (late June, early July) it would be best to research the most up-to-date trail conditions on YAMAP to figure out if it is safe to hike.
We visited on the 19th of July, which turned out to be absolutely the perfect time to see all of the alpine flowers in full-bloom. I would highly recommend climbing around this time of year if you can.
Public transport access
Travelling to Mt Haku from Tokyo will require 3 separate trips on public transport.
1. Tokyo -> Kanazawa station
The one decision you will need to make will be how to get to Kanazawa station. You have two options:
- The night bus: 5,000 yen one way, 9-hour overnight journey from Tokyo. Once you reach Kanazawa station, you can directly connect to the buses that then take you onto the trailhead.
- Shinkansen: 15,000 yen one way, 2.5 hours from Tokyo. However due to the timings, you will need to arrive in Kanazawa the night before, stay at a hotel and wake up early the next morning to then get on the bus to the Visitor Centre.
2. Kanazawa station -> Ichinose Visitor Centre
The bus from Kanazawa station to the Ichinose Visitor Centre only departs on weekends, at 6:00am and 6:15am. It will cost a little under 3000 yen one-way. It does not require reservations in advance, and takes about 2 hours to get to the Visitor Centre. Here is the link for the 2026 bus timetable. I wasn’t easily able to find it in English, but for future years if you search “金沢駅から市ノ瀬 バス” it should show up.
The page I linked notes that they don’t put on additional buses even if it’s crowded - so if the bus seats fill up you’re out of luck. It may be worth lining up early just in case.
3. Ichinose Visitor Centre -> Bettodeai trailhead
From the Ichinose Visitor Centre, there are microbuses that shuttle hikers up to the trailhead itself. These also don’t require reservations. These run every 20 minutes (when it’s busy, basically they just do loops up-and-down the road so you just wait for the next one to come along). These cost 1000 yen one way. Here is a link to the latest timetable in Japanese.
Considering you will only be able to start your hike around 8:30 or 9am, with a 9-hour course you will probably need to plan to make this an overnight hike, and stay at the top for one night.
Example public transport itinerary
Taking all of the above into consideration, the most reasonable itinerary would look like the following:
- Friday night: get the Shinkansen to Kanazawa station. Spend a night at a hotel in the area
- Saturday morning: get the 6am bus from Kanazawa to the Visitor Centre, then the shuttle bus to the trailhead
- Start your hike at 9am, and check into the hut near the peak in the early afternoon
- Hit the peak of Mt Haku either on Saturday afternoon, or Sunday morning (depending which day has the better weather, or whether you want to catch the sunrise or not)
- Sunday: hike back down to make it back in time for the 1:30pm bus back to Kanazawa
- Arrive back to Kanazawa by 3:30pm
- Get on a shinkansen and get back to Tokyo around 6pm on Sunday night
Using the shuttle buses
For those of you that are using public transport or coming by car on the weekends, you will need to make use of the shuttle bus between Ichinose Visitor Centre and the Bettodeai trailhead.
Note you can also skip the bus and walk up the 6km road to the trailhead from the Visitor Centre, which we saw some people do. You’ll save 1000 yen, but it’ll take over an hour to walk up that hill.
We went on the middle of a 3-day weekend in July, and the Visitor Centre staff told us that the lines for the shuttle buses they saw on this day were the longest they had ever seen - so this information may or may not be useful in most scenarios but I figured I’d note it all the same.
The buses start running at 5am, but knowing that lines for these things can get pretty long (I have heard of similar horror stories in the Southern Alps) we opted to start lining up at 4am (yes, a whole hour before). Even so, this was the state of the line when we began lining up.

Before getting on the bus, you will need to buy your tickets separately. The first option is from this little vending machine here (which only accepts 1000 yen notes, and maybe coins). The machine only begins operating around 4:00 or 4:30am.

Or you can also buy from a manned booth, which opens a little closer to 5am (or possibly at 5am, I’m not sure).

My one piece of advice would be to prioritise lining up for the bus. It’s acceptable to leave your backpack in the queue while you go and buy your tickets, and we also found that while there was a long queue for the tickets at first, this line eventually disappeared and you could probably slip out of the bus line and buy your tickets later. If you have two people, this makes it even easier as one person can get in the line for the bus and the other for the tickets.
The other secret strategy is that if you happen to arrive at the carpark around midnight, it may be worth checking the bus stop. Japanese hikers will tend to start reserving their spot for the bus at some point in the night with a clothing item or something small, so if you arrive late enough you can snag an early spot in the line. When we checked at 9pm, no one had “started” the line so we opted not to be the first since I wasn’t sure if this was something we were allowed to do.

The bus timetable is technically every 20 minutes, but from 5am they were running the 4 microbuses continuously to the trailhead and back just to get through the huge line of people. We missed the first round of microbuses, but got on the second batch of 4 around 5:15am, and got to the trailhead by around 5:35am.

The other thing to note is the toilets. The line wasn’t so bad at 4am, but by 4:30 it was ridiculously long and I’d basically be worried about missing the first bus if you joined the line at that point so I’d recommend going early if you can.
One secret hack is that there is a second toilet block, if you walk to the back corner of the campsite - head down the stairs behind the Visitor Centre, then take a left. Walk along the dirt road and there is a toilet block in the corner of the campfield (I have a picture of it further down the page on the campsite section).
There is also a toilet once you get off the bus, and another one about a 45 minute hike into the trail (although this can be closed depending on the time of year) so these are your other options if you don’t mind skipping that first toilet.
Filling in your tozan-todoke before your hike
The tozan-todoke is a hiking itinerary / form you oftentimes submit at trailheads in Japan. These are used by the authorities in the case that you happen to go missing on the mountain so they can try and track you down. You note down your name, contact information, intended hiking course with rough timings, and the details of anyone else travelling with you. Specifically for Mt Haku, you are legally required to submit this form (fines apply if you don’t - although they won’t explicitly check. I assume if you did get caught up in some trouble and needed help from the authorities, that would be the point at which you are fined).

If you use a hiking app like YAMAP, there are options to submit this form online, otherwise you can roughly write out your plans onto the form available outside of the visitor centre and then pop it in the red mailbox.
One thing to note is that there is also a “finished climbing” card you are also supposed to submit. I suppose to make it clear you managed to make it off the mountain.

It was my first time seeing one of these, but I filled it out at the same time I filled out the todoke, and just held onto the card and remembered to pop it in the red box as well after I finished my descent.
Nagai Ryokan and onsen
As well as the mountain huts near the top of Mt Haku, across the road from the Ichinose Visitor Centre building is the Nagai Ryokan. The prices seem to be fairly reasonable, in the range of 20,000 yen for a night’s stay.

If you are coming by car, it would be an option to spend the night here before or after your hike.
It also operates as a day-trip onsen between 11am and 2:30pm, and 6:30 and 8:00pm. The first time slot is perfect if you want to try and get in a soak before getting the bus back to Kanazawa, while the latter would make sense if you are camping for the night.
The onsen is quite tiny and has a max capacity of maybe 8 - 10 people per gender. So at peak times, you will be directed to take a seat on the tatami floors, and they will call you when a spot opens up. There are no lockers for your valuables, but you can hand over your valuables to the receptionist and they will store them in a secure locker with your name attached to it. It has a free hairdryer, soap, shampoo and conditioner, and I think was 800 yen per person.
Car access details
Mt Haku has a rather large free carpark, with 500+ car spots outside the Visitor Centre. If you come on a weekday, you can drive directly up to the Bettodeai trailhead carpark (which means you can skip the shuttle buses) but on weekends you will need to park in this Visitor Centre carpark as the road up to the trailhead is closed off to regular cars.
When we went, we arrived the day before around 5:30pm, which comfortably let us get a spot. Cars steadily streamed in throughout the night, and on a busy weekend I would be sure that arriving at 5am would be too late to get a spot in one of the main carparks. Once the carpark runs out of space, there is a smaller overflow carpark a little up the road (if there’s parking attendants, they will point you in that direction). Otherwise you will have to park your car on the road leading up to the Visitor Centre, which we saw plenty of cars had to resort to do.
Driving from Tokyo
If you are considering a drive from Tokyo to Mt Haku, I would consider this as a proper 3-day weekend. Google Maps puts this drive as 6.5 hours door-to-door, but factoring in some traffic we encountered leaving Tokyo, a break for breakfast and lunch, and then stocking up on some groceries for our dinner at the campsite that night, it ended up being about a 10 - 11 hour journey.
The main reason you might consider driving to Mt Haku is the cost. If you remember from my public transport section above, the cheapest cost is around 20,000 round trip (using the night bus) or closer to 40,000 round trip if you use the Shinkansen (+ some necessary accommodation costs on top of that).
Taking our car, the total cost for us was in the range of 35,000 yen:
- 1000km driving, or about 2 tanks of fuel for my Jimny (10,000 yen)
- Tolls in both directions (maybe around 22,000 yen) - for overseas visitors this might come as a shock, but highway tolls are very pricey in Japan
Of course, if you had to rent a car for 3 days, it would be another 30,000 yen on top of that, at which point it wouldn’t really make driving as much of an appealing option for 2 people (may as well take the Shinkansen). And if you were coming alone, the night bus is the cheapest option - although I don’t sleep too well on those. But for our situation the car made the most sense financially.
It’s a super long drive, but I learnt that knitting is quite a good way to pass the time (while I’m in the passenger seat, mind you) and we also went through the 4-hour Audible adaptation of Pride and Prejudice which was surprisingly decent.
As another note, depending on where you are coming from Tokyo, Google Maps will probably give you 3 different route options all taking about the same time. I would recommend going with the top-most route that goes all the way up to Toyama, and then continues along the coast towards Mt Haku. The road was fairly easy all the way, and from my research it seems like the middle and bottom routes might seem the same or shorter (depending on the traffic) but come with some windy mountain roads which will end up slowing you down.
A note on supermarkets
As you approach the Visitor Centre, you will probably be needing to figure out your dinner for the night (if you aren’t staying at the lodge). I would recommend planning where you are going to go in advance, as the Visitor Centre itself has absolutely nothing nearby. The nearest supermarket is Aコープ てどり店 about a 40-minute drive away, although it looked quite small.
We instead stopped at the Super Centre Shimaya (スーパーセンターシマヤ 白山店) which is about a 70-minute drive away. This was a huge store, even stocking any sort of camping/cooking gear you might need (foldable tables and so on). They also had a petrol station onsite which made filling up our tank super convenient, and the gas was like 10 yen per litre cheaper than back in Tokyo.
Camping at the Ichinose Visitor Centre Campground
For those interested in camping, the Ichinose Visitor Centre has a campground that is 800 yen per person, no reservations required. We stayed on what is possibly the busiest day of the year to hike Mt Haku, but even so we could very comfortably get a spot when we arrived at around 5:30pm, so you shouldn’t have any worries about finding a spot regardless of what time of year you hike.

The campsite is directly down the stairs behind the Visitor Centre, and has 4 small grass fields that can each fit 5 - 10 tents. There is one toilet block next to the Visitor Centre, plus the field furthest in the back has its own toilet block. This area also had the most tables and benches - and seemed to have the most lively crowd of hikers. So I would give this area a miss if you are looking for more quiet sleeping companions.

Before 5pm, you can pay in cash at the Visitor Centre, otherwise outside of those hours there is an envelope and check-in form you can fill out and drop in a box - so make sure to bring exact change. There was also a large communal sink area to wash your dishes like at any typical campsite in Japan.

There is also a small amount of car spots (well, empty patches of grass) you can snag directly outside the mini camp fields, so I might recommend trying to get a car spot near your tent.

Even for a simple day hike, it felt like there were a lot of logistics involved in climbing Mt Haku, but I think we had just about the perfect timing with all the flowers blooming so it was well-worth it for us! I think driving from Tokyo, camping, and then hiking Mt Haku is a fairly niche combination but hopefully at least some of the details in this post can be of use to you :)

Read more
Leave a comment